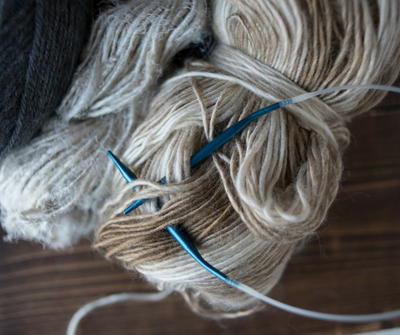
How to Read a Knitting Pattern
Learning to read knitting patterns is more than just knowing the abbreviations! This how to guide will help you get started.

Let's be honest. Knitting patterns look like they're written in a different language. But learning how to read knitting patterns does not have to be that complicated!
The biggest hurdle that new knitters have to overcome when learning to read a knitting pattern is learning the abbreviations. Yeah, there are a lot of them, but most of them are common sense, and once you learn the ones you need for your pattern, you'll be reading them without a second thought.
On top of that, there are brackets and parentheses and asterisks! Oh, my!
From sizes to brackets and asterisks, we'll demystify the mystery behind intimidating knitting lingo and help you start knitting from a pattern with ease.
Knitting Terminology
One of the hardest things for beginner knitters to learn is all of the terminologies needed to read patterns, charts, and articles about knitting. Most of the weird words and phrases start to make sense once you actually get to the knitting itself, but they can be off-putting, especially if you've come across a word or abbreviation in your pattern that you just don't understand.
Luckily we've created a knitting dictionary of knitting terms for you to use to help make reading a knitting chart just a little bit easier:
Knitting Abbreviations
The biggest barrier for most people when it comes to reading knitting patterns is all of those abbreviations. Sometimes they're easy to understand (K = knit, P = purl), but what does k2tog mean? And what on Earth is an SSK?
These most common knitting abbreviations are the ones you will encounter the most:
| Abbreviation | Definition |
|---|---|
| alt | alternate |
| beg | beginning |
| bet | between |
| BO | bind off cast off (UK) |
| CA, CB | color A, color B |
| CC | contrasting color |
| cn | cable needle |
| CO | cast on |
| cont | continue |
| dec(s) | decrease(s) decreasing |
| dpn | double point needle(s) |
| EON | end of needle |
| EOR | end of row |
| FC | front cross |
| fl | front loop(s) |
| foll | follow(s) following |
| grp(s) | groups |
| inc | increase(s) increasing |
| K | knit |
| k2tog | knit two together |
| kwise | knitwise |
| LH | left hand |
| lp(s) | loop(s) |
| M1 | make one stitch |
| MB | make bobble |
| MC | main color |
| P | purl |
| pm | place marker |
| pop | popcorn |
| p2tog | purl two together |
| prev | previous |
| psso | pass slipped stitch over |
| pwise | purlwise |
| rem | remain(ing) |
| rep | repeat(s) |
| RH | right hand |
| rnd(s) | round(s) |
| RS | right side |
| sk | skip |
| skp | skip, knit, pass stitch over |
| sk2p | slip one, knit two together, pass slip stitch over the knit |
| sl | slip |
| sl1k | slip 1 knitwise |
| sl1p | slip 1 purlwise |
| sl st(s) | slip stitch(es) |
| ssk | slip, slip, knit |
| st(s) | stitch(es) |
| T2L T2R |
twist two to the left twist two to the right |
| tbl | through back loop |
| tog | together |
| won | wool over needle |
| wrn | wool around needle |
| WS | wrong side |
| wyib | with yarn in back |
| wyif | with yarn in front |
| yd(s) | yard(s) |
| yo yfwd (UK) |
yarn over yarn forward |
| yrn | yarn around needle |
| yon | yarn over needle |
Sizing Instructions
Depending on what the pattern is for, there may be sizing instructions written into the pattern. This allows the designer to create one pattern for all sizes instead of duplicating the pattern and adjusting the instructions for each size. Knitted sweaters, cardigans, and shawls often come with sizing instructions.
If the knitting pattern is written for multiple sizes, it will look something like this:
Child’s size: 2 (4-6) or Child’s size: 2 (4, 6)
Here’s what that means:
Let’s say you’re making the child’s size 4. As you work through the instructions, there will come a point where the instructions say something like this:
With smaller needles, cast on 52 (58-64) sts
or With smaller needles, cast on 52 (58, 64) sts.
Here’s what you do:
To make the smallest size (2), you would cast on 52 stitches. For the medium size (4), you would cast on 58 stitches.
Where there’s no number in parentheses, you do what it says; for instance, if it said Knit 5 rows you would do that for all sizes. If it said Knit 5 (7, 9) rows, you’d knit as many rows as indicated for your size (5 rows for the smallest size, 7 rows for the medium, 9 rows for the large).
Where there’s something in parentheses, you stick with the number in the position that correlates to the number in the sizing.
Asterisks
Asterisks are used to indicate parts of patterns that repeat. For example:
1st row: (RS). P2. *K2. P2. Rep from * to end of row.
What that means is that you’re going to work the stitches between the asterisks as many times as indicated. So for the example above, you’d P2, then k2, p2, k2, p2, repeating the "k2, p2" part of the pattern until you reach the end of the row.
There are also times when there will be two sets of asterisks, a single, a double, and another single in the same row. If that’s the case you repeat from * to * as many times as indicated, and then work from * to ** for the last repeat, then finish the row as indicated. This is sometimes done to visually balance a pattern and to save space.
Also, it might be that there are pairs of asterisks to tell you what to repeat for a major part of a pattern. For instance, if the back and front of a sweater are knit in the same way except for how you shape the armholes or the neck, the instructions for the front might start with ** and then where the armhole shaping starts, there might be **. Then the back would tell you to work from ** to **, basically telling you to go back to the instructions for the front and work them to that point for the back.
Brackets
Brackets in knitting patterns have two purposes, depending on what the designer needs them for. They can be used for sizing instructions or repeats.
I know what you're thinking -- don't we already have parentheses and asterisks for that?
Sometimes brackets are used instead of parentheses for sizing instructions for visual purposes. Other times they’re used similarly to asterisks to indicate that something’s repeated; some designers find brackets to be easier to follow than asterisks, especially for patterns that have a lot of repeats.
Let’s say you have instructions that read *k 2, p 2+ 6 times. In this case, you would knit 2 and purl 2, then repeat the k 2 and p 2 five more times. If the brackets weren’t used, you might not know what part of the step you were supposed to repeat 6 times.
Learn More: How to Read a Knitting Chart

Your Recently Viewed Projects
Thanks for your comment. Don't forget to share!
Mark
Jun 06, 2018
Fabulous tutorial! The symbols and abbreviations always scared me a little, but they're really all just common sense
Report Inappropriate Comment
Are you sure you would like to report this comment? It will be flagged for our moderators to take action.
Thank you for taking the time to improve the content on our site.