How to Do the Purl Stitch (Knitting Class: Part 5)
The knit stitch and the purl stitch are the most fundamental stitches in knitting. With this tutorial for how to do the purl stitch, you'll be ready to take on any pattern!

Learning how to do the purl stitch has never been easier. This quick and easy tutorial will teach you how to purl so you can take your knitting to a whole new level and learn the stockinette stitch -- the most popular stitch in knitting.
Many knitters learn how to do the knit stitch and simply stop there because they're afraid that the purl stitch will be complicated. But this is simply not true! If you can knit, you can purl because they're essentially just the same stitch done of different sides of your needle.
As mentioned in part 3 of this knitting class, once you've completed a row of stitches, you will turn your knitting so that the next row of stitches is knit in the other direction. The V side of the stitch will be on the opposite side of the fabric as it is on the previous row. Doing the purl stitch, however, will flip that around, and if you alternate knitting and purling each row, your V sides and purl bump sides will all align, giving you the beautiful stockinette stitch.
Knitting Class: Table of Contents
How to Do the Purl Stitch
In knitting, there are two individual stitches -- the knit stitch and the purl stitch. These two stitches are essentially the same, but the purl stitch is the knit stitch made on the other side of your knitting needle. Some beginners are intimidated by the purl stitch, but it's really easy. If you can do the knit stitch, you can do the purl stitch.
Watch: This video will teach you how to do the purl stitch. With the knit stitch, the purl bump side is formed opposite you and the V side is facing you. With the purl stitch, on the other hand, this is reversed, placing the purl bump side closest to you. When you turn your needles, purling the stitches that you knitted in the previous row will align all of your V sides and purl bump sides, giving you stockinette stitch!
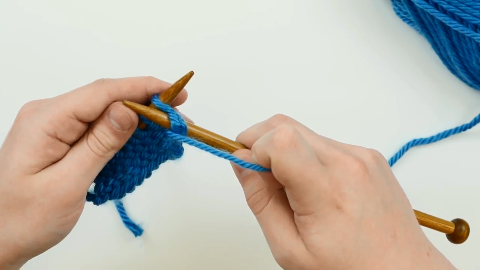
Step 1
Take your working needle and insert it into the first stitch through the front of the stitch (not through the back, like you would do with the knit stitch).
Note: When purling, the yarn will always be held in the front of your work.
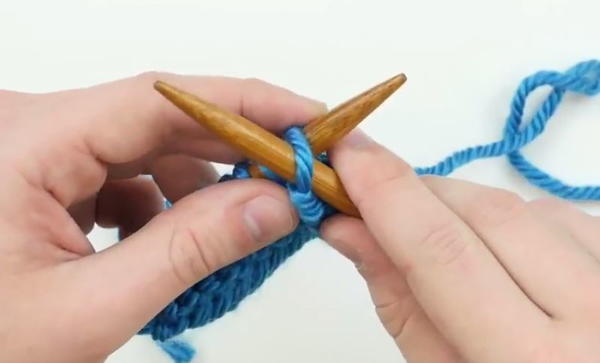
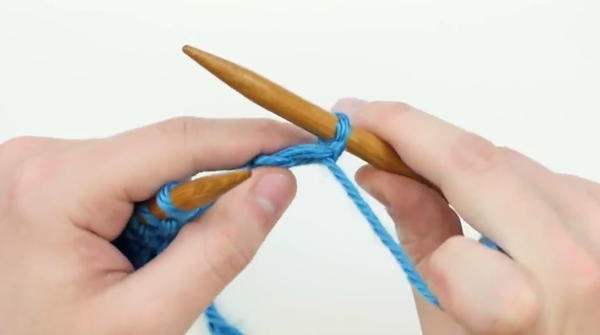
Step 2
Bring your working needle through the stitch to form an X with the left needle where the working needle is on top.

Step 3
Take your working yarn and wrap it around your working needle counterclockwise (or clockwise for left-handed knitters).
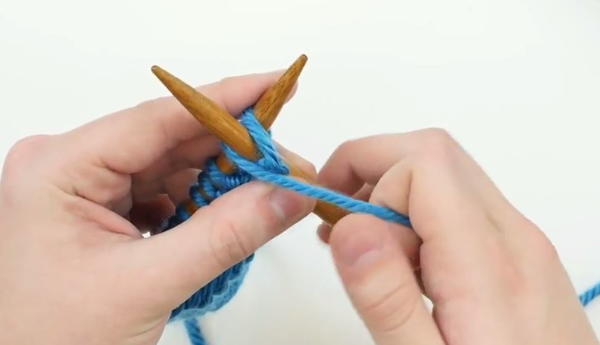
Step 4
Use your working needle to bring the yarn down and through the first stitch.
Step 5
Sweep the first stitch on your left needle off the end and tighten. You've now completed your first purl stitch!
Practice the Purl Stitch with Stockinette Stitch
As mentioned above, stockinette stitch is simply alternating rows of knitting and purling. Follow the tutorial below to practice how to knit and purl with the stockinette stitch.