How to Bind Off (Knitting Class: Part 4)
Learning how to bind of can be tricky for some beginner knitters, but with this tutorial, it's a breeze!

You've reached the end of your swatch, and now it's time to bind off! Binding off can be a little bit of a challenge for beginners, but if you can knit, you can bind off. It's really that simple.
Below you'll learn how to bind off, how to weave in your ends, and complete your first swatch of garter stitch!
In the video below, you will learn the very standard form of bind-off. This method is also sometimes called the stable bind-off. There are other types of bind offs that create different types of edges, but this one is the most common and most useful type of bind off for beginners to know.
Knitting Class: Table of Contents
How to Bind Off
Now that you've got your first swatch of garter stitch completed, it's time to bind off! All binding off means it that you're completing your pattern and finishing the last row of stitches by completing them without starting a new row.
Watch: How to weave in your ends
Step 1
Knit the first two stitches.
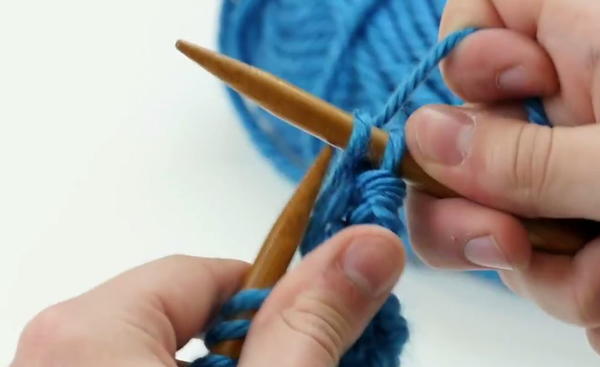
Step 2
Insert the needle that’s in your non-dominant hand into the first stitch on the working needle (the stitch on the right) as if to knit.
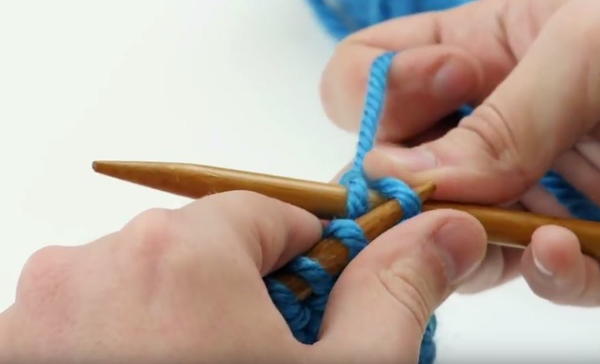
Step 3
Take that stitch and pass it over the second stitch and off of the needle.
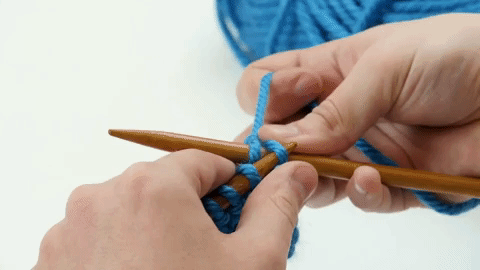
Step 4
Knit the next stitch and repeat from step 1 until you get to your final two stitches.
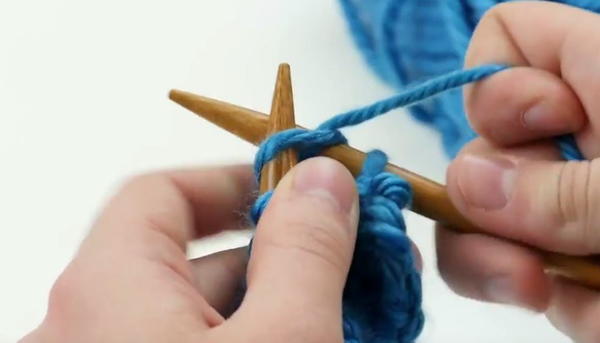
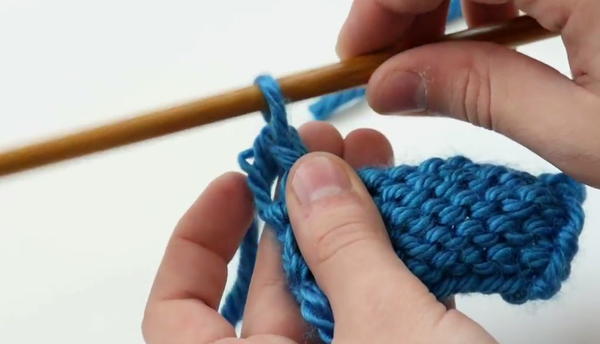
Step 5
When you have your final two stitches on your working needle, insert your left needle into the first stitch and pass it over the second stitch, just like you've been doing for the other stitches in your bind off.
Step 6
With the one remaining stitch on your needle, take a pair of scissors and cut your working yarn so that you have a 3-4 inch tail.
Step 7
Using your needle, simply pull the needle up and bring the yarn through the center of your final stitch. Tighten the yarn, and you're done!
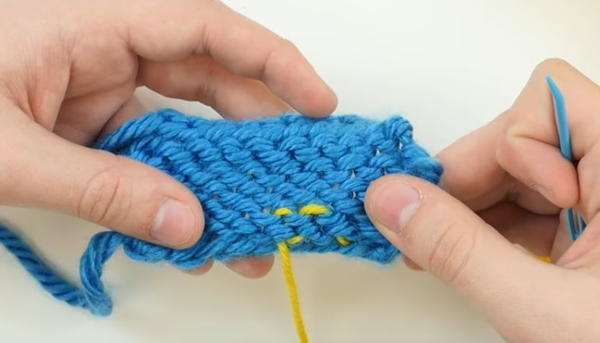
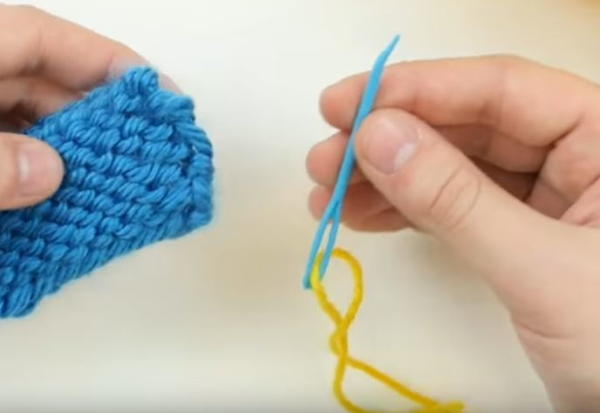
How to Weave in Ends
Now that you've got your yarn off of your stitches, you've probably noticed that you have two strands of yarn, dangling from the ends of your fabric.
Your instinct might be to just cut them off, but don't do that. That will make your yarn unravel, and your project will fall apart. Instead, you want to weave your ends into your knitting in a way that secures them in place!
Watch: How to weave in ends
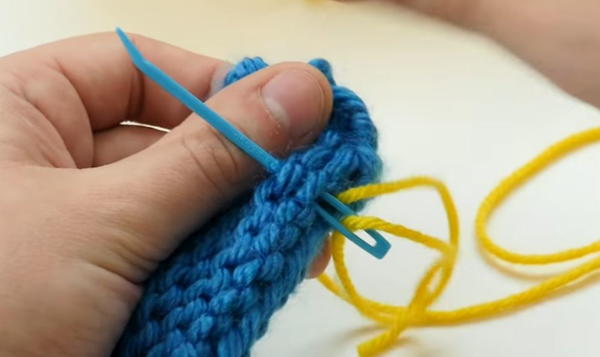
Step 1
Thread your end through the eye of your tapestry needle.
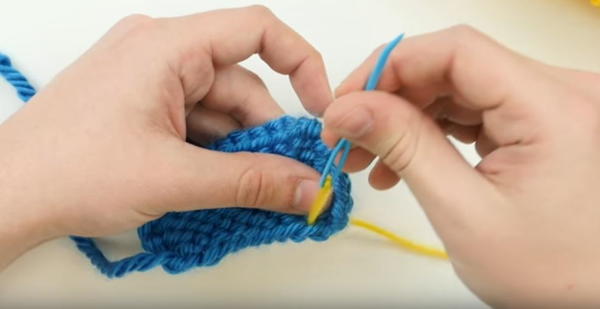
Step 2
Insert the tapestry needle into one of the holes in your bind off row.
Note: Make sure you do not thread your end through the stitch it's coming out of. This will undo the stitch.
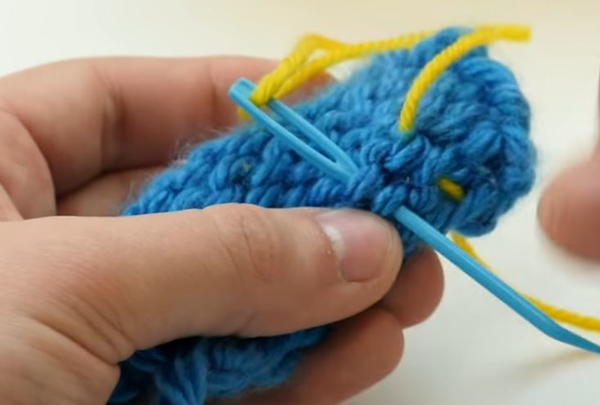
Step 3
Identify the "smiley faces" or "frowny faces" in your work.
Bring the yarn up and through one of the frowny faces.
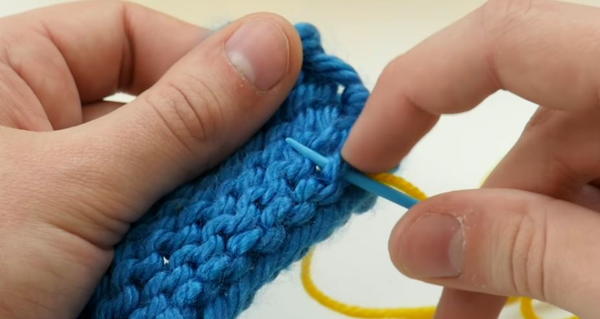
Step 4
Angle the needle up and slightly to the left so that the needle is going through both the frowny face and the smiley face above it.
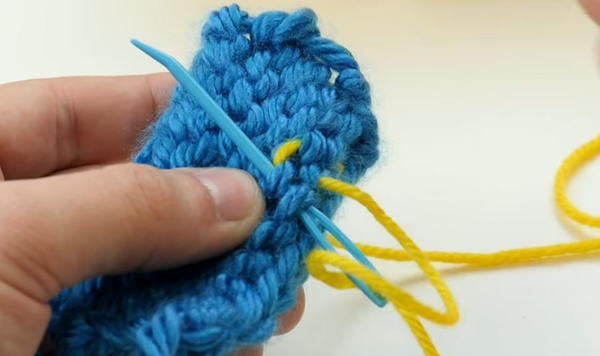
Step 5
Bring your tapestry needle down through the smiley face to the left of the previous smiley face that you just came out of.
Angle the needle down and to the right to go through the frowny face below it.
Step 6
Move the tapestry needle to the next frowny face to the left and bring the yarn back through the smiley face that you just came out of.
You'll be going through each of these loops twice as you weave in your ends.
Step 7
Repeat this, going up and down through the stitches. You should have at last two inches or so of your ends weaves in to keep them secure.
Then you can cut the end close to the fabric. The tip of the yarn will "felt" into the fabric over time.