How to Set Yarn Color: Tips and Tricks
Learn this method of setting dye with vinegar to easily stop yarn color running!

There’s nothing worse than pulling a knitting project out of your wash basin or washer and finding that the colors have dulled or that one color bled into another. That project you worked so very hard on now looks lifeless or silly.
Setting yarn color can be an important step in keeping one project from ruining another project or other clothing. Setting the dye color in yarn will also keep your projects from fading, so those bright orange socks that you knit will always stay as vibrant.
Many yarns, especially cotton yarns, will bleed color if the dye is not set properly. This means your project could dye your skin, other surfaces it is in contact with, or other projects it is washed with. Bright and dark colors, like red or navy blue, are the most likely to fade or bleed. However, any yarn color could fade as it is used and washed. Of course, following your yarn care symbols carefully is a must for proper care of your knitted items, but there are some other things to try to set your color.
Below, we give a knitting tutorial for the “safest” way of setting your yarn dyes with vinegar, but it may not work for all types of yarn. You may have to experiment with different methods to see which one works best on your yarn, but, of course, use test swatches, not finished products!
It is safe to start with this method, though, and if you need to, you can always give something else a try. A few of the other techniques are also explained below.
Make your bright projects shine by setting the dye!
For more great projects like this, subscribe to our free email newsletter!

Method 1: Setting Yarn Color with Vinegar
Note: Be very careful with your project during this process. Do not overly agitate or wring your knitting, since those could lead to irreversible damage.
1. Begin with a completed project, all ends bound off and woven in.
2. Fill a small wash tub with cold water, enough to completely cover your project.
3. Add your project to the basin, ensuring that the water covers every part of it.
4. Add a cup of vinegar to the wash tub, and carefully mix it into the water.
5. Let this mixture soak with your project for about 30 minutes, gently stirring the project every few minutes.
6. Discard the vinegar water.
7. Carefully rinse the vinegar from your project as many times as needed to get rid of the smell.
8. Do not wring out your project. Instead, roll it up in a towel to squeeze out any excess liquid.
9. Block your project, or dry as normal.
ALTERNATE: Rather than immediately drying your project, you could also wash it right away to see if any dye is released. It is a good idea to wash your project by itself for the first time, whether you wash it right away or when it needs its first wash. Watch the water you wash it in. If it is clear during the washing process, you are good to go. If not, you may need to try setting with vinegar again, or try a citric bath.
Heidi from handsoccupied.com loves this method of setting yarn color. You “can combine the processes of this colorfast vinegar bath with blocking your finished project” so easily, she says in her article on the topic.
Method 2: Multi-Colored Projects and Pre-Washing Yarn
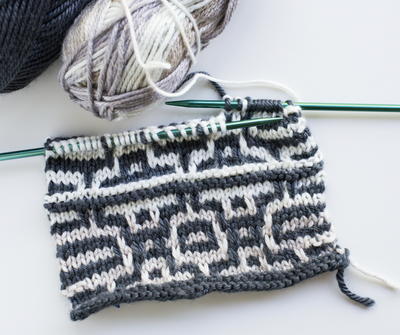
For projects with multiple colors, like red, white, and blue striped patterns, you can use the above method with your completed project, but since every yarn is different, there is always the chance that darker yarns could bleed into the lighter ones.
In this case, it may be best to pretreat your yarn to avoid the color-running. You can certainly do this for single-color projects as well, but it is more imperative for light and dark yarns together.

In order to pre-wash and set your yarn, wind your ball into a hank and then complete the setting process above, but with the hank rather than a completed project.
After you rinse the vinegar out well, as for completed projects, “hand wash the hanks using the product that you intend to use for the final item,” recommends Moira from moiraravenscroft.blogspot.com. This way, you can see if any more dye leeches from the yarn. The water you use to wash should be clear if the dye was set properly.
After you find that your yarn is no longer releasing dye, you can start the knitting process without fear of white stripes turning pink or light gray stripes getting tinted blue.
If you do have an uh-oh moment with darker yarns bleeding into lighter ones, it is a very hard problem to fix. One potential solution is soaking your project in very cold water and gently rubbing the dye out of the affected areas. This may not work, however, especially if detergent was used in the washing process.
Method 3: Setting Yarn Color with Vinegar and Heat
Some people swear that just vinegar by itself will not fix running dye. If you are finding this to be the case with the yarn you use, you may need to add a little heat. Kayanna from stitchtogetherstudio.com is a firm believer that “you need to add heat as well” when setting dye with vinegar. She has a great tips and tricks tutorial for fixing bleeding yarn with vinegar and heat.

Method 4: Setting Yarn Color with Citric Acid and Heat
Citric acid can also be effective in keeping dye from running. This method by Jasmin from betternthanyarn.com uses citric acid and the microwave to fix running dye. Microwaving your yarn can be hazardous, so take extra care in following the instructions and knowing your own microwave.
Hopefully you will find that these solutions banish dye bleeding from your life forever! Don't let fear of fading and running keep you from making bright, beautiful patterns to add light to your home.
Happy Setting!
Have you had success with setting yarn color?
Tell us about it in the comments!