How to Knit Jogless Stripes
Knitting jogless stripes just takes a little bit of foresight and the most basic skills.

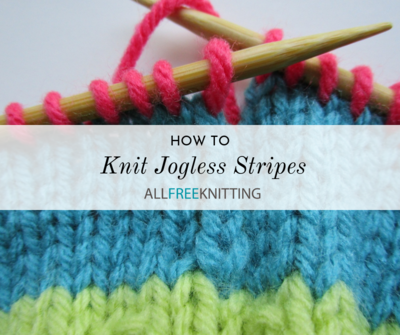
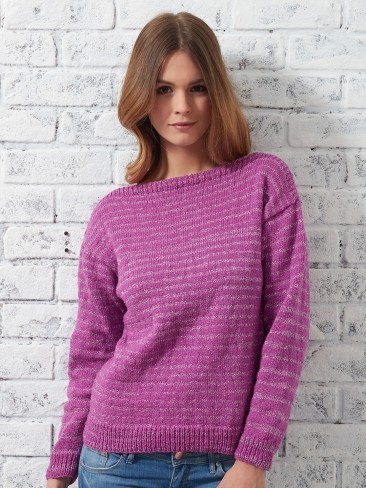
I love striped knitting patterns because they help to keep a stockinette stitch pattern from getting too boring, but don't require nearly as much brainpower as something with intricate stranded knitting. Anyone else who loves knitting stripes and has done so in the round is familiar with the dreaded jog. For those who aren't aware, a "jog" is that little downward step in your knitting where a color is switched at the beginning of the round. It ruins the smooth, seamless appearance of the finished product, causing endless frustration for stripe-lovers.

The first step to fixing this jog is to understand why it happens. When we knit in the round, we're not simply placing one circle of knitting on top of another—rather, we are knitting in a continuous spiral, and so when you begin a new round with a new color, it's not going to match up next to the last stitch in that same round, and will instead sit somewhat beneath it. If you're wondering how to change yarn when knitting in the round so that this doesn't happen, the good news is that you do have some options to minimize the appearance of a jog.
Knit the first of the previous two rounds together
This is my preferred method for avoiding the jogless stripe. If a seasoned knitter squints, he or she can still tell that a new round was begun there because of an elongated stitch spanning two rounds, but the layperson will be none the wiser. The best part is that the technique is super simple; in fact, the hardest part is remembering to do it. Here's how you accomplish it:
1. Once you're done with your first color of yarn (A), and you're ready to knit the next stripe with your contrasting color (B), go ahead and knit that round like normal with your new color.

2. When you reach the first stitch of the next round, identify the stitch in color A just below the first stitch in color B.

3. Using your righthand needle, lift this stitch up by the right leg and slip it onto your lefthand needle.

4. For the first stitch of your next round, knit this stitch in color A together with the stitch next to it (the first stitch in color B).

5. Knit around in color B until you're ready to switch to color A again, and repeat this process.

Slip the first stitch of the first round
This method was popularized by TECHknitting, and is somehow even more mindless than the previous method. To accomplish this, you basically need to just knit the stripes as you usually would, but when you reach the first stitchof the second round in the new color, you slip the first stitch. Here are the instructions, step-by-step.
1. When you're ready to knit the next stripe with color B, go ahead and knit your first round like normal.


2. When you reach the first stitch of the next round, slip the very first stitch purlwise rather than knitting it.


3. Knit around in color B until you're ready to switch to color A again, and repeat the process.

Knitting both colors together
Theresa Vinson Stenersen recommends in Knitty a technique we don't often see mentioned, where you start off a round of a new color by knitting with both colors and then go back and finagle the beginning of the round once it's been completed so you have both colors showing up in the first stitch. This is a great alternative to both of the techniques listed above if you prefer to not have an elongated stitch at the beginning of your round.
1. At the beginning of the round where you're switching to color B, knit the first stitch with both colors A and B.


2. Continue to knit with just the new color for as long as you'd like, or long enough to be able to clearly see the stitches below.

3. Use your needle to pull at the yarn end of color A so that it rests on the right side of the V of the first stitch, and color B is on the left side. This might take a little bit of playing around with to understand the first time you do it.

Up Next:
17 Fair Isle Knitting Patterns
Do you have any tips or tricks on knitting jogless stripes?