How to Cable Knit
Even beginners can learn cable knitting with this tutorial!

It's a very common knitting myth that cables are hard to knit. In fact, while they might look intricate and complex, cables are something that just about any knitter at any level can do. Whether you make DIY knit garments all the time or you are just starting this fun craft, the video below on how to cable knit is going to quickly become your best friend.
When it comes down to it, the only aspects of cable knitting that are actually very challenging are the abbreviations and patterns themselves. The actual cable twists are very easy to perform if you have the right knitting tools on hand.
Watch and Learn
Check out our YouTube Channel to find more fun video tutorials like this one:
Materials
- Yarn
- Knitting needles in the corresponding size for your yarn
- Cable needles that are the same size or smaller than your regular knitting needles.
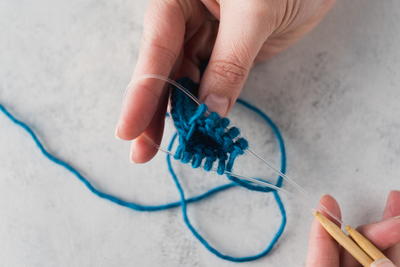
Note: There are many different types of cable needles you can use (see image below). We are personally a fan of the style in the center of the image below because it stays out of the way of your other needles, making the stitches easier to work, but you should try them all and see what works best for you.
Some knitters also use double pointed needles instead, and some more adventurous knitters don't use cable needles at all and just let the stitches slip off of the needle while they're still live.

How to Knit a Left-Leaning Cable
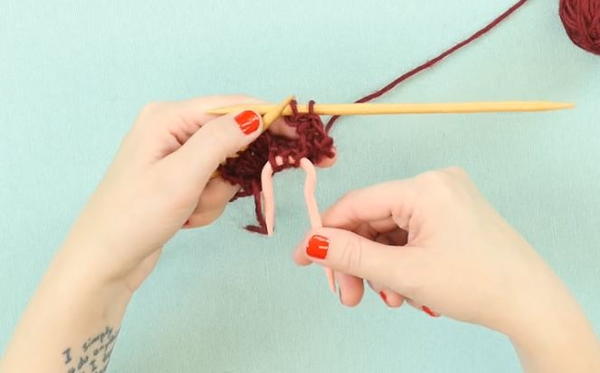
- Work in pattern until the point where your pattern calls for the left-leaning cable.
Note: This will most likely be on a right side row.
- Slip the appropriate number of stitches onto your cable needle. In the example above, this is three stitches. Let go of your cable needle and let it hang on its own in the front of your work.
Note: This is the most important step of this; placing the stitches in the front of your work (instead of the back) is what makes the cable lean to the left.
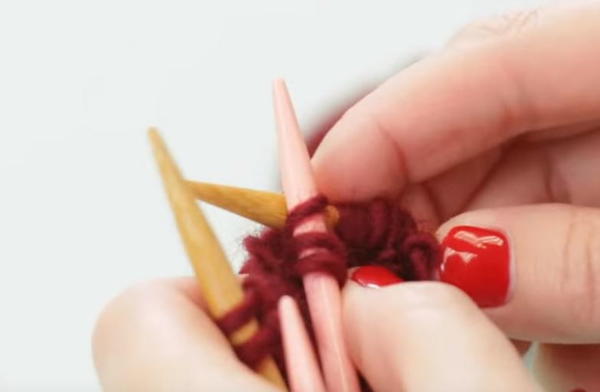
- Knit the rest of the stitches in the cable as your pattern calls for. In this example, it's the next three stitches that are knit.
- Pick up your cable needle, and slide the stitches to the end of the needle so you can knit them. Then, use your cable needle as if it is the left-hand knitting needle and knit the stitches that you slipped onto it in step 2.
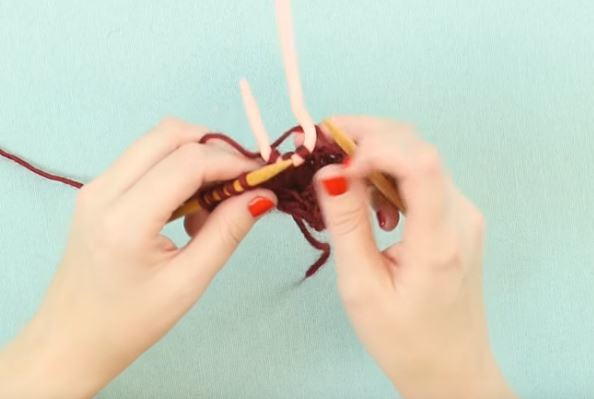
- Continue in pattern through the rest of the row.
How to Knit a Right-Leaning Cable
- Work in pattern until the point where your pattern calls for the right-leaning cable.
Note: This will most likely be on a right side row.
- Slip the appropriate number of stitches onto your cable needle. In the example above, this is three stitches. Let go of your cable needle and let it hang on its own in the back of your work.
Note: This is the most important step of this; placing the stitches in the back of your work (instead of the front) is what makes the cable lean to the right
- Knit the rest of the stitches in the cable as your pattern calls for. In this example, it's the next three stitches that are knit.
- Just like before, pick up your cable needle, and slide the stitches to the end of the needle so you can knit them. Then, use your cable needle as if it is the left-hand knitting needle and knit the stitches that you slipped onto it in step 2.
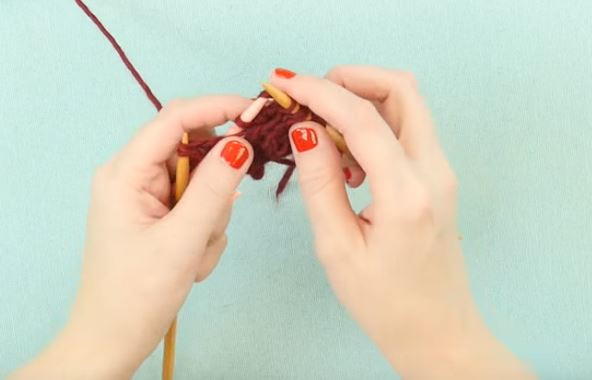
- Finish the rest of your row in pattern.
The Basics of Cable Knitting
Determining the Number of Stitches You Should Cable
When determining the number of stitches involved in a cable, you can simply look at the abbreviation used by the designer in the pattern itself. For instance, if you see a "C6F" (or "cable 6 front"), this means that there is a total of 6 stitches used in the cable.
In general, if you see an even number of stitches are used in a cable, you can simply divide that number in half to determine how many stitches to slip onto your cable needle. To continue the example from above, if you were to knit a C6F, you would slip the first three stitches onto your cable needle, let those stitches hang in the front, knit the next three stitches, and then finish by knitting the stitches on your cable needle.
If you see an odd number of stitches is used in your cable, this probably means that you've got something like a 2/1 cable (or 2 over 1) wherein you would slip the first two stitches onto your cable needle, purl the next stitch, and then knit the stitches from your cable needle. If this sounds like too much to take in right now, don't worry; these kinds of cables are typically only used in advanced aran style cables. Once you've knitted a few cables, you'll get the hang of it, and these kinds of cables with uneven stitch counts will make complete sense.
If you aren't sure what a certain cable symbol means, be sure to check the "abbreviations" section of your pattern; most designers will leave very detailed instructions on how to do the cables necessary for the pattern.
Determining the Direction of the Cable's Lean
This is a surprisingly simple part of cable knitting to wrap your head around. For a left-leaning cable, you will let your stitches hang in the front; for a right-leaning cable, you will let your stitches hang in the back.
Note: If you happen to be knitting cables on a wrong-side row, these are reversed (a left-leaning cable would hang in the back and vice versa). This is extremely rare in knitting, however, and no beginner cable knitting pattern would ever include this.
Cable Knitting Chart Symbols
This is the part that scares some knitters off of cable knitting. They see that complicated knitting chart, and they run in the other direction. Knitting charts, in general, can be a little intimidating; if you're new to knitting from a chart, this handy tutorial will walk you through the ins and outs of it. Cable knitting has its own set of symbols used to tell you exactly what you should be doing.
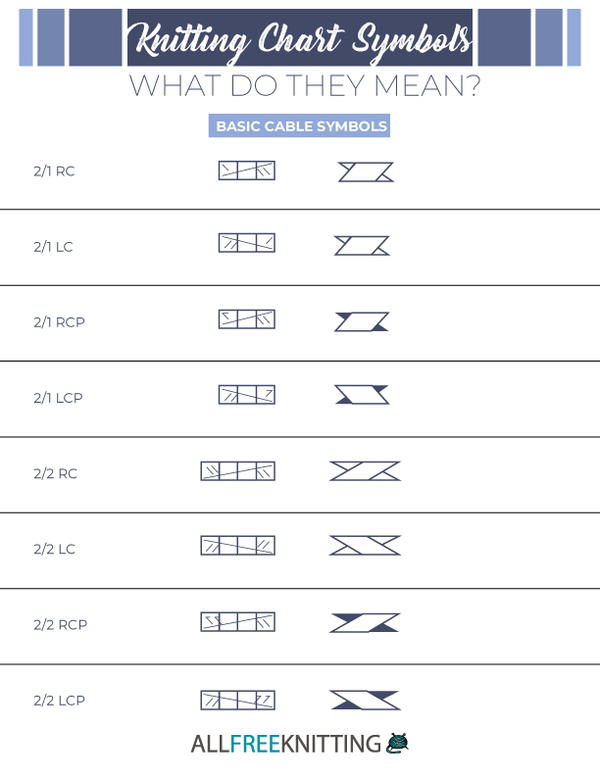
Cable Knitting Abbreviations
While there are a couple of different "styles" of cable knitting chart symbols, for the most part, they all convey information in the same way. Cable abbreviations, however, can get a little more complicated as there are a number of different ways you can write these maneuvers.
Here are a few things to keep in mind with cable abbreviations:
- Pretty much all cable abbreviations will start with C and then a number. For example C6F or a T2F.
- There are two ways to display the number of stitches used in a cable. If it's a very straightforward cable stitch, like the C6F, you'll probably just see one number. This means that you will cable half of those six stitches in front.
The other way to display this information is with two separate numbers; for example, if you see an abbreviation like C2/1F, that means you should slip the first two stitches onto the cable needle and placing them in front, work the next (single) stitch in the pattern, and then knit the two stitches from your cable needle.
- The last part of cable abbreviations indicates whether you should cable front or back (or left or right). Because a left-leaning cable is the same as a cable front and a right-leaning cable is the same as a cable back, F/L and B/R are interchangeable.
Made a Mistake?
How to Fix a Mis-Crossed Cable
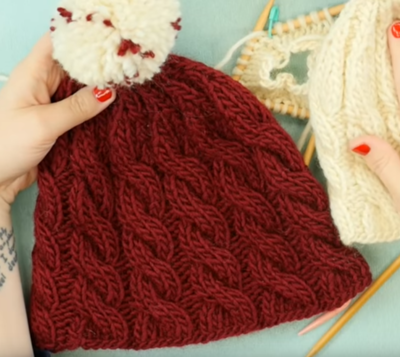
What's your first cable knit project going to be?
Share with us in the comments!
Your Recently Viewed Projects
Thanks for your comment. Don't forget to share!
FrasierFan1901
Jan 20, 2017
I have been hoping to try a cable knit stitch, so I am putting this video on my list!
Report Inappropriate Comment
Are you sure you would like to report this comment? It will be flagged for our moderators to take action.
Thank you for taking the time to improve the content on our site.