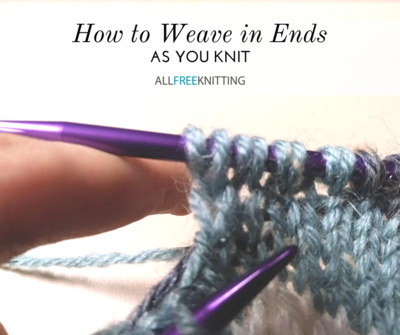
How to Weave In Ends As You Knit
Learn how to hide yarn ends the easy way.

Weaving in ends: if you're anything like me, this is the bane of your existence. When you've been working on your latest piece for hours, knitting needles clicking endlessly in front of the cold light of the television, and finally, at four in the morning on a Tuesday, you've finished that intricate lace shawl, you want to be finished. The last thing you want is to fish your darning needle out of your pool of knitting notions, double-back to every place you started a new skein of yarn and pretend you know how to properly weave in the ends, only for it to end up looking funky.
What if I told you there was a way to avoid the after-bind-off hassle that doesn't involve any darning needles? Well, there is, and it's easier than you might think. All you need to do is weave in the ends while you knit, and remember where you did so. If that sounds simple enough, that's because it is.
If you've never woven in your ends before, don't fret! It's easier than it looks. Before tackling weaving in ends as you knit, learn how to do it after binding off with a darning needle with this helpful video tutorial:How to Weave in Ends in Knitting
Weaving in Ends As You Knit: The Technique
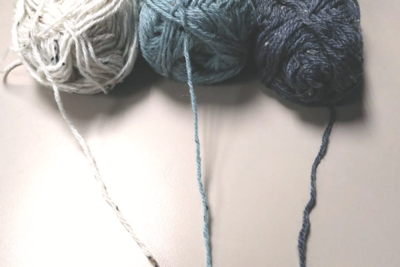
Once you've dropped the old skein of yarn and looped on the new one, you'll find yourself with two tails: the last few inches of your used-up skein of yarn, and the first few inches of your brand new skein of yarn. Both of these ends, you would have to weave in later on if you just kept on knitting as normal, but in just two rows or rounds, you can work the ends directly into your piece.
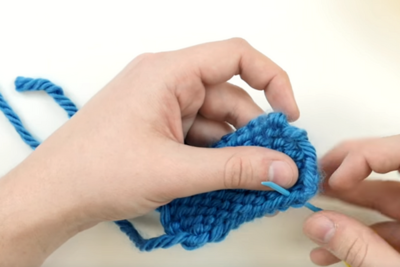
Start by inserting your working needle into the next stitch and looping the new yarn around it as if to knit (or purl, depending on your pattern), like you usually would. Before working the stitch, take the tail from your old skein of yarn and also loop that around your working needle as if to knit. Pull both the tail and your new yarn through the loop as if they were a single strand of yarn, and drop the old stitch off of your holding needle. The new stitch on your working needle will be made of two strands.
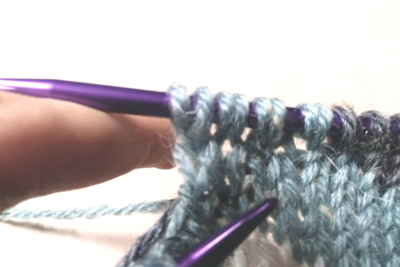
Notice that each stitch where the tail was carried now contains two loops.
Keep knitting with both your new yarn and the tail until the tail runs out, and you can snip off the very end where you can no longer work the tail, just like with weaving in ends. It's very important to remember where you weaved in this end so you can keep track of your stitches: since each stitch where you weaved in ends as you knit will appear to be two loops, you want to make sure to not work each loop separately as if they were two different stitches. This becomes more complicated if your pattern doesn't have the same number of stitches every row or round and will involve some counting on your part.
Tip: A great way to avoid confusing yourself is to watch the stitches from the round or row below the loops on your holding needle. If two loops come out of a single stitch, and you didn't work an increase there in the previous round or row, that is a place where you've woven in ends as you knit, and you should treat those two loops as a single stitch.
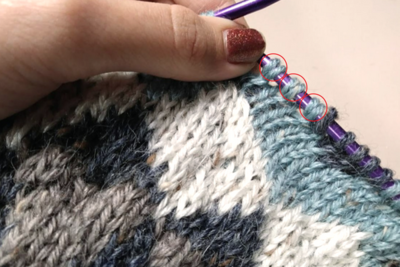
Notice that each stitch where the tail was carried with the working yarn is circled in red.
In the next round or row, you'll want to pick up the tail from the newly-attached yarn and carry it with your knitting in the exact same way. The fabric where you weaved in ends where you knit will be a little more dense than the surrounding fabric, but will be more or less invisible to the untrained eye, and will save you a bunch of time after binding off.
Weaving in Ends As You Knit With Colorwork
This may not seem possible right off-the-bat. While you can work the ends into your knitting with yarn that's the same color as the body of your work, since it would blend in with the original stitches, this camouflaging effect is lost with colorwork patterns. Say you just finished up the last part of your pattern that uses red yarn, and you're moving onto white. If you try to knit with both the white yarn and the tail of the red yarn, the first few stitches of the white section will have the look of a red-and-white marled yarn. This can be a cool effect, but probably not what you're looking for with an intricate colorwork piece.
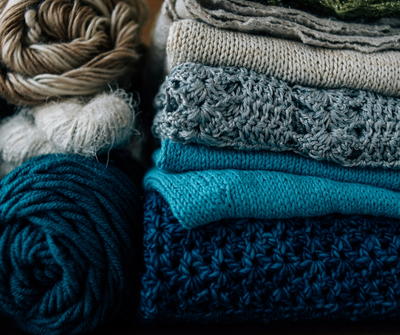
Using multiple colors of yarn in one project can often complicate things, but you can still weave in ends as you go with colorwork patterns.
Not all hope is lost, though; there is a different way to weave in yarn of the opposite color when you knit. In stranded colorwork, you typically catch long floats of yarn by twisting the old yarn behind the new yarn. You can find a great tutorial for that here, if that's something you've never done. If you treat the tail of your previous color as though you're still going to use it in the future, and "catch" that yarn every other stitch until it runs out, you can use up the tail without it showing in the front end of your work and leave yourself with no ends to weave in. This is especially helpful for patterns utilizing a lot of different colors, where you would otherwise be left with a lot of differently-colored ends.
What about beginning a new color? When you loop a new colored yarn onto a colorwork piece, you create a tail at the beginning of where that color started. Simply use the same knit-as-you-go technique from the beginning of this article, but just be sure to only carry and knit with the tail when you're supposed to be using that yarn. This can get tricky to keep track of with stranded or fair isle colorwork, but try not to knit the tail of color A when you're using color B.
When Not to Weave In Ends As You Knit
While this technique is very helpful for simpler patterns, you may avoid unnecessary headaches in more complicated patterns by just letting the yarn tails stay there until the end and weave them in after the fact. While we explained how to weave in ends with colorwork, if you're working on a pattern with four different colors all going at once, the effort of keeping track of where your tails should be worked and where they should float will only serve to complicate an already very difficult knitting process. Something like the Magic No-Ends Knot might suit your needs better if you'd really rather avoid yarn ends.
Sometimes, it's just simpler to do things the old-fashioned way.
Furthermore, as stated above, if you have a pattern that has a different number of stitches on every row, especially one that involves increases which you may accidentally identify as a woven-in end (or worse, if you had to increase in the same place where you carried your yarn, leaving you with four loops coming out of one stitch), unless you're confident that you can work all the right stitches, it may make more sense to just come back when you're through with the pattern and weave in your ends with a darning needle.
Try It Out!
In summary, weaving in ends as you knit is basically just knitting the tail along with the new yarn as if they're one strand of yarn. Now that you know how to do it, try it out with your next project! Tell us in the comments below how it worked out, and if you're going to do it this way from now on, or just stick to weaving in ends after your pattern is all knit up.
Read NextYarn Weight Categories 101
Your Recently Viewed Projects
Thanks for your comment. Don't forget to share!
bsolnoky 2431195
Sep 22, 2018
Thank you for the article. I will definitely try this method of weaving in ends on my current project as I absolutely don't like weaving in ends. I have been using the Russian join for some time but this will be a neat alternative.
EditorLP
Sep 06, 2018
Oh man, I HATE weaving in ends, so I am glad I found this article! I would much rather weave in ends as I go than deal with a bunch of them after finishing my pattern.
Report Inappropriate Comment
Are you sure you would like to report this comment? It will be flagged for our moderators to take action.
Thank you for taking the time to improve the content on our site.