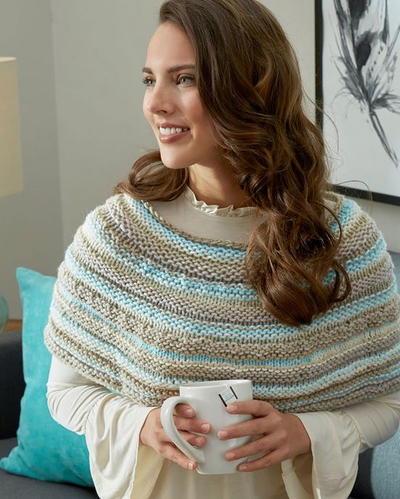
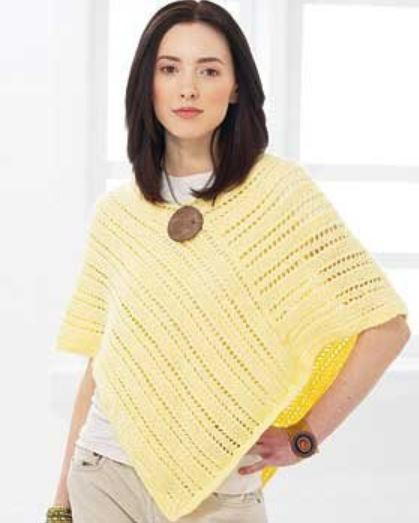
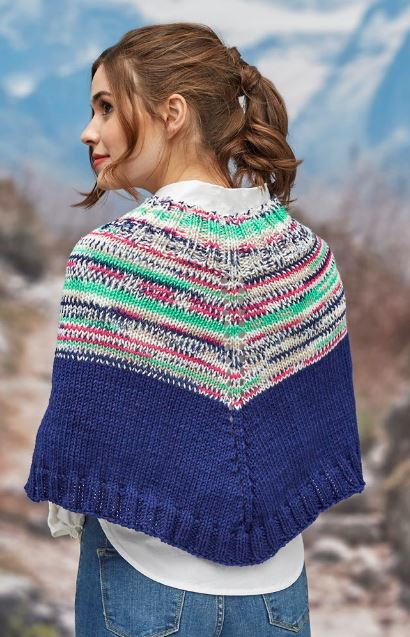
Faux Fair Isle Knit Poncho
This knit poncho pattern looks much harder than it is!

If you're not quite ready yet to get your feet wet with fair isle knitting, you can still knit a gorgeous fair isle-style poncho! This Faux Fair Isle Knit Poncho looks, from afar, as though there's an intricate design along the upper half of the capelet, but it's actually just the variegated style of the yarn. This easy poncho pattern will be a breeze for more seasoned knitters, and a fun new challenge for beginners. While we love the jewel tones of the original pattern, it would look gorgeous in lighter colors for spring, or more muted colors for winter.
NotesDirections are for adult’s size Extra Small/Small; changes for Medium/Large and XL/2XL are in parentheses. When only 1 number is given, it applies
to all sizes. This poncho is worked in the round,
from the top down.

Knitting Needle Size8 or 5 mm
Yarn Weight(4) Medium Weight/Worsted Weight and Aran (16-20 stitches to 4 inches)
Gauge15 sts = 4" [10 cm] ;20½ rounds = 4" [10cm] in St st. CHECK YOUR GAUGE. Use any size needles to obtain the gauge.
Finished SizeNeck Circumference: 26 (27¼, 28½)" [66 (69, 72.5) cm]; Lower Edge Circumference: 53 (56, 60)" [134.5 (142, 152.5) cm]; Length: 19¼ (20½, 21¾)" [49 (52, 55) cm]
Materials List
- RED HEART® Super Saver Fair Isle® yarn: 1 skein 7251 Derby (A)
- RED HEART® Super Saver® yarn: 1 skein 387 Soft Navy (B)
- Susan Bates® Knitting Needles: 5mm [US 8]
- 5 stitch markers (1 contrasting)
- Yarn needle
Poncho
Neck
With A, cast on 100 (104, 108) sts using Wrap Cast-On. Join, being careful that stitches are not twisted, and begin working in the round. Place contrasting marker for beginning of round.
Body
-
Set-Up Round: K24 (25, 26), place marker, k2, place marker, k48 (50, 52), place marker, k2, place marker, knit to contrasting marker.
-
Shape Body
Round 1 (increase round): Knit to 1 st marker, M1, slip marker, k2, slip marker, M1, knit to next marker, M1, slip marker, k2, slip marker, M1, knit to end of round; 4 sts increased - 104 (108, 112) sts.
Rounds 2-3: Knit, slipping markers as you come to them.
Rounds 4-33 (4-36, 4-39): Repeat Rounds 1-3, 10 (11, 12) times - 144 (152, 160) sts. Cut yarn leaving 6" [15 cm] tail. Join B.
Rounds 34-66 (37-72, 40-78): With B, repeat Rounds 1-3, 11 (12, 13) times - 188 (200, 212) sts.
Lower Edge
Note: Drop all four shaping markers as you come to them, keeping contrasting marker at beginning of round.
Rounds 1-8: Work in K2/P2 rib.
Bind off all sts using Stretchy Bind-Off.
Cut yarn leaving 6" [15 cm] tail.
Abbreviations
- M1
- Make 1 (Inc) - With left-hand needle, lift strand between needles, from front to back, and place on needle. With right-hand needle, knit through the back of this loop.
- Wrap Cast-On
- Make a slip knot and place it on right-hand needle. *Wrap the ball end of the yarn around your thumb from front to back and grasp the yarn with left-hand fingers. With the right-hand needle, go up into the loop just created by wrapping the yarn. Drop the loop from your thumb. Pull to tighten on right-hand needle. Repeat until desired amount of stitches are on right-hand needle.
- Stretchy Bind-Off
- Knit first st. *Knit next st and then slip 2 sts from right-hand needle to left-hand needle and K2tbl (1 st remains on the right hand needle). Repeat from * across.
- A, B
- Color A, B
- K2tbl
- Knit 2 sts together through the back loop
- cm
- centimeters
- mm
- millimeters
- p
- purl
- st(s)
- stitch(es)
- *
- Repeat whatever follows the * as indicated.
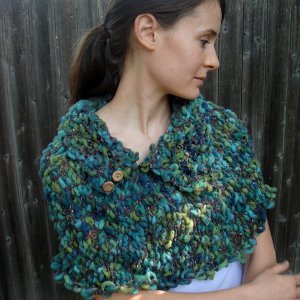
Read NextMixed Greens Capelet
Your Recently Viewed Projects
Thanks for your comment. Don't forget to share!
gmh5 9961759
Dec 26, 2018
After making this poncho, I realized that directions for the ribbing at the beginning of the neck pattern are missing. Without this ribbing, the neckline has a roll which is ok but not as nice as the ribbing would have been. Otherwise, it was easy to make and looks good.
Lisa
Dec 31, 2020
I made this a couple of years ago and this version is missing the 18 rows of ribbing, that is done before the set up for the shaping.
Report Inappropriate Comment
Are you sure you would like to report this comment? It will be flagged for our moderators to take action.
Thank you for taking the time to improve the content on our site.