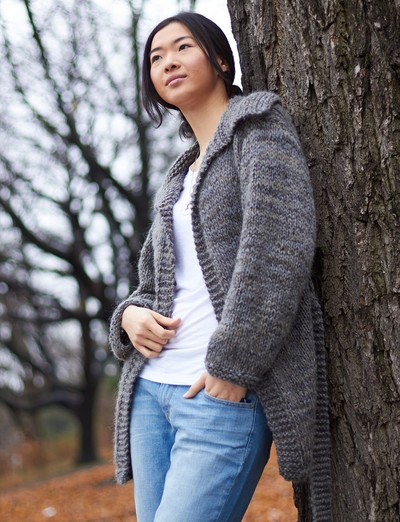
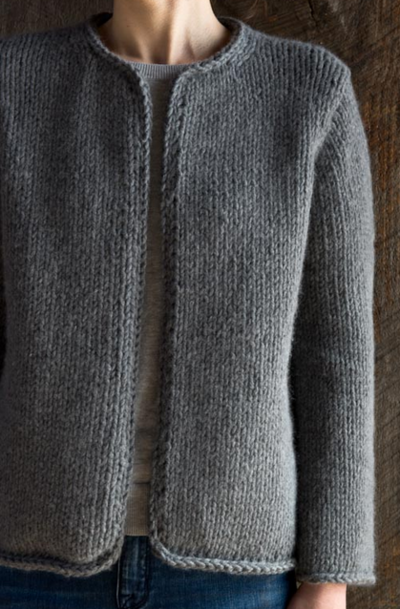
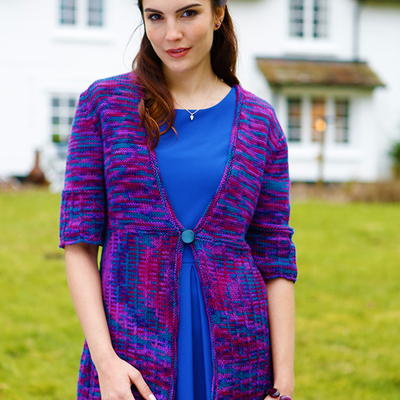
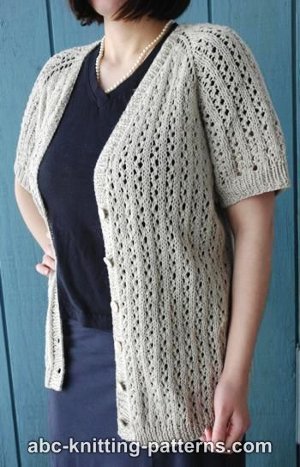
City Girl Cardigan

Subtle texture and a flattering silhouette combine to form a garment that will span the seasons. The City Girl Cardigan is a laid-back knit cardigan pattern you'll love being able to take credit for. Short sleeves and an open-front style make this breezy piece the perfect cardi for the girl on the go. Throw it on over your favorite t-shirt to dres up a casual outfit, or keep it with you so that you are always comfortable on capricious fall and spring days. For a unique finishing touch, this knit cardigan can be fastened shut with a pin or tassel of your choosing.

Knitting Needle Size9 or 5.5 mm, 10 or 6 mm
Yarn Weight(4) Medium Weight/Worsted Weight and Aran (16-20 stitches to 4 inches)
Gauge18 stitches, 25 rows, 4 inches. Texture Pattern
Materials:
- RED HEART® Boutique™ Midnight™ (E786 available in 2.5 oz (70g), 153 yd (140m) balls.) : 5 (6, 7, 7, 8) balls 1945 Shadow.
- Knitting Needles: 5.5mm [US 9] and 6mm [US 10]
- 6 Split lock stitch markers
- yarn needle
- shawl pin for closure
GAUGE: 18 sts = 4”; 25 rows = 4” in Texture Pattern with larger needles.
CHECK YOUR GAUGE. Use any size needles to obtain the gauge.
Directions are for size Small; changes for sizes Medium, Large, 1X and 2X are in parentheses.
Finished Measurements
Bust: 36 (40, 44, 48, 52)” with Fronts overlapped 4”.
Length: 23 (23½, 24, 24½, 25½)”.
ABBREVIATIONS:
dec = decrease; inc = increase; K = knit; mm = millimeters; P = purl; pm = place marker; st(s) = stitch(es); tog = together; * = repeat whatever follows the * as indicated; [ ] = work directions in brackets the number of times specified.
Special Abbreviations
ssk (slip, slip, knit) = slip next 2 sts knitwise, one at a time, to right needle, insert tip of left needle into these 2 sts from the front and knit together.
ssp (slip, slip, purl) = slip next 2 sts purlwise, one at a time, to right needle, insert tip of left needle into these 2 sts from the front and purl together.
Stitch Patterns
Ribbing (multiple of 2 sts + 1)
Row 1 (Wrong Side): P1, * k1, p1; repeat from * across.
Row 2: K1, * p1, k1; repeat from * across.
Repeat Rows 1 and 2 for ribbing.
Texture Pattern (multiple of 2 sts +1)
Rows 1 and 5 (Right Side): Knit.
Rows 2 and 6: Purl.
Row 3: P1, * k1, p1; repeat from * across.
Row 4: K1, * p1, k1; repeat from * across.
Row 7: K1, * p1, k1, repeat from * across.
Row 8: P1, * k1, p1; repeat from * across.
Repeat Rows 1-8 for Texture pattern.
Technical Tip: An extra stitch is added to each side of the bottom ribbing. When sewn together, these extra stitches will be taken into the seam allowing for continuity of the 1x1 ribbing pattern.
CARDIGAN
Back
With smaller needles, cast on 83 (91, 101, 111, 119) sts.
Row 1 (Wrong Side): P2, k1, * p1, k1; repeat from * to last 2 sts, p2.
Row 2: K2, p1, * k1, p1; repeat from * to last 2 sts, k2.
Row 3: Repeat Row 1.
Change to larger needles and Texture Pattern until 15½” from beginning, ending after a wrong side row. Pm at beginning and end of this row to mark placement of armbands.
Shape Armholes
Work decreases 1 stitch in from the edge as follows:
On right side rows: K1, ssk, work in pattern to last 3 sts, k2tog, k1.
On wrong side rows: P1, p2tog, work in pattern to last 3 sts, ssp, p1.
Dec 1 st at each end every row 3 times, then every right side row 3 times – 71 ( 79, 89, 99, 107) sts. Work even in pattern until armholes measures 7½ (8, 8½, 9, 10)” from markers, ending after a wrong side row. Bind off in pattern.
Technical Tip: As for the Back, an extra rib st is included at the side edges of both the Left and Right Front ribbing.
Left Front
With smaller needles, cast on 38 (42, 46, 52, 56) sts.
Row 1 (Wrong Side): * K1, p1; repeat from * to last 2 sts, k2.
Row 2: P2, * k1, p1; repeat from * to last 2 sts, k2.
Row 3: Repeat Row 1.
Change to larger needles.
Technical Tip: Working one stitch in Garter St at the center front edge gives a finished appearance to the lower front and facilitates picking up stitches around the neck.
Work all shaping increases and decrease on the center front edge inside this Garter St selvedge.
Next Row (Right Side): Work Row 1 of Texture Pattern over 37 (41, 45, 51, 55) sts, k1. Keeping 1 st at front edge (end of Right Side and beginning of Wrong Side rows) in Garter St, continue in pattern AND AT THE SAME TIME, increase 1 st at the front edge (inside Garter St selvedge) on the 5th row, then every 4th row 6 (8, 7, 3, 5) times, then every 6th row 6 (5, 6, 9, 8) times, working added sts into pattern – 51 (56, 60, 65, 70) sts. Work even until piece measures 11½ (11¾, 12, 12¼, 12¾)” from beginning, ending after a wrong side row.
Technical Tip: Work neck decreases 1 st in from the front edge, maintaining Garter St selvedge. Work neck decreases as follows: Work to last 3 sts, k2tog, k1.
Shape Neck:
Pm at end of this row to mark placement for neckband. Keeping continuity of pattern, dec 1 st at neck edge (inside Garter St selvedge) every right side row 22 (23, 22, 21, 24) times, then every other right side row 5 (5, 6, 7, 6) times AND AT THE SAME TIME, when front measures same as back to armhole markers, shape armhole, ending after a wrong side row.
Shape Armhole:
Pm at beginning of this row to mark placement for armband. Dec 1 st one st in from the edge at armhole edge in same manner as for the Back every row 3 times, then every right side row 3 times, continuing neck shaping and then work even in pattern until armhole measures 7½ (8, 8½, 9, 10)” from marker, ending after a wrong side row – 18 (22, 26, 31, 34) sts. Bind off in pattern.
Right Front
With smaller needles, cast on 38 (42, 46, 52, 56) sts.
Row 1 (Wrong Side): K2, * p1, k1; repeat from * across.
Row 2: K2, * p1, k1; repeat from * to last 2 sts, p2.
Row 3: Repeat Row 1.
Change to larger needles.
Technical Tip Working one stitch in Garter St at the center front edge. Work all shaping increases and decreases on the center front edge inside this Garter St selvedge.
Next Row (Right Side): K1, work Row 1 of Texture pattern over 37 (41, 45, 51, 55) sts. Keeping 1 st at front edge (beginning of Right Side and end of Wrong Side rows) in Garter St, continue in pattern and complete as for Left Front, reversing all shaping, working neck decreases at beginning of Right Side rows as “k1, ssk”; and work armhole decreases as follows: End of Right Side Row: k2tog, k1. Beginning of Wrong Side Row: p1, p2tog.
FINISHING
Sew shoulder seams.
Armbands:
With right side facing and smaller needles, pick up and K72 (76, 80, 84, 92) sts evenly between makers on armhole edge.
Row 1 (Wrong Side): P2, * k1, p1; repeat from * to last 2 sts, k2.
Repeat last row 4 more times. Bind off in ribbing pattern.
Neckband:
With right side facing and smaller needles, begin at marker on Right Front, pick up and K54 (55, 57, 58, 60) sts to right shoulder seam, 35 (35, 37, 37, 39) sts across back neck and 54 (55, 57, 58, 60) sts from left shoulder seam to marker on Left Front – 143 (145, 151, 153, 159) sts.
Row 1 (Wrong Side): P1, * k1, p1; repeat from * across.
Row 2: K1, * p1, k1; repeat from * across.
Repeat Rows 1 and 2 until neckband measures 1½”, ending after a wrong side row. Bind off in ribbing.
Sew side seams taking up a full stitch on each edge, including edges of armhole bands. Weave in ends.

Read NextMagical Top Down Cardigan
Your Recently Viewed Projects


Thanks for your comment. Don't forget to share!
Alysanne
Dec 09, 2016
This looks like a fun pattern that my teen in Tennessee would love. It's snappy and casual but could be dressed up to please. The yarn is particularly pretty and fun to work with. Made a totally different type sweater with it and it turned out beautifully.
Report Inappropriate Comment
Are you sure you would like to report this comment? It will be flagged for our moderators to take action.
Thank you for taking the time to improve the content on our site.