How to Dye Yarn: Cake Dyeing Method
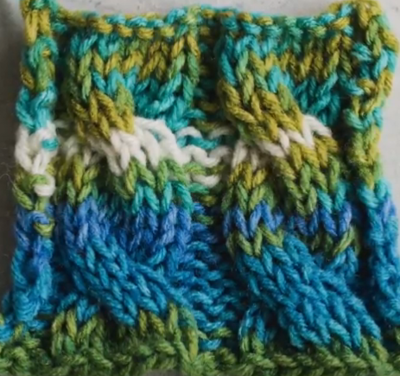
Like tie dyeing a t-shirt, there are many ways you can dye yarn to achieve unique results. In the following video tutorial, we will learn how to dye yarn that has already been wound into a cake, creating a unique-asymmetric colorway. Dyeing cakes of yarn creates asymmetric colorways by limiting the access of fiber to the dye. This can also take advantage of the fact that different colors of dye absorb to yarn at different rates, so you can get multiple colors in the yarn starting from a dyebath of a single color.

Materials:
- Yarn - In this tutorial I used 100 grams
- Ball Winder - To wind your yarn into a uniform “cake” you will need some kind of knitting yarn ball winder. The ball winder featured in this video is by KnitPicks.
- Yarn Swift (Optional) - A yarn swift is an umbrella like contraption that will hold the skein of yarn as you wind it into a ball. While this is not necessary to use a ball winder, it makes the process faster, easier and helps prevent unwanted tangles.
- A stove safe pot with a lid
- Heat - In this tutorial we are using stovetop methods.
- Dye - Liquid food coloring or paste food coloring dissolved in a small amount of water.
- Acid - I supplement my dyebath with a healthy splash of white vinegar, approximately 4 tablespoons per 6 cups of water.
- Water - 6 cups of tap water
- Utensil - A slotted spoon, tongs, something to help you safely submerge the yarn.
- Rubber Gloves (Optional) - Keep your hands color free by wearing gloves!
- Niddy Noddy (Optional) - To wind the yarn into a skein to help it dry after it has been dyed.
Instructions:
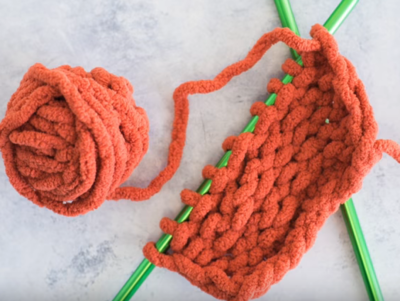
- Wind Yarn into a cake using the ball winder. Try to keep the yarn loose so the dye has a chance to penetrate the center of the ball.
- (Optional) Presoak your yarn. (If you want to have even more variation of color, add the yarn dry like we have done in our kettle dyeing methods.)
- Set up your dyebath: Add 3-4 tablespoons of white vinegar to 6 cups of water. Add your desired dye (in the video it is a mixture of different types of food coloring.)
- Cover the pot to prevent evaporation and bring the dyebath to a boil.
- Add your yarn. If the yarn is dry, gently press it into the pot to help it submerge. If the yarn has been pre-soaked, squeeze to remove excess water before adding it to the dyebath. If the dye bath does not cover the entire cake of yarn, add more water.
- Recover the pot and allow the yarn to simmer until the water runs clear (20-40 min; depending on the amount of dye you used.) Make sure you check on the yarn periodically.
- When all (or most, depending on your color prefernece) of the dye is in the yarn, turn off the heat and allow the dyebath to cool. I left the yarn in the pot to cool to allow additional dye to absorb to the fibers.
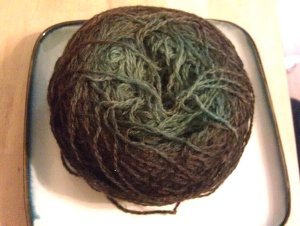
- Once the yarn is cool, use tongs or a slotted spoon to remove the yarn cake from the pot. Allow excess water to drain out and the put the cake on a heat safe plate to cool further.
- When the yarn is cool, rinse in luke warm water with mild dish soap. If you are having trouble rinsing out all of the excess dye, you should add a second rinse cycle after you have wound the yarn into a skein. It can be difficult to rinse all of the fiber while it is still in cake form.
- Place the yarn on a cooling rack to dry as much as possible.
- You can let the yarn dry completely when it is cake form, but this will take days. Once the yarn has dried out a bit (after a day), wind it into a skein on a niddy noddy or around a chair. Take care to not stretch the yarn out too much while it is wet.
Notes and Tips:
- What do you do if you want to make a scarf or sideways shawl and have a symmetric gradient? What if you want to use this method to create yarn for a pair of socks? Two cakes of yarn in the same dyebath will come out differently, since there are slight differences in the way they are wound and the tension, but by winding two strands together you can create symmetrical yarns or “identical” dye lot skeins. Please note that most ball winders have a limit to how much yarn they can hold at a time, so this will limit how much yarn you can wind together.
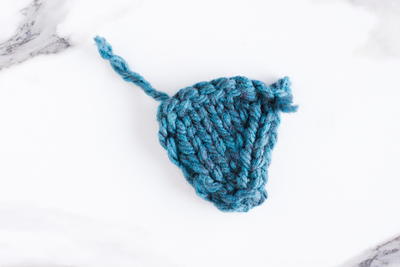
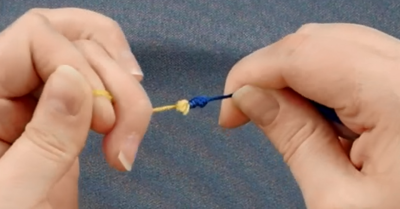
- To create a symmetrical skein: Wind your center pull yarn cake and then hold the two ends of yarn together. Attach these two ends to the ball winder, and wind a new cake of yarn with a double strand. Follow the dyeing instructions above, until it is time to wind the yarn back into a skein. Find the two ends (located on the inside of the ball) and wind each end into a separate skein. These two skeins should still be connected in the center. Once the yarn is dry, you all the yarn into a ball by winding one skein at a time.
- To create two identical asymmetric skeins: Wind as in the symmetrical skein, but cut the yarn at the middle point. You now have two 50g skeins! Continue the rest of the instructions as above
Cake Dyeing Yarn Video Tutorial:
Cake Dyeing Yarn for Symmetrical Colorways:
Read NextHow to Make a Magic No-Ends Knot