How to Do a Russian Join
The Russian join is great for knitters who hate weaving in ends and don't like to waste yarn!

No matter how long you've been knitting, weaving in ends never really gets that much easier or any less time-consuming. Luckily there are many different ways to avoid creating countless ends in your work. One that we here at AllFreeKnitting particularly love is the Russian join!
There are many different ways to join yarn in knitting, but often you'll end up with weird bumps, awkward knots, or unnecessary ends. The Russian join, on the other hand is great for a few reasons. Not only will you not have ends to weave in, but there is a minimal amount of yarn that is wasted in this join.
You might notice that there's a slight bump in your work when you're knitting back over this join in the subsequent row, but this should not show on the finished work itself. Over time, the yarn will felt into itself, and the join will be very secure.
Materials
- Your skeins of yarn
- A tapestry needle
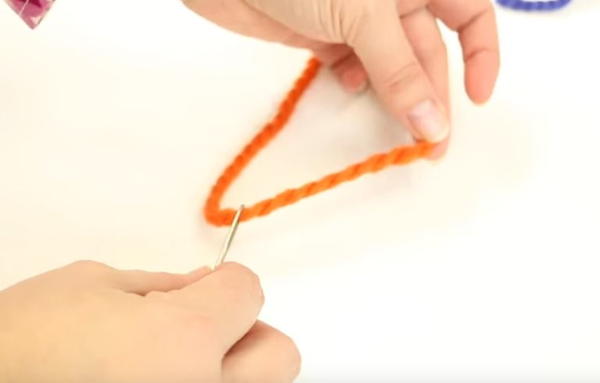
Step 1:
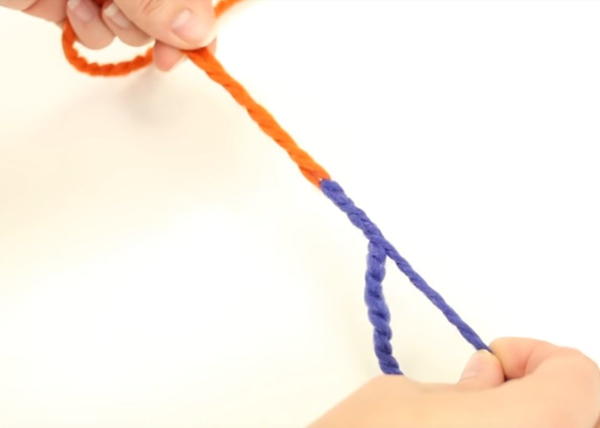
Thread your tapestry needle onto one of your skeins of yarn, giving yourself about a two-inch tail.
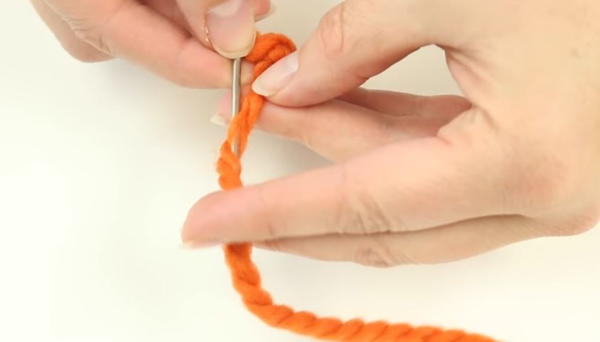
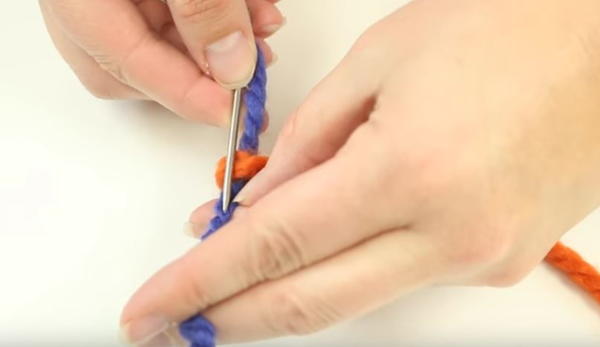
Step 2:
Turn your needle around and push it in between the plies of the yarn.
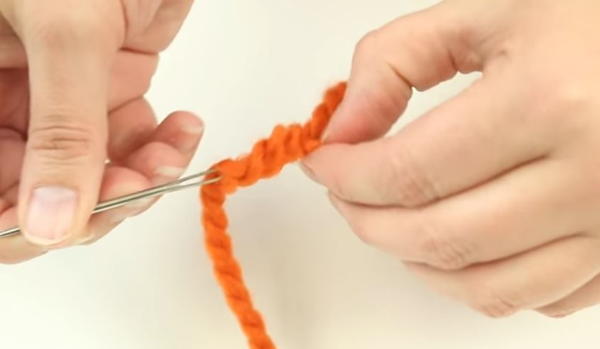
Step 3:
Pull the tail of yarn through the plies. You should still see a little loop of yarn and the end.
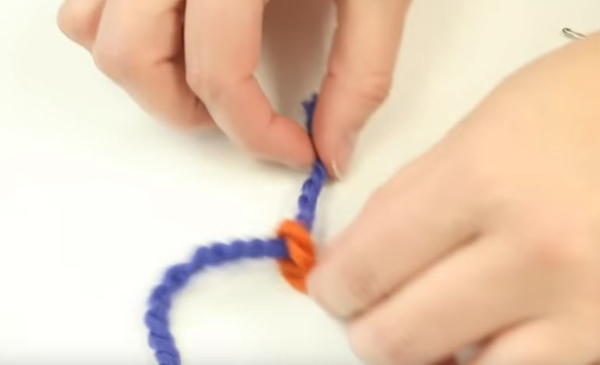
Step 4:
Take the tail of yarn from your other skein and bring it through the loop of yarn that you just made.
Step 5
Repeat steps 1-3 for your other tail of yarn, threading it back into itself through the plies.
Step 6:
Trim your tails that are sticking out from the yarn. Now you've got a continuous join of yarn and no ends to weave in later!