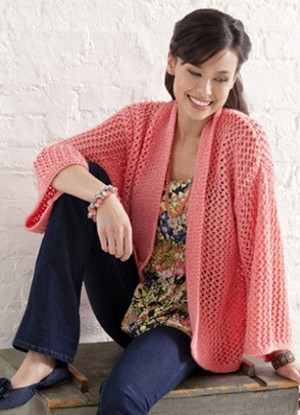
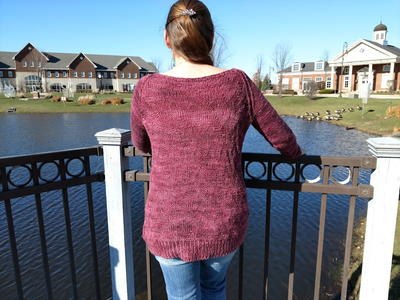
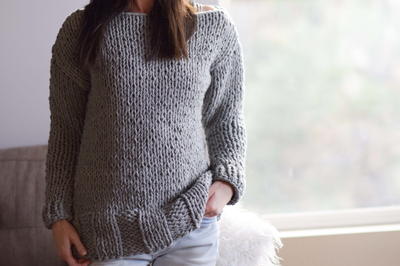
Vintage Knit Sweater

The Vintage Knit Sweater was inspired by a sweater-scarf hybrid from 1917, in the early years that women supported the troops by working with the Red Cross. This easy to wear knitted sweater is perfect for being active or relaxing. Plus, the pewter color of the yarn is incredibly versatile, so you can throw this sweater on as a finishing touch to almost any outfit. The sweater is made from a rectangle and a thin belt which provides definition to the body. The front of the garment is longer than the back providing a nice amount of visual interest. Give this free knitting pattern a try and you will be pleased as punch with the result.

Knitting Needle Size8 or 5 mm, 9 or 5.5 mm
Yarn Weight(4) Medium Weight/Worsted Weight and Aran (16-20 stitches to 4 inches)
Gauge14 sts = 4” [10 cm] in Garter stitch (knit every row) with smaller needles. CHECK YOUR GAUGE. Use any size needles to obtain the gauge.
Finished SizeSweater Scarf measures about 20 x 62” [51 x 157.5 cm)
Materials List
- RED HEART® With Love®: 3 skeins 1401 Pewter
- Susan Bates® Knitting Needles: 5mm [US 8] and 5.5mm [US 9]
- Tape measure, stitch markers, four ⅞” [22 mm] buttons, yarn needle
If you're looking for beginner knit sweater patterns, be sure to check out
Special Stitch
kfb (Knit into front and back) = Knit next stitch but do not remove from needle, knit into back loop of same stitch and remove from needle.
Notes
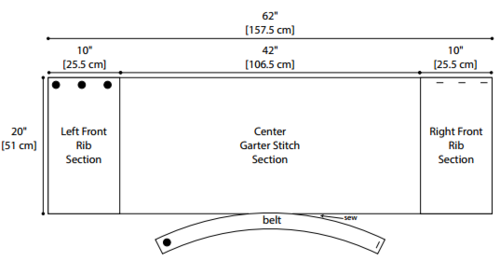
1. Sweater Scarf is made from a rectangle and a thin belt.
2. The rectangle is worked back and forth in rows in three sections: Left front rib section, Center Garter stitch section, and right front rib section.
3. The belt is sewn to the center of the long, lower edge of the rectangle (see diagram).
Sweater Scarf
With larger needles, cast on 70 sts.
Left Front Rib Section
Row 1 (right side): K4 for Garter st border, place marker, p2, *kfb, p2; repeat from * to last 4 sts, place marker, k4 for Garter st border—90 sts.
Row 2 (wrong side): K4, slip marker, k2, *p2tog, k2; repeat from * to next marker, slip marker, k4—70 sts.
Repeat Rows 1 and 2 until piece measures about 10” [25.5 cm] from beginning, end with a wrong side row (Row 2)—70 sts.
Center Garter Stitch Section
Change to smaller needles. Continue to slip markers as you come to them. Work in Garter st (knit every row) until piece measures about 52” [132 cm] from beginning, end with a wrong side row.
Right Front Rib Section
Change to larger needles.
Repeat Rows 1 and 2 of left front rib section for 3” [7.5 cm], end with a wrong side row.
Buttonhole Row 1 (right side): K4, slip marker, p2, *kfb, p2; repeat from * to next marker, slip marker, k1, bind off 2 sts for buttonhole—88 sts.
Buttonhole Row 2 (wrong side): K1, cast on 2 sts, k1, slip marker, k2, *p2tog, k2; repeat from * to next marker, slip marker, k4—70 sts. Repeat Rows 1 and 2 of left front rib section until piece measures about 3½” [9 cm] from first buttonhole, end with a wrong side row. Repeat Buttonhole Rows 1 and 2.
Repeat Rows 1 and 2 of left front rib section until piece measures about 3½” [9 cm] from 2nd buttonhole, end with a wrong side row. Repeat Buttonhole Rows 1 and 2. Repeat Rows 1 and 2 of left front rib section until piece measures about 10” [25.5 cm] from beginning of right front rib section, end with a wrong side row—70 sts.
Bind off in pattern.
BELT
With tape measure, measure your true waist.
With smaller needles, cast on 8 sts. Work in Garter st for 3 rows.
Buttonhole Row 1: K3, bind off 2 sts, knit to end of row—6 sts.
Buttonhole Row 2: K3, cast on 2 sts, k3— 8 sts.
Work even in Garter st until piece measures same as waist measurement.
Bind off.
Finishing
Fold sweater scarf in half and place a marker on long edge.(opposite buttonhole edge) at fold for center. Fold belt in half and place a marker on one edge at fold for center. Sew marked sides of sweater scarf and belt together, beginning at marked center, sewing for about 4” [10 cm] on each side, and stretching the belt slightly as you sew. Sew three buttons along left front edge of sweater scarf, opposite buttonholes along right front edge. Sew remaining button to end of belt opposite buttonhole. Weave in all ends.
-
Click image to enlarge
Abbreviations
- k
- knit
- p
- purl
- p2tog
- purl next 2 sts together
- st(s)
- stitch(es)
- *
- repeat whatever follows the * as indicated
Why do you like vintage knitting patterns?
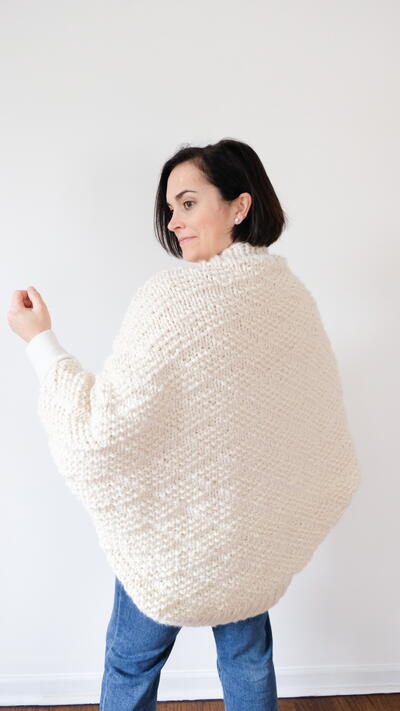
Read NextEmbarker Cocoon Cardigan
Your Recently Viewed Projects
Thanks for your comment. Don't forget to share!
BarbaraLowell 5856 328
Jul 28, 2017
I'M curious, if you didn't switch to smaller needles would it not have a poufy attractive look? Wondering why you switched? I will try this, thanx
Lisa
Jan 07, 2019
I expect you are switching to a smaller needle to do the garter section to minimize the stretch of the garter stitch section. I suspect if you don't switch to a smaller needle, you won't have a "poufy attractive look" it will be misshapen because of the stretch of the garter stitch. I've made 3 of them and dropped the belt and buttons after the first one and just make it as a shawl without the belt and buttons.
Sara R
Jun 23, 2017
I'm in love with how this sweater looks. It looks stylish and cozy at the same time.
Report Inappropriate Comment
Are you sure you would like to report this comment? It will be flagged for our moderators to take action.
Thank you for taking the time to improve the content on our site.