This project was submitted by one of our readers, just like you.
Center Street Pullover Pattern
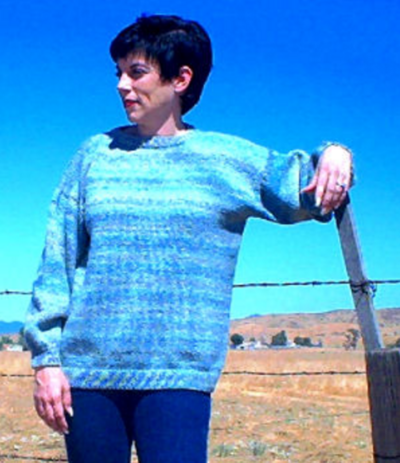
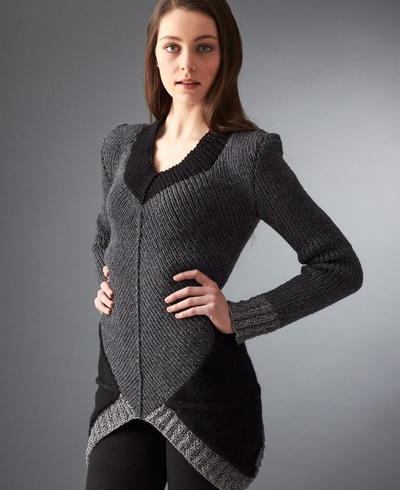
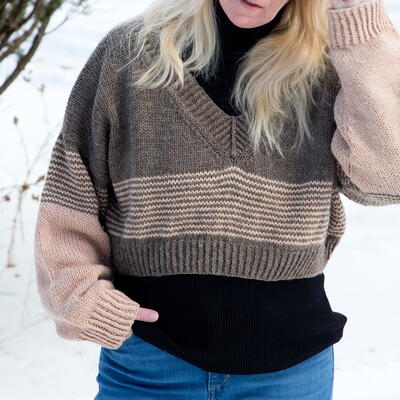
This adorable sweater pattern is great for knitters who want to try something a little more challenging!

Center Street Pullover Pattern
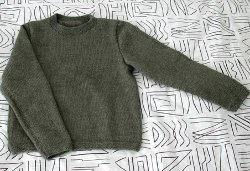
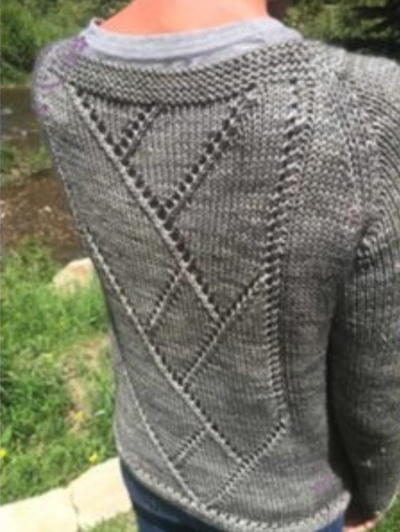
"Center Street is a worsted weight, oversized boatneck pullover. It is knit in the round, bottom up with raglan shaping and a simple, intuitive lace panel up the center back. Materials Needed: size 8 (6mm) circular needles Western Sky Knits Magnolia Worsted MCN, or similar worsted weight yarn. 800-1200 yards needed. Gauge (after blocking): 17 stitches x 22 rows per 4 inches Finished Chest Measurements: 35, (38, 42, 46, 50, 54) *Note: sweater is designed to be worn with several inches of positive ease, so knitter should work size 3-4 inches larger than actual bust measurement."

Knitting Needle Size8 or 5 mm
Yarn Weight(4) Medium Weight/Worsted Weight and Aran (16-20 stitches to 4 inches)
Materials List
-
size 8 (6mm) circular needles at least 32 inches long and DPNs (or size needed to obtain gauge)
-
Western Sky Knits Magnolia Worsted (80-10-10 SW Merino, Cashmere, Nylon) in the barn wood colorway, or similar worsted weight yarn. 800-1200 yards needed.
- stitch markers
- stitch holder or waste yarn
-
tapestry needle to weave in ends
Instructions
Body:
-
CO 74 (80, 88, 98, 106, 114) sts for front.
-
Row 1(WS): Knit to end
-
Row 2 (RS): Knit to end.
Repeat Rows 1 and 2, three more times for a total of 4 garter ridges -
Row 7: K1, *(YO, K2T), repeat * to end K1
-
Row 8: Purl to end.
Break yarn and set aside.
CO 74, (80, 88, 98, 106, 114) stitches for sweater back. -
Row 1(WS): Knit to end
-
Row 2 (RS): Knit to end.
Repeat Rows 1 and 2, four more times for a total of 5 garter ridges -
Row 7: K1, *(yo, k2tog), repeat from * 1 st rem, k1.
-
Row 8: Purl to end.
-
Rnd 9: K16 (19, 23, 28, 32, 36), PM, work Row 1 of First Repeat Chart, PM, k16 (19, 23, 28, 32, 36) to end, PM (to indicate side), knit across front body sts (so the front and back are joined), PM (to indicate beginning of round), joining two sections in the round.
Continue working body of sweater and switch to Remaining Repeats Chart after the first chart is completed. Work until the body measures 15 (15, 16, 16, 17, 17) inches, or the distance from your underarm to desired length. On the next row, knit in pattern to 3 sts before side marker, BO 6 sts, knit to 3 sts bef BORM, BO 6 sts removing markers as you come to them. Leave yarn attached and sweater on needles, set aside.
Sleeves:
-
CO 36 (40, 44, 50, 56, 64) sts. PM (to indicate beginning of round) and join in the round.
-
Rnd 1: Purl to end.
-
Rnd 2: Knit to end.
Repeat rows 1 and 2, four more times for a total of 5 garter ridges. Note that garter stitch in the round is one round of knits followed by one round of purls.
Knit all stitches until sleeve is 4 inches from CO edge then work increase row. -
Increase Row: Knit 1, M1, knit to 2 sts from end, M1, K1.
Repeat Increase Row every 10th row 5 additional times, resulting in 48 (52, 56, 62, 68, 76) sleeve stitches. Then knit until sleeve measures 17 (17, 17.5, 18, 18.5, 18.5) inches. Cut yarn, put stitches on holder and set aside.
Repeat for second sleeve.
Note: The sleeves are written to be slightly wider at the cuff than a traditional tapered sleeve. If you prefer a more tapered look, you can easily alter the pattern by casting on fewer stitches and starting the sleeve increase rows sooner to finish sleeve with the same number of stitches as the pattern instructions.
Attaching Sleeves to Body:
-
Slip BORM, Knit across 48, (52, 56,62, 68, 76), sleeve stitches with needles attached to the sweater body, PM, Knit 74, (80, 88, 98, 106, 114) back stitches in pattern, PM, knit 48, (52, 56,62, 68, 76) second sleeve stitches, PM, knit 74, (80, 88, 98, 106, 114) front stitches to BORM.
This should result in 220, (240, 264, 289, 316, 348) stitches on the needle.
Note: It is helpful to use a different color or style of stitch markers for the raglan decreases than you have used to mark the lace panel.
Raglan Decreases:
-
Row 1: Slip BORM, K1, K2T, *(knit to 3 stitches before marker, SSK, K1, SM, K1, K2T), repeat * 2 times, then knit to 3 stitches before marker, SSK, K1. Decreasing 8 stitches.
-
Row 2: Knit in establish pattern to end.
Repeat rows 1 & 2, an additional 13, (14, 16, 18, 20, 22) times, leaving you with 108, (120, 128, 137, 148, 164) stitches.
On the final round, remove markers on either side of back lace panel.
Note: It does not matter which row of the chart you finish on.
Collar:
-
Row 1: Purl all stitches slipping markers as you come to them.
-
Row 2: Slip BORM, K1, K2T, (*knit to 3 stitches before marker, SSK, K1, SM, K1, K2T).
Repeat * 2 times, then knit to 3 stitches before marker, SSK, K1. Decreasing 8 stitches. Repeat Rows 1&2, twice more, leaving you with 84, (96, 104, 113, 124, 140) stitches.
Stop knitting the last row, one stitch before BORM, wrap that stitch and turn your work. Knit across back collar to 1 stitch before marker, W&T. -
Row 9: Purl all stitches Row 10: Bind off all stitches knitwise.
Finishing:
-
Soak and block sweater. Seam underarm stitches, and weave in all ends, then wear and enjoy!
Abbreviations
- K
- knit
- P
- purl
- YO
- yarn over
- W&T
- pull yarn to front, slip stitch, pull yarn to back, slip same stitch back to left needle, then turn work
- SSK
- slip first stitch as to knit, slip second as to knit, knit two stitches together
- K2TOG
- Knit 2 stitches together as one stitch
- Center Double Decease
- slip two, knit one, pass two slipped stitches over knit stitch
- PM
- place stitch marker
- BORM
- Beginning of round marker

Read NextDistrict 12 Sweater Pattern
Your Recently Viewed Projects
Thanks for your comment. Don't forget to share!
Lisa
Sep 01, 2023
There is absolutely no point in putting up a pattern key for the abbreviations, if there are abbreviations in the pattern that do not appear on the key. Specifically K2T appears often, I suspect it is in fact K2tog (knit 2 together) simply because I have been knitting a long time and it's my best guess. I even went to the pattern page to see if their key makes it more clear, it does not. I would not want to get into an intermediate pattern only to discover there are more stitches that I need to guess about later.
susannelson1951
Feb 21, 2018
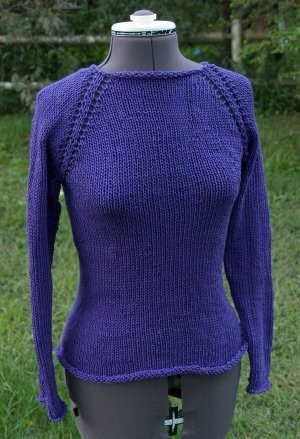
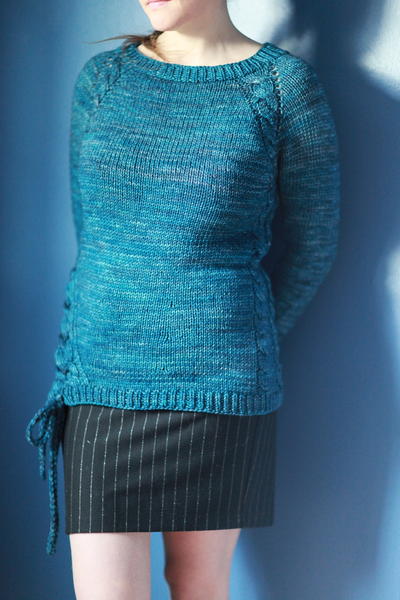
I'd LOVE to see the front view, also. Then I'll decide if I wish to knit this sweater..
KathrynAllison
Feb 22, 2018
Hi susannelson1951, if you click the green link above that reads, "Click here for knitting pattern," you will be able to see additional photos for this sweater. Hope this helps! -Editors of AllFreeKnitting
RachelAnne
Dec 15, 2017
This is such a pretty knit sweater. The design on the back is lovely, and the neutral tones are very nice.
Kristina K
Dec 15, 2017
After a somewhat-rocky experience with the first sweater I ever knit, I promised I'd never knit another one. This one is making me change my mind. I love the design on the back!
Report Inappropriate Comment
Are you sure you would like to report this comment? It will be flagged for our moderators to take action.
Thank you for taking the time to improve the content on our site.