Enchanted Knit Top
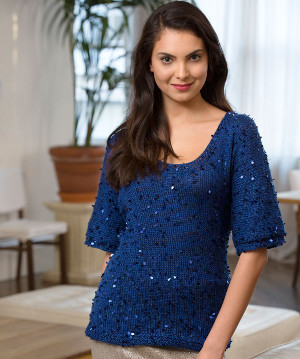
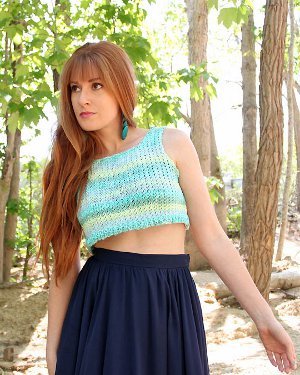
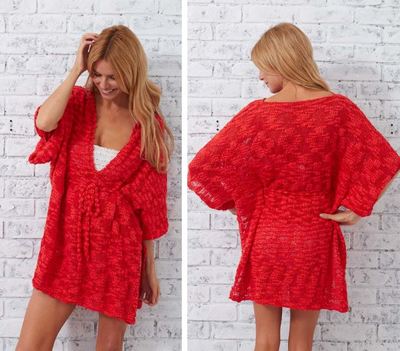
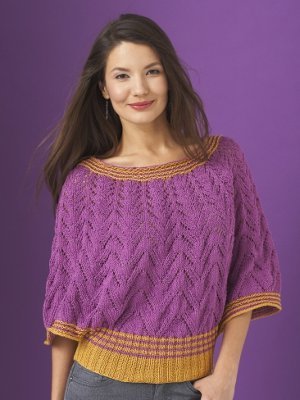
Get ready for a magical evening with the Enchanted Top Pattern. This effortlessly elegant knitting pattern will have you looking fabulous wherever you go. The yarn is really what gives this top an extra special element. Sequins spun into the yarn will give you a sparkle that wont fade. Since the yarn does a lot of the work, the top is really fairly simple to knit up. With a little patience, youll be ready for a night on the town.

Knitting Needle Size4 or 3.5 mm, Circular Knitting Needles
Yarn Weight(3) Light/DK (21-24 stitches to 4 inches)
Materials:
- RED HEART® Boutique Swanky™: 5 (5, 5, 6, 6) balls 9853 Midnight Blue
- Susan Bates® Knitting Needles: 4mm [US 6] 24” (60 cm) long circular needle
- Stitch holder
- Stitch marker
- Yarn needle
GAUGE
19 sts = 4” (10 cm); 26 rows = 4” (10 cm) in Stockinette st (knit on right side, purl on wrong side). CHECK YOUR GAUGE. Use any size needles to obtain the gauge.
Directions are for size Small. Changes for sizes Medium, Large, 1X, and 2X are in parentheses
Finished Bust: 35½ (39½, 44, 48, 52)” [90 (100.5, 112, 122, 132) cm]
Finished Length: 24 (24¼, 24½, 25¼, 25½)” [61 (61.5, 62, 64, 65) cm]
Special Stitches
kfb (Knit into front and back) = Knit next st but do not remove from needle, knit into back loop of same st and remove from needle.
pfb (Purl into front and back) = Purl next st but do not remove from needle, purl into back loop of same st and remove from needle.
ssk = Slip next 2 stitches, one at a time as if to knit, to right needle, insert point of left needle through front of sts, knit these sts together through back loop.
Notes
1. Top is knitted in one piece beginning at lower edge of back. At back neck, center stitches are placed on holder for neck opening and shoulders worked separately. Piece is then joined again and front is worked from front neck edge down to lower front edge.
2. Increases are worked at edges of back to begin dolman sleeves. Stitches are decreased later at edges of front to complete the sleeves.
Instructions:
Enchanted Top Pattern Construction Chart
TOP
Beginning at lower edge of back, cast on 84 (94, 104, 114, 124) sts. Work back and forth in rows on circular needle as if working with straight needles.
Garter Band
Work in Garter st (knit every row) for 8 rows.
Back
Beginning with a right side (knit) row, work in Stockinette st (knit on right side, purl on wrong side) for 62 rows (or desired length to beginning of sleeves, ending with a wrong side row).
Increase for Dolman Sleeves
Row 1 (increase row – right side): K1, kfb, knit to last 2 sts, kfb, k1—86 (96, 106, 116, 126) sts.
Row 2: Purl.
Row 3 (increase row): Repeat Row 1—88 (98, 108, 118, 128) sts.
Rows 4–31: Repeat last 2 rows 14 more times—116 (126, 136, 146, 156) sts.
Row 32: Purl.
Row 33 (increase row): Repeat Row 1—118 (128, 138, 148, 158) sts.
Row 34 (increase row – wrong side): P1, pfb, purl to last 2 sts, pfb, p1—120 (130, 140, 150, 160) sts.
Rows 35 and 36: Repeat last 2 rows—124 (134, 144, 154, 164) sts.
Row 37 (increase row): Repeat Row 1—126 (136, 146, 156, 166) sts.
Row 38: Purl.
Row 39: P5 (for cuff), knit to end of row, cast on 20 (18, 16, 14, 12) sts at end of row using backward loop or cable cast-on—146 (154, 162, 170, 178) sts.
Row 40: Purl to end of row, cast on 20 (18, 16, 14, 12) sts at end of row using backward loop or cable cast-on—166 (172, 178, 184, 190) sts.
Row 41 (right side): P5, knit to last 5 sts, p5.
Row 42: Purl.
Repeat last 2 rows 20 (21, 22, 24, 25) more times.
Divide for Neck
Row 1 (right side): P5, k58 (61, 64, 65, 68) for one shoulder, place next 40 (40, 40, 44, 44) sts on holder, knit to last 5 sts, p5 for the other shoulder—63 (66, 69, 70, 73) sts for each shoulder.
Note: You will now work both shoulders at the same time using separate balls of yarn. Take care to always use one ball when working the first set of shoulder stitches and the other ball when working the other set of shoulder stitches.
Row 2 (wrong side): Purl all sts of first set of shoulder sts, join a 2nd ball of yarn at beginning of next set of shoulder sts and purl all sts.
Row 3 (neck decrease row): P5, knit to last 3 sts of first set of shoulder sts, k2tog, k1; k1, ssk, knit to last 5 sts of next set of shoulder sts, p5—62 (65, 68, 69, 72) sts for each shoulder.
Row 4: Purl across all sts of both sets of shoulder sts.
Row 5 (neck decrease row): Repeat Row 3—61 (64, 67, 68, 71) sts for each shoulder.
Row 6: Purl across all sts of each set of shoulder sts.
Row 7: P5, knit all remaining sts of first set of shoulder sts; knit to last 5 sts of next set of shoulder sts, p5.
Rows 8–15: Repeat last 2 rows 4 times.
Row 16: Purl across all sts of both sets of shoulder sts.
Row 17 (increase row – right side): P5, knit to last 2 sts of first set of shoulder sts, kfb, k1; k1, kfb, knit to last 5 sts of next set of shoulder sts, p5—62 (65, 68, 69, 72) sts for each shoulder.
Row 18: Purl across all sts of both sets of shoulder sts.
Row 19: P5, knit all remaining sts of first set of shoulder sts; knit to last 5 sts of next set of shoulder sts, p5.
Row 20: Purl across all sts of both sets of shoulder sts.
Row 21 (increase row): Repeat Row 17—63 (66, 69, 70, 73) sts.
Rows 22-37 (37, 37, 41, 41): Repeat last 4 rows 4 (4, 4, 5, 5) more times—67 (70, 73, 75, 78) sts.
Row 38 (38, 38, 42, 42): Purl across all sts of both sets of shoulder sts.
Row 39 (39, 39, 43, 43) (increase row): Repeat Row 17—68 (71, 74, 76, 79) sts.
Rows 40 (40, 40, 44, 44)–45 (45, 45, 49, 49): Repeat last 2 rows 3 more times—71 (74, 77, 79, 82) sts.
Row 46 (46, 46, 50, 50) (increase row – wrong side): Purl to last 2 sts of first set of shoulder sts, pfb, p1; p1, pfb, purl across all sts of next set of shoulder sts—72 (75, 78, 80, 83) sts.
Row 47 (47, 47, 51, 51) (increase row): Repeat Row 17—73 (76, 79, 81, 84) sts.
Rejoin at Front Neck
Row 48 (48, 48, 52, 52) (wrong side): Purl across all sts of first set of shoulder sts, cast on 20 (20, 20, 22, 22) sts using backward loop or cable cast-on, do not change to 2nd ball of yarn continue with current ball, purl across all sts of next set of shoulder sts—166 (172, 178, 184, 190) sts.
Cut yarn still connected near middle of row.
Work now resumes using single ball of yarn.
Row 49 (49, 49, 53, 53): P5, knit to last 5 sts, p5.
Row 50 (50, 50, 54, 54): Purl.
Rows 52 (52, 52, 56, 56)–58 (60, 62, 66, 68): Repeat last 2 rows 4 (5, 6, 6, 7) more times.
Decrease to Complete Dolman Sleeves
Row 1 (wrong side): Bind off 20 (18, 16, 14, 12) sts, purl to end of row—146 (154, 162, 170, 178) sts.
Row 2: Bind off 20 (18, 16, 14, 12) sts, knit to end of row—126 (136, 146, 156, 166) sts.
Row 3: Purl.
Row 4 (decrease row): K1, ssk, knit to last 3 sts, k2tog, k1—124 (134, 144, 154, 164) sts.
Row 5 (decrease row): P1, p2tog though back loops, purl to last 3 sts, p2tog—122 (132, 142, 152, 162) sts.
Rows 6 and 7: Repeat last 2 rows—118 (128, 138, 148, 158) sts.
Row 8 (decrease row): Repeat Row 4—116 (126, 136, 146, 156) sts.
Row 9: Purl.
Row 10: Repeat Row 4—114 (124, 134, 144, 154) sts.
Rows 11–40: Repeat last 2 rows 15 more times—84 (94, 104, 114, 124) sts. Work even in Stockinette st for 62 rows (or until same length as same section of back).
Garter Band
Work in Garter st for 8 rows.
Bind off loosely.
FINISHING
Neckband
Round 1 (right side): With right side facing, knit 40 (40, 40, 44, 44) back neck sts from holder, pick up and k37 (40, 43, 46, 49) sts evenly across left front neck edge, pick up and k20 (20, 20, 22, 22) sts across front neck cast-on edge, pick up and k37 (40, 43, 46, 49) sts evenly across right front neck edge—134 (140, 146, 158, 164) sts.
Place marker for beginning of round and prepare to work in rounds.
Round 2: *P9, p2tog; repeat from * to last 2 (8, 3, 4, 10) sts, purl any remaining sts—122 (128, 133, 144, 150) sts.
Round 3: [K18 (19, 20, 22, 23), k2tog] 6 times, knit any remaining sts—116 (122, 127, 138, 144) sts.
Round 4: [P2tog, p17 (18, 19, 21, 22)] 6 times, purl any remaining sts—110 (116, 121, 132, 138) sts.
Round 5: [K25 (27, 28, 31, 32), k2tog] 4 times, knit any remaining sts—106 (112, 117, 128, 134) sts.
Round 6: [P2tog, p24 (26, 27, 30, 31)] 4 times, purl any remaining sts—102 (108, 113, 124, 130) sts.
Round 7: [K23 (25, 26, 29, 30), k2tog] 4 times, knit any remaining sts—98 (104, 109, 120, 126) sts.
Round 8: Purl.
Bind off loosely.
Cut a length of yarn about 36” (91.5cm) long.
Remove the sequined thread from the length of yarn. With yarn, sew side and sleeve seams.
Weave in ends. Steam block gently.
Read NextNew Lightweight Raglan Pullover
Your Recently Viewed Projects
The Designing Peng uin
Jul 19, 2016
One of these days I am going to go through two or three of these lists of knitting suggestions and find nothing that I want to knit - it will be a frosty Friday in July, but it may just happen. Until then, the list of to-knits keeps growing. This particular pattern is just what I need even to the colour to wear with a new skirt and pants -- don't know how the editors knew, but thanks a bunch.
trzskitz 7658278
Jun 16, 2016
The neck is too low for me. Any ideas on how i could make it two inches below the base of neck?
lawrenceljb 615621 0
Jul 06, 2016
Just begin the DIVIDE FOR NECK instructions an inch or two higher than the instructions. You want to measure how much HIGHER than the original neckline you want the neck, rather than measuring from the base of the neck down. Just make sure the neck opening is big enough to get your head through!
amymatilda
May 16, 2014
evieindyca 8067541, what I do is use the "File" button on my browser then choose "Print", and when the printer dialogue (window) appears I click on the "PDF" button and save the pattern as a PDF document on my computer. I have a directory for knitting and crochet patterns. It is easy to print a PDF, and the color photo will appear, too. This is a wonderful website and I have downloaded lots of patterns that these folks collect and compile from many various sources who generously make their patterns available for free. Now, back to knitting!
evieindyca 8067541
May 15, 2014
How can I make it when the only copy is on my computer? I have picked here and there trying to rprint it so that I can carry instructions with me when I leave home. Knitting in cars, buses amd meetings is the most relaxing, but would not be so with trying to read it on the computer. Soon I will delete all your messages.
Lisa
May 16, 2014
You can hardly blame this web site for your lack of skills with a computer and printer. If you are unable to print it from the print screen of your computer, you can copy and paste it into a word document and print from there.
Report Inappropriate Comment
Are you sure you would like to report this comment? It will be flagged for our moderators to take action.
Thank you for taking the time to improve the content on our site.

