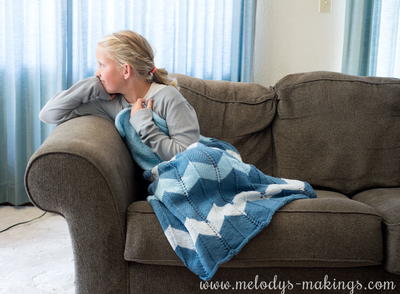
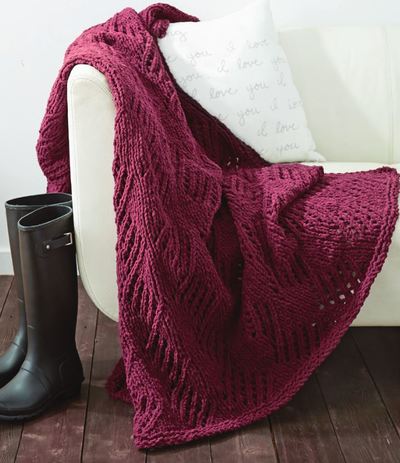
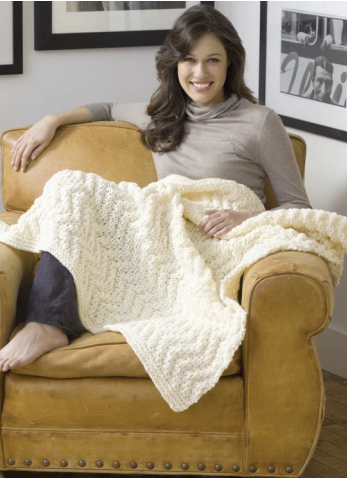
Modern Elegance Knit Blanket

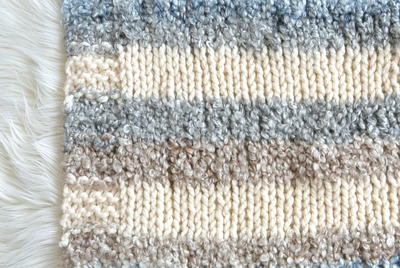
It seems like every knit blanket pattern today is made up of only one or two different stitches. Those are nice, but if you're a knitter who likes their projects to have a bit of pizazz, the Modern Elegance Knit Blanket is right up your alley. Made up of two different kinds of panels featuring both cables and lace, this pattern will teach you how to knit a blanket you can pass down to your children and your children's children. If you're not a fan of classic white, we think this blanket would look excellent in any other light color.

Knitting Needle Size8 or 5 mm, Circular Knitting Needles
Yarn Weight(4) Medium Weight/Worsted Weight and Aran (16-20 stitches to 4 inches)
Gauge16 sts and 20 rows = 4" [10 cm] in stocking st.
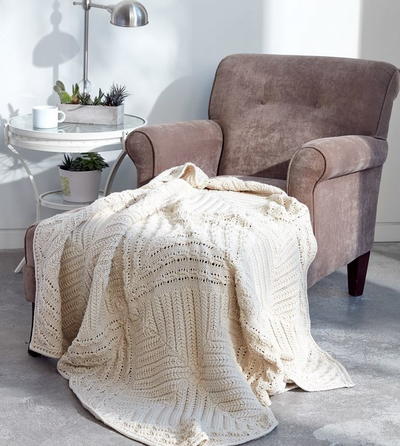
Finished SizeApprox 62" [157.5 cm] square.
Materials List
- Caron® One Pound™ yarn (16 oz/453.6 g; 812 yds/742 m): Off White (10514) - 3 balls
-
Size U.S. 8 (5 mm) circular knitting needle 29" [74 cm] long or size needed to obtain gauge.
- Cable needle.
Instructions
Square (make 16)
Note: First Half of Square is worked as a triangle from point to point in Lacy Cable Pat. Second Half of Square is worked as a triangle in Cable Column Pat and begins with picked up sts along straight side edge of First Half.
-
First Half
Cast on 3 sts. See Chart for charted instructions.
Work back and forth across needle in rows as follows:
1st row: (RS). K1 (selvege st). P1. Kfb. 4 sts.
2nd row: K4.
3rd row: K1. P2. Kfb. 5 sts.
4th row: K5.
5th row: K1. P3. Kfb. 6 sts.
6th row: K1. P1. K4.
7th row: K1. P3. K1. Kfb. 7 sts.
8th row: K1. P2. K4.
9th row: K1. P3. yo. ssk. Kfb. 8 sts.
10th row: K1. P3. K4.
11th row: K1. P3. yo. ssk. K1. Kfb. 9 sts.
12th row: K1. P4. K4.
13th row: K1. P3. yo. ssk. K2tog. yo. Kfb. 10 sts.
14th row: K2. P4. K4.
15th row: K1. P3. C4B. P1. Kfb. 11 sts.
16th row: K3. P4. K4.
17th row: K1. P3. yo. ssk. K2tog. yo. P2. Kfb. 12 sts.
18th row: K4. P4. K4.
19th row: K1. P3. yo. ssk. K2tog. yo. P3. Kfb. 13 sts.
20th row: K1. P1. K3. P4. K4.
21st row: K1. P3. yo. ssk. K2tog. yo. P3. K1. Kfb. 14 sts.
22nd row: K1. P2. K3. P4. K4.
23rd row: K1. P3. yo. ssk. K2tog. yo. P3. yo. ssk. Kfb. 15 sts.
24th row: K1. P3. K3. P4. K4.
25th row: K1. P3. C4B. P3. yo. ssk. K1. Kfb. 16 sts.
26th row: K1. (P4. K3) twice. K1
Keeping cont of pat, as placed in last 16 rows, inc 1 st at end of every following RS row (as before) until there are 33 sts.
Work 1 row (WS) in pat.
Next row: (RS). Pat to last 2 sts. K2tog.
Next row: Work even in pat.
Rep last 2 rows until there are 3 sts.
Cast off.
-
Second Half
With RS of First Half facing, pick up and knit 92 sts evenly across selvedge (straight) edge of First Half.
1st row: (WS). K1. *P6. K1. Rep from * to end of row.
2nd row: (RS). K1. *Cr3B. Cr3F. P1. Rep from * to end of row.
Last 2 rows form Cable Column Pat.
Next row: K2tog. Pat to last 2 sts. ssk.
Keeping cont of pat (as placed), rep last row until 2 sts rem. Cast off.
Finishing
Pin Squares onto flat surface to measure approx 15" [38 cm] square. Cover with a damp cloth leaving cloth to dry. Following assembly diagram, sew 16 Squares tog. See diagram.
-
Bottom edging:
With RS facing, pick up and knit 240 sts evenly across bottom edge.
**Knit 2 rows.
Next row: (WS). K1. *yo. P2tog.
Rep from * to last st. K1.
Knit 2 rows.
Cast off knitwise.** -
Top edging:
Work as for Bottom edging, picking up sts evenly across top edge. -
Side edging:
With RS facing, pick up and knit 246 sts evenly across side edge.
Rep from ** to ** as given for Bottom edging.
Read NextEffortless Cherry Wine Afghan
Your Recently Viewed Projects
Thanks for your comment. Don't forget to share!
trishclark529
Nov 30, 2017
This is really gorgeous when done. I worked on this throughout the year. I love the finished product so much. This is a great afghan to use as decoration. It looks so pretty. The instructions are pretty easy to follow. By the time you get one square done, you pretty much have it down. I am thinking about making another to give as a gift to my mother in law.
3cats2love
Jul 22, 2017
This is a lovely pattern for a blanket. However, I think personally I would not have the patience or time to knit 16 of the squares, then seam them all together, then pick up 240 stitches along the edge to knit the border, and do that four times. That said, if you did take the time to make this, it would be an heirloom gift for someone, it's that beautiful.
schiebet
Apr 20, 2017
I really like the look of this afghan. I wish I could see it more closely, but I r ally like how the angles seem to fit together. Is there anyway we could see a picture of it all laid out flat?
Report Inappropriate Comment
Are you sure you would like to report this comment? It will be flagged for our moderators to take action.
Thank you for taking the time to improve the content on our site.