Nana's Favorite Winter Set Pattern
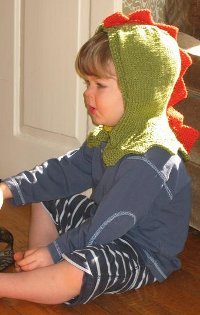
This knitted winter scarf and hat set is just what you need for those chilly winter nights!
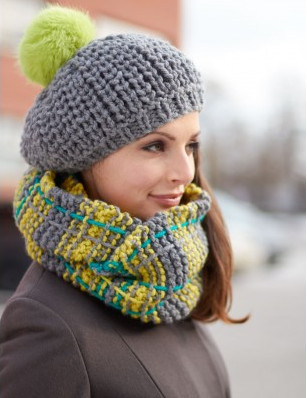
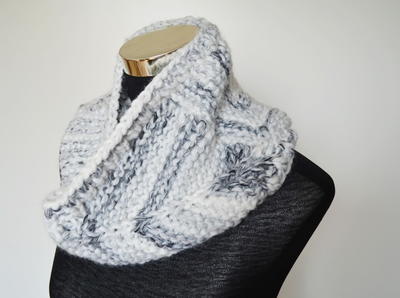
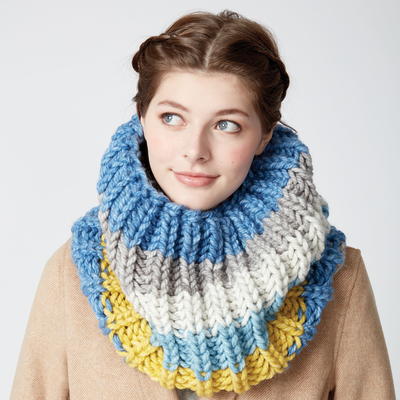
Staying warm in the winter doesn't have to mean sacrificing style. Nana's Favorite Winter Set, a matching knit hat pattern and knit cowl pattern, will have you strutting your stuff in cozy confidence. Knit on straight needles with chunky yarn, these simple patterns are a quick and easy way to learn how to knit a hat or cowl, especially because it is made with the garter stitch and ribbing. The punchy color combination and plaid-like striping will make this hat and cowl a fast favorite. Get knitting now to heat up your winter wear.

Knitting Needle Size11 or 8 mm
Yarn Weight(6) Super Bulky/Super Chunky (4-11 stitches for 4 inches)
Gauge11 sts and 14 rows = 4" [10 cm] in stockinette st.
Materials List
-
Bernat Softee Chunky (3.5 oz/100 g; 108 yds/99 m)
- Main Color (MC) True Grey (28044) - 1 ball for hat + 2 balls for cowl
- Contrast A Grass (28223) - 2 balls for cowl
- Contrast B Emerald (28200) - 1 ball for cowl
- Bernat Faux Fur Pompom Bright Green (01223)
- Size U.S. 11 (8 mm) knitting needles or size needed to obtain gauge
- Yarn needle
Pattern
Hat
Cast on 48 sts.
1st row: (RS). *K1. P1. Rep from * to end of row.
Rep last row (K1. P1) ribbing 3 times more.
Next row: (RS). K1. *M1. K2. Rep from * to last st. M1. K1. 72 sts.
Proceed in pat as follows:
1st row: (WS). Knit.
2nd row: K1. *P1. K1below. Rep from * to last st. P1.
Rep last 2 rows for pat until work from beg measures 6" [15 cm], ending on a RS row.
Shape crown:
1st row: (WS). K3. *Sl1. K2tog. psso. K6. Rep from * to last 6 sts. Sl1. K2tog. psso. K3. 56 sts.
2nd and alt rows: K1. *P1. K1below. Rep from * to last st. P1. (Note: When working K1below into st that has been decreased on previous row, insert needle into all sts to avoid dropped sts).
3rd row: K2. *Sl1. K2tog. psso. K4. Rep from * to last 5 sts. Sl1. K2tog. psso. K2. 40 sts.
5th row: K1. *Sl1. K2tog. psso. K2. Rep from * to last 4 sts. Sl1. K2tog. psso. K1. 24 sts.
7th row: *Sl1. K2tog. psso. Rep from * to end of row. 8 sts.
Break yarn, leaving a long end. Draw through all sts tightly. Fasten securely.
Sew back seam. Sew Bernat Faux Fur Pompom to top of hat.
Cowl
With MC, cast on 22 sts.
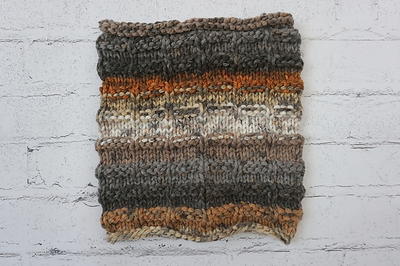
Stripe Pattern [knit every row (garter st)]
With MC, work 8 rows.
*With A, work 1 row.
With MC, work 1 row.
With A, work 4 rows.
With MC, work 1 row.
With A, work 1 row.*
With B, work 1 row.
With MC, work 2 rows.
With B, work 1 row.
Rep from * to * once.
With MC, work 8 rows.
Rep from * to * once.
These 44 rows form Stripe Pat.
Proceed in Stripe Pat, noting first row is WS, until work from beg measures approx 52" [132 cm].
Cast off.
Weaving
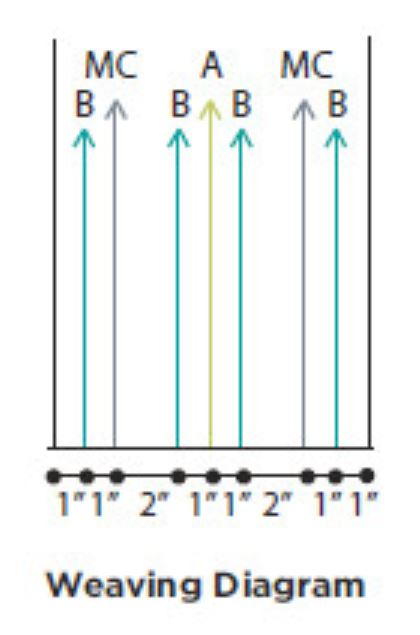
Cut lengths of yarn approx 65" [165 cm] long. With RS facing and beg at cast on edge, weave vertically under garter “bumps” every 4th row to cast off edge to create plaid appearance. Take care not to pull strands too tightly.
See Weaving Diagram for color placement and spacing of woven stripes.
Finishing
Sew cast on and cast off edges tog.
Abbreviations
- Alt
- Alternate(ing)
- Beg
- Beginning
- K1below
- Knit into next stitch 1 row below at same time slipping off stitch above
- K2tog
- Knit next 2 stitches together
- M1
- Make 1 stitch by picking up horizontal loop lying before next stitch and knitting into back of loop
- Psso
- Pass slipped stitch over
- Sl1
- Slip next stitch knitwise
Read NextGroovy Tassel Cowl Pattern
Your Recently Viewed Projects
Susan S
Sep 25, 2018
Such a playful combo! The color variations could be endless and I really like the plaid pattern on the cowl. This is pretty enough to give as a gift if you know the person's favorite colors.
Tricia108
Aug 28, 2018
This looks like a nice set to make. I have quite a bit of chunky yarn so this pattern will really come in handy. I know my friends will be asking for this set as well. The fall is almost here and then the winter. This set will guard against the chill and it will work up nicely and fast. Thank you.
aliceaherne 362076 5
Jan 05, 2017
Struggling with colour changes. Do you recommend carrying yarn across the back of each row? Due to changing colour after only one row causes lots of cut off ends to sew in on completion. Please help and thanks in advance.
sandra 7073234
Oct 17, 2018
Me too...I've put it out there to experienced knitters and I've had recommendations fro carry across back of row and cut off ends where necessary. I did find a tutorial for flat knitting on circular needles (you push the work to the other needle and reverse your stitch.) This allowed me to have the yarn where I needed it without cutting...but the carrying is problematic as it shows along the side, especially the contrast colour. Even though this comment is 18 months later I'd love to get some feedback as to how you addressed this.
Lisa
Feb 09, 2023
For this pattern, it is intended for the knitter to carry yarn up the side of their work, never across the back. Carrying yarn up the side is not as noticeable but can be trickier with such heavy yarn. Carrying it across the back will destroy the look of the project in its entirety. When you carry yarn across the back, unused portions are known as floats, floats cannot be used on patterns/garments that are reversible. For rows that only have a single row of a colour, it will require a little extra work to cut and move the yarn but it is worth it, if you do it with floats you will have a tangled mess and will use up to double the amount of yarn as the pattern calls for. Hope this helps someone, happy knitting.
justinewillem 8775 444
Jan 09, 2016
I am confused on how to do the k1below in the crown section..do you have a link/video that shows how to do it?
Report Inappropriate Comment
Are you sure you would like to report this comment? It will be flagged for our moderators to take action.
Thank you for taking the time to improve the content on our site.

