close

Search Term

Enter a search term (optional)

Categories

Select One (optional)

Printable

(optional)

Show only printer-friendly patterns


Difficulty Level

Select One (optional)

Yarn Weight

Select One (optional)

Knitting Needle Size

Select as many as you like (optional)

  • 1 or 2.25 mm
  • 2 or 2.75 mm
  • 3 or 3.25 mm
  • 4 or 3.5 mm
  • 5 or 3.75 mm
  • 6 or 4 mm
  • 7 or 4.5 mm
  • 8 or 5 mm
  • 9 or 5.5 mm
  • 10 or 6 mm
  • 10.5 or 6.5 mm
  • 11 or 8 mm
  • 13 or 9 mm
  • 15 or 10 mm
  • 17 or 12.75 mm
  • 19 or 15 mm
  • 35 or 19 mm
  • 50 or 25 mm
  • Circular Knitting Needles
  • Double-Pointed Knitting Needles (DPNs)
AllFreeKnitting.com

Menu

How to Knit Linen Stitch

Because linen stitch is so simple, it's become one of the most universal knitting stitches. It's also a great way to practice making the slip stitch.

How to Knit Linen Stitch
This image courtesy of AllFreeKnitting.com

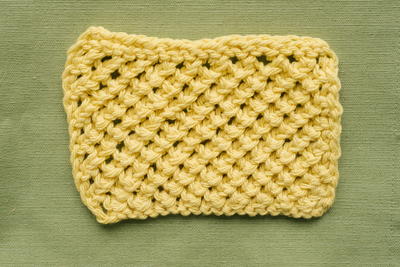
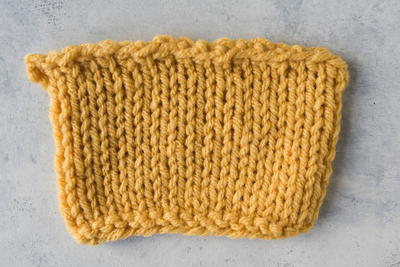
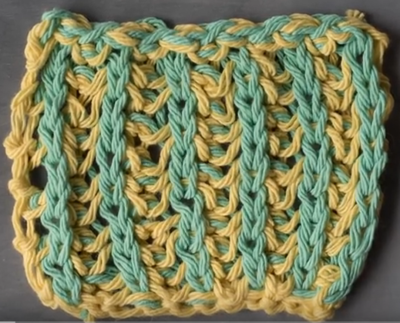
The linen stitch is a super fun knitting pattern that creates a gorgeous dense fabric! Right after stockinette and garter stitch, the linen stitch is probably one of the first stitches you'll learn to knit. You can recognize this stitch because the slip stitches make the finished fabric almost look woven.

This particular knitting stitch requires a combination of purl, knit, and slip stitches to create the pretty pattern. If you've never done a slip stitch before, never fear; it's so easy to do, and the video above makes it a piece of cake to recreate. The linen stitch can also be used for a number of different projects that you can test out in the future, and will always create a pretty woven pattern!

Beginner

Materials List

  • Yarn
  • Knitting Needles

Instructions

  1. Cast on any even number of stitches.

  2. Row 1: (RS) Knit 1, bring your yarn to the front and slip the next stitch purlwise with no yarn over. Return the yarn to the back and repeat the knit 1, slip 1 purlwise with yarn in front until you've reached the end of your row.

  3. Row 2: (WS) Bring the yarn to the front and purl 1. Bring the yarn to the back and slip the next stitch purlwise without working it or making a yarn over. Repeat the purl 1, slip 1 purlwise with yarn in back until you've reached the end of the row.

  4. Repeat rows 1 and 2 until you've reached the end of your pattern.

    Bind off and weave in your ends.

Free projects, giveaways, exclusive partner offers, and more straight to your inbox!

Your Recently Viewed Projects

I have not made this yet so I cannot rate it.

Include a Photo Include a Photo

Click the button above or drag and drop images onto the button. You can upload two images.

Cancel Reply to Comment

Thanks for your comment. Don't forget to share!

Close

Report Inappropriate Comment

Are you sure you would like to report this comment? It will be flagged for our moderators to take action.

Thank you for taking the time to improve the content on our site.

Project of the Day

Easy No Sew Sweater

If you hate free knitting patterns for sweaters that feature tons of seaming and sewing, this is a great pattern to add to your… Continue reading: "Easy No Sew Sweater"


Something worth saving?

Register now for FREE to:

  • SAVE all your favorite patterns
  • ADD personal notes
  • QUICKLY reference your patterns


Connect With Us

Facebook Twitter Pinterest Twitter
Email RSS

About Us Advertise Contact Us FAQ Keyword Index Do Not Sell My Personal Information Privacy Policy Share Your Project Subscribe Terms of Service Unsubscribe

---- 1 ----

close

Images from other crafters

There are currently no images from other crafters.

I Love It