close

Search Term

Enter a search term (optional)

Categories

Select One (optional)

Printable

(optional)

Show only printer-friendly patterns


Difficulty Level

Select One (optional)

Yarn Weight

Select One (optional)

Knitting Needle Size

Select as many as you like (optional)

  • 1 or 2.25 mm
  • 2 or 2.75 mm
  • 3 or 3.25 mm
  • 4 or 3.5 mm
  • 5 or 3.75 mm
  • 6 or 4 mm
  • 7 or 4.5 mm
  • 8 or 5 mm
  • 9 or 5.5 mm
  • 10 or 6 mm
  • 10.5 or 6.5 mm
  • 11 or 8 mm
  • 13 or 9 mm
  • 15 or 10 mm
  • 17 or 12.75 mm
  • 19 or 15 mm
  • 35 or 19 mm
  • 50 or 25 mm
  • Circular Knitting Needles
  • Double-Pointed Knitting Needles (DPNs)
AllFreeKnitting.com

Menu

How to Knit Garter Stitch

If you're new to knitting, this garter stitch video tutorial is the one for you!

How to Knit Garter Stitch
This image courtesy of AllFreeKnitting.com

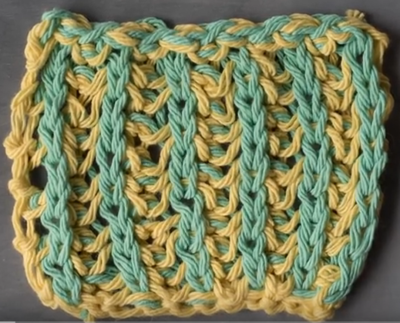
When first learning to knit, the garter stitch is one of the first stitches you learn, along with stockinette stitch. All you need to know in order to do the garter stitch is how to cast on, how to bind off, and how to do the knit stitch! It's really that easy. Garter stitch is an excellent way for you to learn just how easy it is to become an expert at knitting.

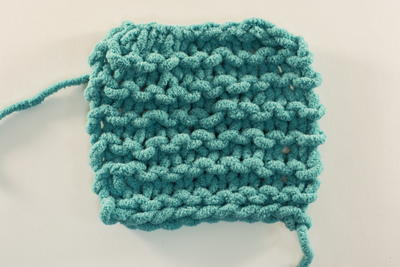
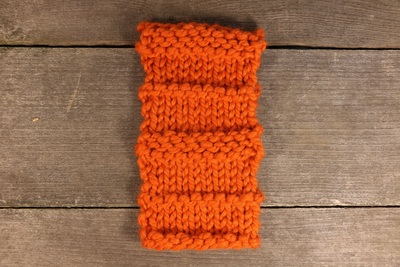
Because of the mechanics of the knit stitch, the purl bump side of the stitch will always be made opposite you and the V side will always be facing you. When you turn your needles, this flips the direction of the stitches every other row, giving you alternating lines of purl bumps and the signature Vs that you see with stockinette.

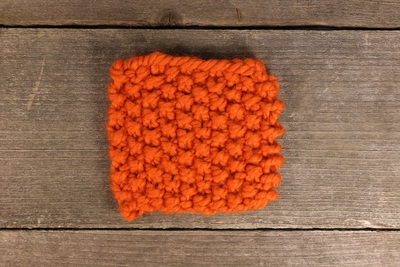
Garter stitch is great for things like knit scarves and even baby blankets because of its thickness and soft feel. Garter stitch patterns can also include dishcloths or washcloths. Thus, no matter what project you want to create, you can most likely craft it by using some form of the garter stitch. This video will break down how to perfectly knit this stitch and is perfect for if you are a knitting beginner!

Beginner

Materials List

  • Yarn
  • Knitting Needles

Instructions

  1. Start with the stitches on your non-dominant hand needle.

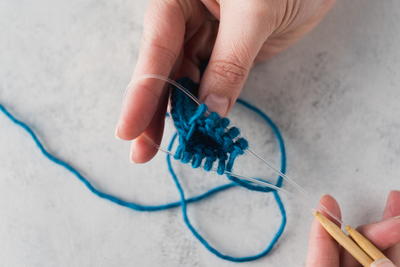
  2. With your dominant hand needle cross the needles forming an X going through the front loop of your work, ending with the non-dominant needle on top and the dominant needle on the bottom.

  3. Wrap the yarn going toward yourself and around, and pull the yarn through.

  4. Sweep the yarn off the end.

  5. Repeat all the way down your needle.

  6. When you finish the row, turn your needle like you are turning the page of a book, so that the stitches are back in your non-dominant hand, and repeat the process.

Free projects, giveaways, exclusive partner offers, and more straight to your inbox!

Your Recently Viewed Projects

I have not made this yet so I cannot rate it.

Include a Photo Include a Photo

Click the button above or drag and drop images onto the button. You can upload two images.

Cancel Reply to Comment

Thanks for your comment. Don't forget to share!

Close

Report Inappropriate Comment

Are you sure you would like to report this comment? It will be flagged for our moderators to take action.

Thank you for taking the time to improve the content on our site.

Project of the Day

Exploding Flower Baby Blanket

Greet the newest member of your family with the gorgeous Exploding Flower Baby Blanket. The big flower pattern on this knit baby… Continue reading: "Exploding Flower Baby Blanket"


Something worth saving?

Register now for FREE to:

  • SAVE all your favorite patterns
  • ADD personal notes
  • QUICKLY reference your patterns


Connect With Us

Facebook Twitter Pinterest Twitter
Email RSS

About Us Advertise Contact Us FAQ Keyword Index Do Not Sell My Personal Information Privacy Policy Share Your Project Subscribe Terms of Service Unsubscribe

---- 1 ----

close

Images from other crafters

There are currently no images from other crafters.

I Love It