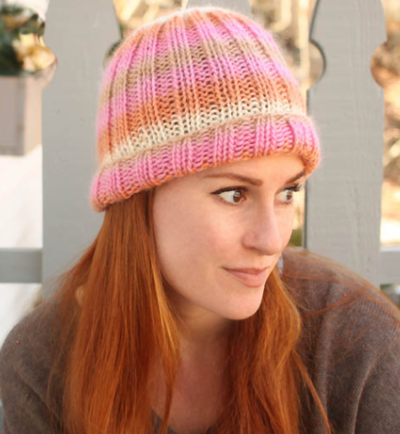
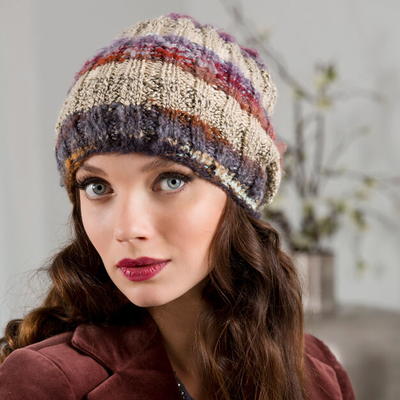
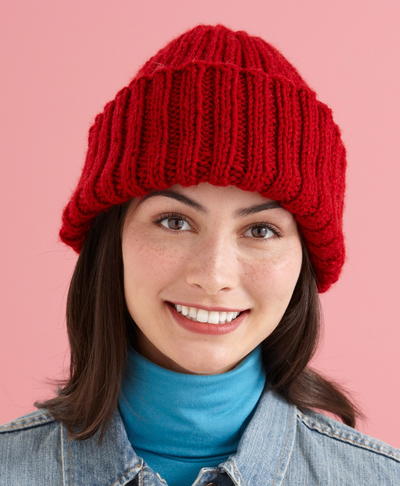
Cranberry Kiss Ribbed Hat

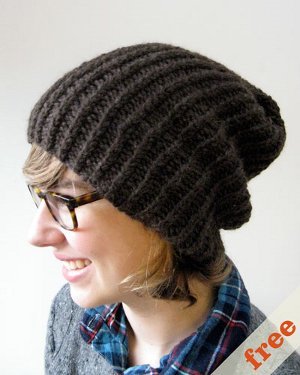
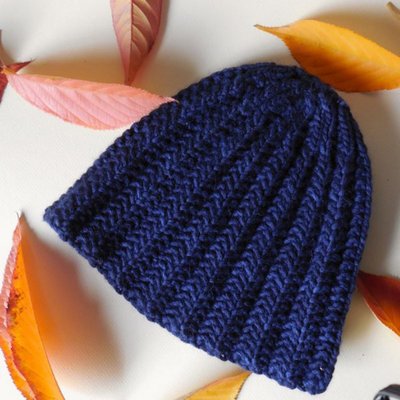
If you don't already have a go-to hat, the Cranberry Kiss Ribbed Hat is that lucky pattern. This basic ribbed knit hat pattern is a classic. It's thick, warm, and has cozy ribbed stitching with a simple fold-over brim. The Cranberry Kiss Ribbed Hat is a quick project that can be finished in a night. Turn on the TV and pull out your knitting needles, or catch up with a old friend while stitching a practical cold weather accessory. The Cranberry Kiss Ribbed Hat will hug your head and keep you warm all winter long.

Knitting Needle Size9 or 5.5 mm, Circular Knitting Needles, Double-Pointed Knitting Needles (DPNs)
Yarn Weight(4) Medium Weight/Worsted Weight and Aran (16-20 stitches to 4 inches)
Materials:
- 860-180 Vanna's Choice Yarn: Cranberry
- Lion Brand Double-Pointed Needles - Size 9
- Boye Aluminum Circular Knitting Needles 16 inches Size 9
- Lion Brand Split Ring Stitch Markers
- Lion Brand Large-Eye Blunt Needles (Set of 6)
GAUGE:
24 sts = about 4 in. (10 cm) in K2, p2 Rib, slightly stretched. Gauge note: The Stargazer Hat was worked in a very elastic (very stretchy) rib, created by knitting 2 stitches, then purling 2 stitches. The finished Hat circumference will be 20 in. (51 cm) if you match the gauge exactly! Because the Hat is worked in the round, it is strongly suggested that you work your gauge swatch in the round. To make a swatch, cast 48 sts onto double pointed needles. Divide the sts so that you have 12 sts on each of 4 needles. Join to work in the round, and work about 4 in. (10 cm) in k2, p2 rib. Without binding off, flatten the swatch, then slightly stretch it across the ribbing. Check the measurement – the swatch should measure 4 in. (10 cm) across. If the swatch measures more than 4 in. (10 cm) change to smaller needles and continue in ribbing for another 4 in. (10 cm), then measure again. BE SURE TO CHECK YOUR GAUGE. When you match the gauge in a pattern, your project will be the size specified in the pattern and the materials specified in the pattern will be sufficient. If it takes you fewer stitches and rows to make a 4 in. [10 cm] square, try using a smaller size hook or needles; if more stitches and rows, try a larger size hook or needles.
ABBREVIATIONS/REFERENCES
beg = begin(s)(ning)
k = knit
p2tog = purl 2 together
rnd(s) = round(s)
dpn(s) = double pointed needle(s)
k2tog = knit 2 together
rep = repeat(s)(ing)
st(s) = stitch(es)
NOTES:
1. Hat is worked from lower edge up to crown (top of Hat).
2. Hat is worked in the round, beg with a circular needle, then changing to double pointed needles (dpns) when sts are decreased to shape crown (top of Hat).
3. Hat is worked using only 4 of the set of 5 dpns.
4. When knitting in the round on dpns, your sts need to be divided fairly evenly onto the needles. When working with a set of 4 dpn, your sts should be divided among 3 needles. The total number of sts will not always be evenly divisible by the number of dpns that you are using - this is not a problem! Simply divide your sts as evenly as possible, you will still create a symmetrical 'tube' of knitting.
5. If you prefer, the entire Hat can be worked on double-pointed needles.
HAT
With circular needle, cast on 120 sts. Place marker for beg of rnd. Join by working the first st on left hand needle with the working yarn from the right hand needle and being careful not to twist sts.
Rnd 1: *K2, p2; rep from * to end of rnd.
Rep last rnd until piece measures about 10 in. (25.5 cm) from beg.
Shape Crown (top of Hat)
Rnd 1: Change from circular needle to double pointed needles (dpns), as follows: With first dpn, (k2, p2) 10 times; with 2nd dpn, (k2, p2) 10 times; with 3rd dpn, (k2, p2) 10 times. Set the circular needle aside and work with dpns only.
Rnd 2: *K2, p2tog, k2, p2; rep from * to end of rnd - 105 sts at the end of this rnd.
Rnd 3: *K2, p1, k2, p2; rep from * to end of rnd.
Rnd 4: *K2, p1, k2, p2tog; rep from * to end of rnd - 90 sts at the end of this rnd.
Rnd 5: *K2, p1; rep from * to end of rnd.
Rnd 6: *K2tog, p1, k2, p1; rep from * to end of rnd - 75 sts at the end of this rnd.
Rnd 7: *K1, p1, k2, p1; rep from * to end of rnd.
Rnd 8: *K1, p1, k2tog, p1; rep from * to end of rnd - 60 sts at the end of this rnd.
Rnd 9: *K1, p1; rep from * to end of rnd.
Rnd 10: *K2tog, k1, p1; rep from * to end of rnd - 45 sts at the end of this rnd.
Rnd 11: *K2tog, p1; rep from * to end of rnd - 30 sts at the end of this rnd.
Rnd 12: *K2tog; rep from * to end of rnd - 15 sts at the end of this rnd.
Cut yarn, leaving a long yarn tail. Thread tail through remaining sts and pull to gather. Knot securely.
FINISHING
Weave in ends.
Read NextOrange Sherbet Easy-Fit Hat
Your Recently Viewed Projects
Thanks for your comment. Don't forget to share!
Cranberry
Feb 12, 2016
The only size needle that seems to work to get the recommended gauge is no. 1 I used dpns and regular worsted weight yarn. Anybody else have this problem? Would like to rate this with more stars but for the needle size problem.
Report Inappropriate Comment
Are you sure you would like to report this comment? It will be flagged for our moderators to take action.
Thank you for taking the time to improve the content on our site.