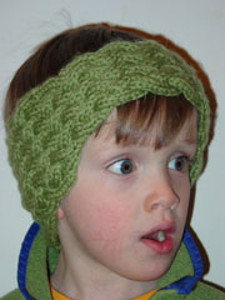
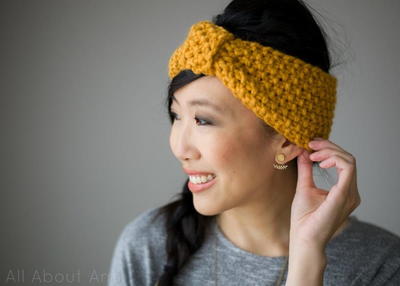
Twisted Sister Headband

Learning how to knit a headband is as easy as 1-2-3 with the Twisted Sister Headband. This easy knit headband pattern mainly uses the basic knit and purl stitches with only one deviation from the simple stitches. Perfect for beginner knitters who want to try their hand at cable stitch knitting, the Twisted Sister Headband features a slight cable in the front that gives the finished project a trendy bohemian-chic look. Who says beautiful knits have to take forever to make? Once you've gotten the pattern, you'll be free to make one in every color for a stylish knitted headband to go with all of your outfits from January to December.
For more great projects like this, subscribe to our free email newsletter!

Knitting Needle Size10.5 or 6.5 mm
Yarn Weight(5) Bulky/Chunky (12-15 stitches for 4 inches)
Gauge12 stitches, 16 rows, 4 inches. stockinette stitch
Materials:
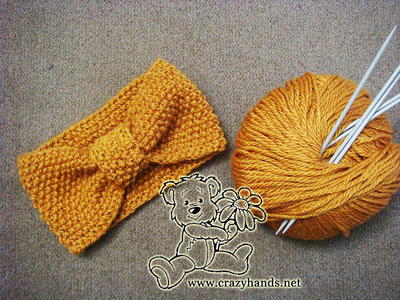
- Bernat® Roving™ (3.5 oz/100 g; 120 yds/109 m) Dark Grey (00044) - 1 ball
- Size U.S. 10½ (6.5 mm) knitting needles or size needed to obtain gauge
- Cable needle
GAUGE: 12 sts and 16 rows = 4" [10 cm] in stocking st.
Measurements: One size to fit average woman's head.
Abbreviations:
Beg = Beginning
C18F = Slip next 9 stitches onto cable needle and leave at front of work. (K1. P1) 4 times. K1. [(P1. K1) 4 times. P1] from cable needle.
K = Knit
P = Purl
Pat = Pattern
Rep = Repeat(ing)
RS = Right side
St(s) = Stitch(es)
Tog = Together
WS = Wrong side
Instructions:
Cast on 18 sts.
1st row (RS): *K1. P1. Rep from * to end of row.
Rep last row until work from beg measures 11" [28 cm], ending on a WS row.
Next row: C18F.
Next row: *K1. P1. Rep from * to end of row.
Rep last row until work from beg measures 22" [56 cm], ending on a WS row. Cast off in pat.
Sew ends tog.
Read NextCabled Crown Headband
Your Recently Viewed Projects

Thanks for your comment. Don't forget to share!
Heavendreamer2 018 9845
Dec 10, 2019
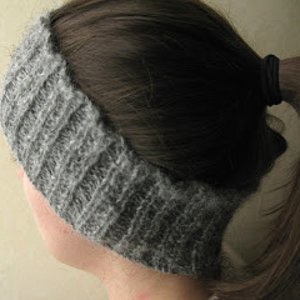
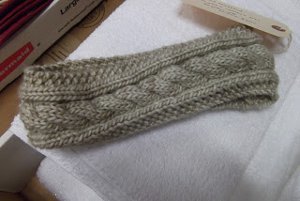
um... is it just me? It looks like you are doing 11" of RIBBING , then the twist, then another 11 inches of ribbing, and yet the image shows a stockinette item
Lisa
Dec 21, 2019
You are correct, the picture of the finished project does not match the pattern for the project.
melanieaumont 4800 891
Nov 27, 2019
I can't figure this out. If you slip 9 (kpkpkpkpk) onto a cable needle, you are left with 9 stitches, but if you follow the instructions, you are knitting the purls and purling the knits at that point. am i the only one? i ended up slipping an even # of stitches to get the twist to work in pattern.
Kathryne
Nov 30, 2019
Hi! I'm working on this headband and I don't understand how to do the cable. I've done cables before but this one just isn't working out. How did you get it to work? Thanks! Kathryne
Lisa
Dec 21, 2019
The picture of the project and the pattern do not match, you have to slip half of the stitches to the cable needle to make the twist work. Cable is just working the stitches out of order, so after you slip to the front, work the last 9 stitches to match what you have already done, regardless of the pattern, otherwise it will not match.
magel5 7857592
Apr 18, 2018
Can't figure out however to make the twist.
Kristina K
Apr 19, 2018
Hi magel5, the twist occurs halfway through the pattern, where the pattern reads "C18F." This is a stitch where you slip the first 9 stitches on your needles onto a cable needle, work the last 9 stitches, and come back to the stitches on the cable needle. The instructions for C18F under "abbreviations" should teach you how to do this. This creates the chunky twist in the middle of the pattern. We hope this helps! -Editors of AllFreeKnitting
Susan S
Dec 23, 2016
I'm crazy for cables, so this headband really does it for me. I'd indulge in a handpainted yarn for this one to make it really special, maybe a variegated yarn.
Report Inappropriate Comment
Are you sure you would like to report this comment? It will be flagged for our moderators to take action.
Thank you for taking the time to improve the content on our site.