This project was submitted by one of our readers, just like you.
Matthew's Beanie

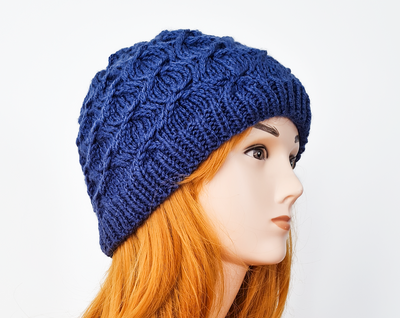
Matthews Beanie
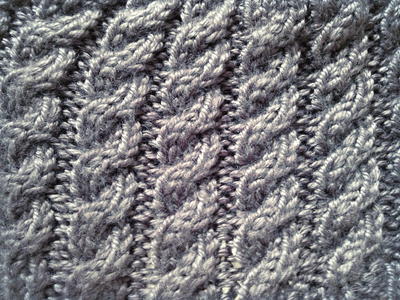
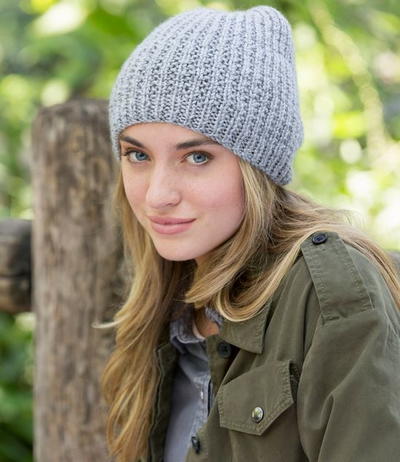
"Matthew's beanie is an understated cabled beanie, which I created for my brother, Matthew (hence the name). It is knit with two strands of yarn held together, which gives it extra weight and creates a hat that will keep you warm even in the dead of winter. The double strands also make this hat a quick knit. When I'm in the mood for some marathon knitting, I've been known to finish one of these hats in less than two days."

Knitting Needle Size7 or 4.5 mm, 9 or 5.5 mm, Circular Knitting Needles, Double-Pointed Knitting Needles (DPNs)
Yarn Weight(4) Medium Weight/Worsted Weight and Aran (16-20 stitches to 4 inches)
Materials List
- 1 skein Yarn Bee Soft Secret. The colors featured are Shale and Honey. Simply Soft yarn by Caron also fits the gauge.
- Size 4.5mm 16 inch circular needles (for ribbing)
- Size 5.5mm 16 inch circular needles
- Size 5.5mm dpns
- Cable needle
- Place markers
Instructions
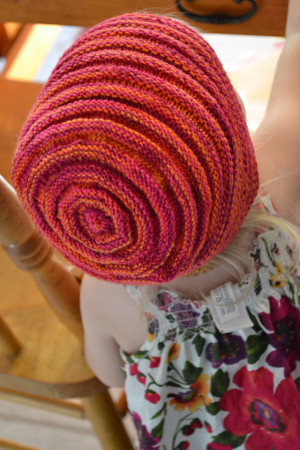
Abbreviations: CO: Cast on. c2b: slip two stitches onto cable needle and hold behind work. Knit the following two stitches, then knit the two stitches from the cable needle. c1b: slip one stitch onto cable needle and hold behind work. Knit the following two stitches, then knit the one stitch from the cable needle. k2tog: knit two together. ssk: slip the next two stitches knit-wise. Insert the left hand needle through the front of these two slipped stitches, wrap the working yarn around the right hand needle, and knit the two stitches together. K3tog: knit three together. Gauge: 4 cables (equal to 20 stitches worked in pattern) = 4 inches when comfortably stretched as it will be worn. Note: Size medium fits most adults. To make this hat for an especially small or large head, follow the sizes shown as: Medium [small, large] Knitting the Body Using two strands of yarn and the smaller needles, CO 84 [80, 88] stitches and place a marker. Join into a round, being sure not to twist. Rows 1-9: *k2, p2, repeat from * to end of row. Row 10: [k2, p2] to end of row, increasing 11 [10, 12] stitches throughout the round. You will be left with 95 [90, 100] stitches. Switch to 5.5mm 16in circular needles. Row 11: *k4, p1, repeat from * to end of row. Row 12: Knit the knits and purl the purls. Row 13: *C2b, p1, repeat from * to end of row. Rows 14–16: Repeat row 12 Row 17: Repeat row 13 Repeat rows 14-17 until piece measures [6] [5, 6] inches, ending after a cable row Decrease Section Personally, I prefer that the decreases align with the cables, because it looks much cleaner than other decrease methods (in my opinion). So, for the basic 95 stitch pattern, we will separate it into 4 sections of 20 stitches, and 1 section of 15 stitches, with each marker falling in the middle of a cable (see the following pages for adaptations to the 90 and 100 stitch patterns). You can also consult the added chart, which shows the decrease for the 20-stitch and 15-stitch sections individually. Note: Don’t forget to switch to dpns when work gets too small! Decrease for 95 stitch pattern Decrease row 1: remove original marker, then *k2tog, pm, ssk, p1, k4, p1, k4, p1, k4, p1, repeat from * 3 more times, then k2tog, pm, ssk, p1, k4, p1, k4, p1. The first marker you placed in this round will now be used as the start of the row. Row 2: knit the knits and purl the purls. Row 3: knit even, decreasing 1 stitch before and after each marker. Here is my preferred method: k2tog, slip marker, ssk. Row 4: starting at first decrease marker, *k1, c2b, p1, c2b, p1, c2b, k1, repeat from * three more times, then k1, c2b, p1, c2b, k1 Row 5: repeat row 3 Row 6: repeat row 2 Row 7: repeat row 3 Row 8: starting at first decrease marker, *c1b, p1, c2b, p1, c1b, repeat from * three more times, then c1b, p1, c1b. Row 9: repeat row 3 Row 10: repeat row 2 Row 11: Repeat row 3 Row 12: starting at first decrease marker, *k1, p1, c2b, p1, k1, repeat from * three more times, then k1, p1, k1 Row 13: repeat row 3 until last three stitches, k3tog. Row 14: knit Row 15 to end: k2tog continuously until you have 5-10 stitches left. Cut yarn with a 6 inch tail, and weave through the final stitches, pulling tight to close the top of the hat. Weave in all ends and block to finish. Decrease for size small (90 stitch pattern) Decrease row 1: remove original marker, then *k2tog, pm, ssk, p1, k4, p1, k4, p1, k4, p1, repeat from * two more times, then (k2tog, pm, ssk, p1, k4, p1, k4, p1)x2. The first marker you placed in this round will now be used as the start of the row. Row 2: knit the knits and purl the purls. Row 3: knit even, decreasing 1 stitch before and after each marker. Here is my preferred method: k2tog, slip marker, ssk. Row 4: starting at first decrease marker, *k1, c2b, p1, c2b, p1, c2b, k1, repeat from * two more times, then (k1, c2b, p1, c2b, k1)x2 Row 5: repeat row 3 Row 6: repeat row 2 Row 7: repeat row 3 Row 8: starting at first decrease marker, *c1b, p1, c2b, p1, c1b, repeat from * two more times, then (c1b, p1, c1b)x2. Row 9: repeat row 3 Row 10: repeat row 2 Row 11: Repeat row 3 Row 12: starting at first decrease marker, *k1, p1, c2b, p1, k1, repeat from * two more times, then (k1, p1, k1)x2 Row 13: repeat row 3 until last six stitches, (k3tog)x2. Row 14: knit Row 15 to end: k2tog continuously until you have 5-10 stitches left. Cut yarn with a 6 inch tail, and weave through the final stitches, pulling tight to close the top of the hat. Weave in all ends and block to finish. Decrease for size large (100 stitch pattern) Decrease row 1: remove original marker, then *k2tog, pm, ssk, p1, k4, p1, k4, p1, k4, p1, repeat from * four more times. The first marker you placed in this round will now be used as the start of the row. Row 2: knit the knits and purl the purls. Row 3: knit even, decreasing 1 stitch before and after each marker. Here is my preferred method: k2tog, slip marker, ssk. Row 4: starting at first decrease marker, *k1, c2b, p1, c2b, p1, c2b, k1, repeat from * four more times. Row 5: repeat row 3 Row 6: repeat row 2 Row 7: repeat row 3 Row 8: starting at first decrease marker, *c1b, p1, c2b, p1, c1b, repeat from * four more times. Row 9: repeat row 3 Row 10: repeat row 2 Row 11: Repeat row 3 Row 12: starting at first decrease marker, *k1, p1, c2b, p1, k1, repeat from * four more times Row 13: repeat row 3 Row 14: knit Row 15 to end: k2tog continuously until you have 5-10 stitches left. Cut yarn with a 6 inch tail, and weave through the final stitches, pulling tight to close the top of the hat.

Read NextVintage Hat