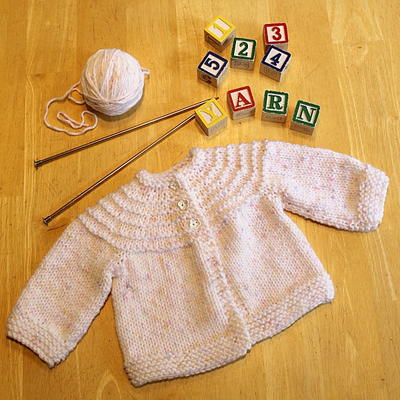
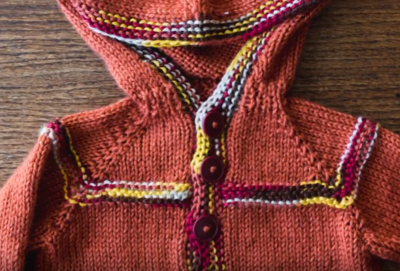
Simple Knit Baby Hoodie

The Simple Knit Baby Hoodie is a quick and easy knitting pattern for babies. The adorable hooded cardigan is a great way to keep your little one nice and warm. You really can't beat such a practical and stylish garment. This free baby knitting pattern involves raglan shaping and garter stitch for the trim. You will also learn a technique for adding buttonholes and how to create a one-step provisional cast on. Based on your preference, you can work up this simple baby hooded sweater using either circular or regular knitting needles.
Hoodies are probably some of your favorite pieces of clothing. Now your baby can join you with one of these Simple Baby Hoodies! Designed for ages 6-24 months, this easy-to-knit hoodie will keep any little one cute and cozy all day and night. Easy baby knitting patterns like this one are great because they only require two balls of yarn to create!
This simple yet satisfying knit baby cardigan is a joy to make and a great knitting project for beginners. The classic style and timeless construction make it a piece that will quickly become one of your favorite free knitting patterns for babies.
Watch and Learn

Knitting Needle Size6 or 4 mm, Circular Knitting Needles
Yarn Weight(4) Medium Weight/Worsted Weight and Aran (16-20 stitches to 4 inches)
Gauge18 sts x 24 rows = 4” in st st
Finished Size12 mos , 18 mos, 2T - Finished Chest: 20 ½ (22 ½, 24 ½)”
Materials List
- Caron Simply Soft yarn, 1 (1, 2) skein(s) Pumpkin (MC)
- Caron Simply Soft Stripes, 1 skein Martha’s Vineyard
- Circular knitting needle size 6
- Crochet hook for provisional cast-on – size not important
- 7 buttons, 1”
- Tapestry needle
- 4 stitch markers
- 2 stitch holders or pieces of waste yarn
Pattern
Sweater Yoke
With provisional cast-on and CC, cast on 45 (51, 51) sts
Row 1 (RS): With MC, k7 (8, 8), pm, k5 (6, 6), pm, k21(23, 23), pm, k5 (6, 6), pm, k7 (8, 8).
Row 2: Purl, slipping markers as you come to them.
Row 3: (K to 1 st before marker, k1fb, slm, k1fb) 4 times, k to end. 8 sts increased
Rep Rows 2 – 3 eight times, then Row 2 once more.
Row 21: With CC, rep Row 3.
Row 22: With CC, knit.
Rows 23 – 26: Rep Rows 21 – 22 twice. End off CC.
Change back to MC, rep Rows 2 – 3 until work measures 4 (4 ¼, 4 ¾ )” from cast-on, ending with a WS row.
Separate Fronts/Back
Row 1 (RS): K to first marker, [remove marker, place all stitches before next marker onto stitch holder or waste yarn, remove marker, cast on 6 (8, 10) sts, knit to next marker], rep instructions in [ ], k to end.
Row 2: Purl.
Work in st st until work measures 8 (8 ½, 9)” ending with a WS row.
With CC, k 6 rows. Bind off in knit.
Sleeves
With MC, cast on 4 (5, 6) sts, move stitches from waste yarn/stitch holder to knitting needles, cast on 4 (5,6) sts.
With MC, work in st st until work measures 7 (8, 9)” long, ending with a WS row, while working a decrease at the beginning and end of every 4th (4th, 6th ) row 7 (8, 9) times.
With CC, k 6 rows. Bind off in knit.
Hood
Unzip provisional cast on and place sts on needle.
Work 5 rows of k1, p1 ribbing.
Set up Row (WS): P 18 (20, 20), pm, p9 (11, 11), pm, p to end.
Row 1 (RS): (K to 1 st before marker, k1fb, slm, k1fb) twice, k to end. 4 sts increased.
Row 2: Purl, slipping markers as you come to them.
Rep Rows 1 – 2 6 (7, 8) times. 73 (83, 87) sts
Work even in st st until work measures 6 ½ (7, 8)” from top of ribbing, ending with a WS row.
Pm at center of last row.
Hood Decreases
Row 1 (RS): K to 4 sts before marker, k2tog twice, slm, k2tog twice, k to end.
Row 2: P to 4 sts before marker, p2tog, p2, slm, p2, p2tog, p to end.
Rep Rows 1 – 2 until 6 (5, 7) sts remain, bind off.
Front Bands/Hood Trim
With CC and RS facing, beginning at bottom right front corner, pick up 36 (42, 48) sts to top of Front, 63 (68, 76) sts along edge of hood (including ribbing), and 36 (44, 48) sts along left front to bottom edge. 135 (152, 172) sts.
Row 1 (WS): Knit.
If you want the buttonholes on the right side:
Row 2: K2, (k2tog) twice, *k2 (3, 4), (k2tog) twice. Rep from * 5 more times (6 repeats total); knit to end of row.
Row 3: *Knit to gap between two k2togs, cast on 2 sts. Rep from * 6 more times, k to end of row.
Rows 4 – 5: Knit.
Bind off knitwise.
If you want the buttonholes on the left side:
Row 2: Knit.
Row 3: K2, (k2tog) twice, *k2 (3, 4), (k2tog) twice. Rep from * 5 more times (6 repeats total); knit to end of row.
Row 4: *Knit to gap between two k2togs, cast on 2 sts. Rep from * 6 more times, k to end of row.
Row 5: Knit.
Bind off knitwise.
Finishing
Block.
Sew up sleeve seams.
Sew up underarm gaps.
Sew on buttons.
Weave in all ends.
Up Next:
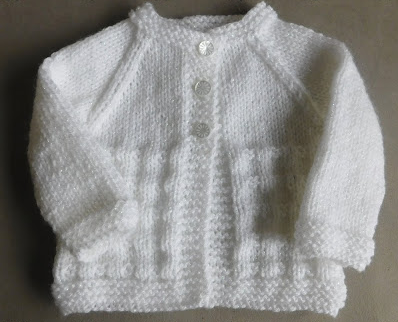
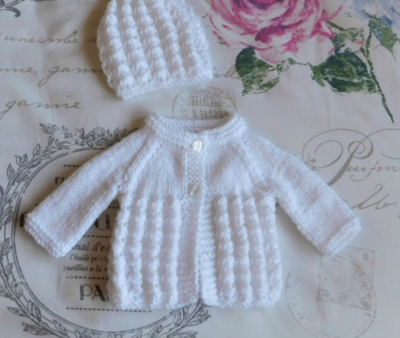
More Free Knitting Patterns for Babies
Have you made this hoodie?
Show us your progress in the comments!
Read NextPink Princess Cardigan
Your Recently Viewed Projects
Thanks for your comment. Don't forget to share!
hannahbenoit14 778 5380
Apr 14, 2021
I love the hoodie, but I just finished the hood, and it's ginormous. I followed the instructions exactly and double-checked my work. Increasing to 73 stitches should make it 16 inches wide, and then we're instructed to knit to 6.5 inches above the ribbing (smallest size). So that puts it at 16 inches wide by 7.5 long (with ribbing) before you even start decreasing. From there, decreasing to 5 stitches takes about 22 rows, or nearly 4 inches, for a total length of 11.5 inches. So the hood dimensions would be 16 inches wide by 11.5 inches long. Thats in theory. My hood ended up 17.5 inches wide by 14 inches long, even though I used the same needles for the hood as for the body. Go figure.
wandavuorela 08308 75
Sep 11, 2017
I've made this with a few modifications... absolutely love this pattern... the tutorial made making this sweater a breeze! This is the first sweater I've done.. I see more in my future!! Thank you for this pattern and video! I can't wait to see my expected grandbebe wear this!
mehunt 5474601
Aug 28, 2017
I think front/hood bands has an error in stitched to pick up for 18 month size, should be 44 instead of 42 stitches. Then both sides will be equal.
Lisa
Oct 02, 2022
It would seem like that, just reading the directions, but the pattern is actually accounting for the natural slope for the top of the head, so hoods are not typically picked up equally on each side, there is usually a few stitches added to one side to allow for some shaping.
wandavuorela 08308 75
Aug 20, 2017
Thank you for this sweater pattern and video to help with making it much easier to understand! I'm new to making sweaters and I'm looking forward to trying this one!
3cats2love
Aug 18, 2017
Im not sure that simple, easy, or quick are words that I would apply myself to sweater patterns. This pattern to me is just as complex as others, because you have to knit several pieces and stitch them together, and for other parts you have to pick up stitches and work them. The resulting hoodie is cute but its a lot of work.
Report Inappropriate Comment
Are you sure you would like to report this comment? It will be flagged for our moderators to take action.
Thank you for taking the time to improve the content on our site.