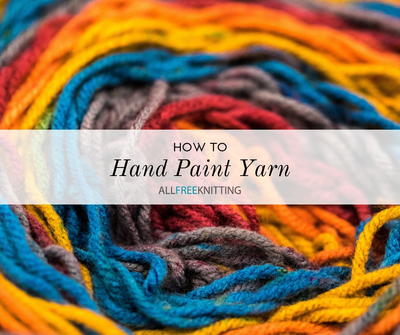
How to Hand Paint Yarn
Learn to hand paint your own yarn for truly one-of-a-kind colorways!

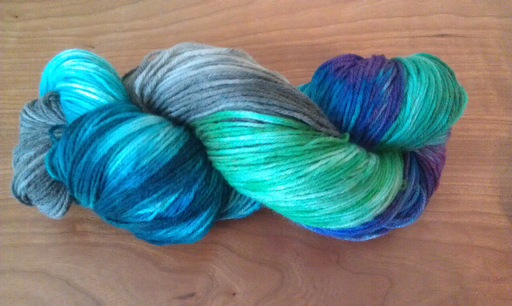
Hand-painted yarns have delicious variegated colorways. Unfortunately these gorgeous yarns come with an increased price tag because of the extra time of dyeing.
Today I will show you how to hand paint yarn in the comfort of your own kitchen. Not only will you save yourself money in the long run, but you will also add a layer of handcrafting to your hand knit/crochet projects. If you have ever tie dyed anything, you will find that the overall technique of applying dye is very similar. Make sure you also check out the accompanying video at the end of this tutorial!
Materials:
- Fiber - In this tutorial I used 100g of a 75% wool, 25% nylon blend. This technique will work for natural based fibers, but not acrylic or cotton. The yarn should be tied into a circular skein.
- Work Surface - I paint my yarn on a granite counter top that cannot be stained by the food coloring. You may work on any sort of table. If you are worried about staining cover the surface in trash bags and paper towels to pick up any excess spills.
- Plastic Wrap - Enough to fully wrap up your skein of yarn and protect your work surface.
- Water - Cold tap water is used to pre-soak the yarn.
- Container - you will need a container that can hold at least 6 cups of water to pre-soak your yarn.
- Acid - 2 Tablespoons of white vinegar per 6 cups of water. You can experiment with different acid levels to achieve different results.
- Dye - In this tutorial I have mixed food coloring from a few different McCormick dye kits and Wilton’s paste.
- Small Containers - Depending on how many colors you want to mix, you will need some small containers to mix your different dye solutions.
- Heat - In this tutorial, the heat source is a microwave oven. Some people prefer to use a steam pot to set the dye to handpainted yarn.
- Gloves - Since you will be handling the dye a lot, you will want to protect your hands so they are not dyed as well.
- Syringes (optional) - You can apply the color directly to the yarn by pouring, but you will have a little more control over the volumes you add if you use some kind of kitchen syringe.
Instructions:
- Set up your workspace. Before you begin, make sure you have a work area large enough for your skein of yarn, and clear of anything you wouldn’t want the dye to touch. Depending on your surface, you may want to lay down extra plastic bags and paper towels to protect your tables.
- Add 6 cups of water and 2 Tablespoons of white vinegar to a bowl. Stir to mix the solution. Add your yarn and let it soak at room temperature for 30 minutes.
- While the yarn is soaking, mix your dyes. You want your dye solutions to be fairly concentrated so you are not adding too much extra water to your yarn.
- Lay an rectangle of plastic wrap on your work surface, large enough to contain your oval of yarn and to wrap your yarn into a tube when you are done dyeing. Lay two long pieces of plastic parallel with a little space in between so they aren’t overlapping. Place two smaller pieces on the ends to complete the rectangle.
- Remove your yarn from the soak bath, and gently squeeze out excess water. (The skein should be wet, but not dripping.)
- Paint your yarn. There is no right or wrong way to apply the dye to your yarn. You can use a syringe to inject the dye into spots, or you can pour directly from your dye containers. Some people don’t pre-mix dyes at all and just apply food coloring directly from the bottle. Once you have applied the dye to the yarn you will want to work it through with your (gloved) hands to make sure it is as evenly applied as you want. Don’t forget to check the inside of the skein to check for white spots!
- Wrap the plastic wrap around the yarn to get a circular wrapped tube. Carefully transfer the wrapped skein on a microwave safe plate.
- Now it is time to heat the yarn to set the dye. Heat the yarn for 2 min at a time until the yarn is audibly steaming (hissing) or is hot to touch. Let the yarn cool until you can touch it comfortably (which can take 10-20 min), then repeat this process 1 more time. In submersion dyeing methods you can wait for the dyebath to clear, but this time there is no dyebath, so you cannot wait to see clear water to know that you are done.
- Allow the yarn to cool completely to room temperature before you unwrap it.
- Gently wash your yarn with luke warm water and some mild soap. You want to rinse the yarn until the water runs clear to remove all excess dye. In my experience, hand painted skeins require a bit more washing than other dyed skeins because there tends to be more excess dye.
- Gently squeeze out excess water, and hang your skein up to dry.
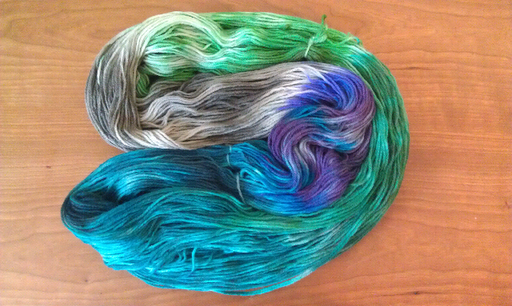
When you are handpainting yarn, you are creating a unique colorway that can be really difficult to reproduce. I therefore recommend that you make sure you dye enough yarn at one time for your project. Keep in mind that even with careful attention to the application of dye, there will still be some differences between different skeins.
Read NextSimple Moss Stitch Dishcloth
Your Recently Viewed Projects
Thanks for your comment. Don't forget to share!
victhrop 8869306
Mar 12, 2015
Yes, I have tried it many times. The colors can be glorious,but it is important that the vinegar is strong enough to "set" the color. The higher acidity the better.
bbanks
Jun 19, 2012
Why can't you dye cotton yarn?
Karenramel
Apr 04, 2019
googled answer for you "Cotton vs. wool. ... Cotton yarn, as you may know, is a plant fiber. Plant fibers behave just a little bit differently than animal fibers, so we need to treat them differently when dyeing them. This not only ensures that we get a gorgeous color, but it also ensures that the beautiful color lasts through wearing and washing "
Report Inappropriate Comment
Are you sure you would like to report this comment? It will be flagged for our moderators to take action.
Thank you for taking the time to improve the content on our site.