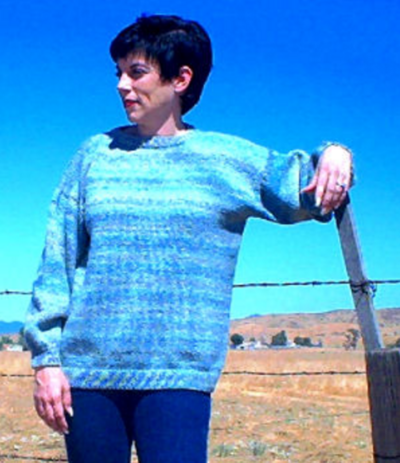
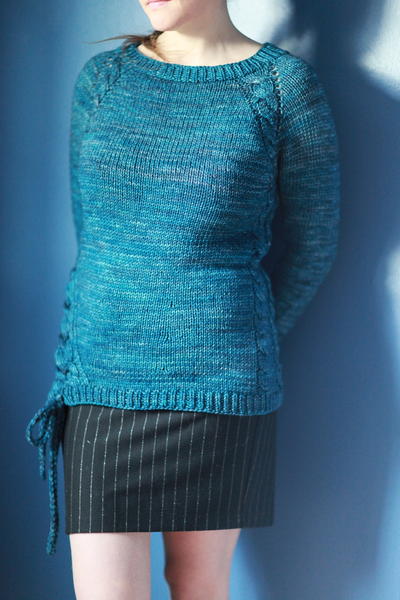
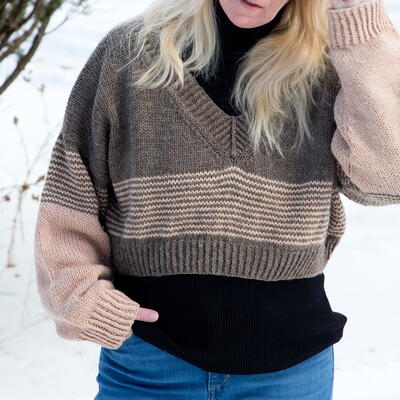
Easy Seaside Sweater
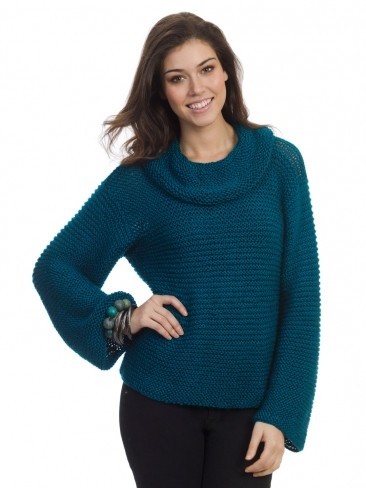
Now is the time to learn how to knit a sweater that will have you looking your best morning, noon, and night. The Easy Seaside Sweater is the beautiful knit sweater pattern you don't have to be a professional knitter to cast on. With patience and plenty of time, even the most novice of knitters can cast on this gorgeous knit. So, don't be afraid to step a bit out of your comfort zone with a knit that combines the simplicity of common garter stitch knitting with the trendiness of a new fashion sweater. Creating a knit for warmth has never been so stylish. Wear it as is or cinch the sweater's waist with a belt for two looks from the same amazing sweater. This easy-to-knit sweater is the flattering knit you're going to love having in your wardrobe.

Knitting Needle Size9 or 5.5 mm, 10.5 or 6.5 mm
Yarn Weight(4) Medium Weight/Worsted Weight and Aran (16-20 stitches to 4 inches)
Gauge1 stitches, 2 rows, 3 inches. stockinette stitch
Materials:
- Caron Simply Soft (170g/6.oz;288m/315yds) Pagoda (0014) - 3 (S/M), 4 (L/XL), 5 (2XL)
- Size 6.5 mm (U.S. 10.5) straight knitting needle 14"
- Size 5.5 mm (U.S. 9) circular knitting needle 16"
GAUGE: In Garter Stitch using size 10 ½ (6.5mm) needles, 14 sts and 26 rows = 4"/10 cm
Measurements:
Bust
S 38" (96.5 cm)
M 42" (106.5 cm)
L 46" (117 cm)
XL 50" (127 cm)
2XL 54" (137 cm)
Length
S 20" (51 cm)
M 21.5" (54.5 cm)
L 22" (56 cm)
XL 23.5" (59.5 cm)
2XL 24" (61 cm)
Abbreviations:
Beg = beginning
co = cast on
bo = bind off
pu = pick up
K = knit
k2tog = Knit next 2 stitches together.
P = purl
RS = right side
st(s) = stitch(es)
Instructions:
Easy Seaside Sweater Chart
BACK
With size 10 ½ straight needles, CO 66 (74, 80, 88, 94) sts. Work in Garter st until piece measures 13 (14, 14, 15, 15)” from beg.
Shape armholes
BO 6 sts at beg of next 2 rows—54 (62, 68, 76, 82) sts. Work even in Garter st until armholes measure 5 ½ (6, 6 ½, 7, 7 ½)”.
Shape Neck
Next row (RS): K17 (21, 23, 27, 29) sts, k2tog, turn place rem sts on a holder—18 (22, 24, 28, 30) sts on ndl.
Next row: Knit.
Next row: K16 (20, 22, 26, 28) sts, k2tog—17 (21, 23, 27, 29) sts.
Next row: Knit.
Next row: K15 (19, 21, 25, 27) sts, k2tog—16 (20, 22, 26, 28) sts.
Next row: Knit.
Next row: K14 (18, 20, 24, 26) sts, k2 tog—15 (19, 21, 25, 27) sts.
Knit 3 more rows. BO.With RS facing, return to sts on holder, attach yarn at neck edge, BO 16 (16, 18, 18, 20) sts, k to end of row—19 (23, 25, 29, 31) sts on needle.
Next row (WS): K17 (21, 23, 27, 29) sts, k2tog, turn place rem sts on a holder—18 (22, 24, 28, 30) sts on ndl.
Next row: Knit.
Next row: K16 (20, 22, 26, 28) sts, k2tog—17 (21, 23, 27, 29) sts.
Next row: Knit.
Next row: K15 (19, 21, 25, 27) sts, k2tog—16 (20, 22, 26, 28) sts.
Next row: Knit.
Next row: K14 (18, 20, 24, 26) sts, k2 tog—15 (19, 21, 25, 27) sts.
Knit 2 more rows. BO.
FRONT
Work same as Back.
Sew shoulders together.
Cowl Neck
With RS facing and size 9 circular needle, beg at right shoulder seam, PU and k7 (8, 8, 10, 11) sts along Back neck decs to center Back, PU and k16 (16 , 18, 18, 20) sts across Back neck, PU and k7 (8, 9, 10, 11) sts along Back neck decs to shoulder, PU and k7 (8, 9, 10, 11) sts along Front neck decs to center Front, PU and k16 (16, 18, 18, 20) sts across Front neck, PU and k7 (8, 9, 10, 11) sts along Front neck decs to shoulder—60 (64, 68, 76, 84) sts. Join, placing marker at beg of rnd. Work around in Garter st (k 1 rnd, p 1 rnd) for 8 rows (4 ridges).
Inc rnd: Inc 6 sts evenly spaced on rnd—66 (70, 74, 82, 90) sts.
Rnds 1-7: Continue in Garter st .
Rnd 8: Inc 6 sts evenly spaced on rnd—72 (76, 80, 88, 96) sts.
Optional: Continue cowl on size 9 circular needle or change to a size 10 ½ circular needle for looser and larger cowl.
Rep Rnds 1-8 once more—78 (82, 86, 94, 102) sts.
Continue even until there are 48 rows (24 ridges) or desired length of cowl. BO.
SLEEVES
With larger straight needles, PU and k60 (64, 68, 72, 76) sts evenly around armhole within BO armhole sts.
Knit 8 rows (4 ridges). Note: These 4 ridges will be sewn to the 6 BO armhole sts.
Shaping
Row 1: K1, k2tog, k to last 3 sts, k2tog, k1.
Rows 2-8: Knit.
Rep Rows 1-8, 4 (5, 6, 7, 8) more times—50 (52, 54, 56, 58) sts.
Continue even until 55 (57, 59, 61, 63) ridges from beg. Note: Sleeve measures approx 17 (17 ½, 18, 18 ½, 19)” from beg.
BO all sts.
FINISHING
Sew 4 ridges at beg of Sleeves to BO armhole sts. Sew side and Sleeve seams.
Using yarn needle, weave in ends.
Read NextDistrict 12 Sweater Pattern
Your Recently Viewed Projects
Thanks for your comment. Don't forget to share!
Lynn K
Jan 27, 2017
Sometimes, for me, the simplest designs are the best - like less is more. This is such a pretty sweater, loose and comfy looking and I LOVE the color. Here in the south of Africa we will be heading into autumn in a few months and I am pinning this to definitely make for the upcoming season. If anyone has already made it please could you tell me if the sizes are fairly accurate?
drapetsona8 194702 8
Nov 23, 2016
I presume I can pick up and knit the cowl on ordinary needles and not circular. In England we don't tend to knit on circular needles and I just don't know how to.
Lisa
Dec 13, 2016
Not sure what you mean by ordinary needles, but if you mean straight than the answer is no. The cowl must be knit in the round in order for it to work out properly, if circular needles are a problem, it could be done on double points. Circular needles are quite easy there are many youtube videos to help.
The Designing Peng uin
Sep 15, 2016
I like this sweater - have to knit it but I think I should prefer it in a deeper blue, perhaps navy blue for the seaside - Having checked out the instructions for the cowl, I don't see any problem there (let's chat when I get there lol)
rsdb
Mar 11, 2016
A sweater in my favorite color! I love the comfort look and the large collar shown in the picture. I want to try knitting this sweater! But before I start I was wondering if anyone has made this sweater and if they are happy with the way it turned out?
mdupont57 4306532
Jan 25, 2016
I don't understand the neck shaping instructions. I have 62 stitches. First Row says to knit 21, then knit two together. Is that once? Then it says turn and place remaining stitches on a holder. Is this the just knit stitches or the ones remaining 42 stitches? Then 3rd shaping row says to knit 20, then knit 2 together. Is this once?
Lisa
Sep 22, 2016
Yes, the instructions are for once, unless a knitting pattern specifies to repeat from a certain point it is just once. The reason you are leaving some stitches on a holder is in order to shape and create the cowl neck collar of the sweater, it will probably make more sense to you as you move along. The pattern is extremely helpful at this section because at the end of each instruction it tells you how many stitches you should have for each size, so if you are in doubt always verify the stitch count at the end of each row. I know this is late, hope it helps someone.
bluemorpho
Jan 13, 2016
Hi Marilyn, I began knitting the Seaside Sweater, starting with the back. I cast on 88 stchs as written, for the xl size. When I came to directions for the neck shaping I became aware that the pattern is wrong. half of 76 is 38...not able to continue because I've never rewritten a pattern, and would hate to rip out 4 days of work. I haven't checked the rest of the sweater pattern, but I'm guessing it may be incorrect as well for the xl size? Sadly, L
Lisa
Jan 17, 2016
No re-write is required, you've simply found a mistake in the amount of stitches that you are putting on holder after the first neck decrease, the amount being left on a spare needle is incorrect, but the instructions to finish the neck are correct, if you had read the rest of the pattern, you would have realized that the neck is not dividing evenly at that point, when you go back to the stitches held on the spare needle there is a 18 stitch bind off for the centre of the neck which makes the actual neck shaping 29 stitches on each side left and right of centre to allow for he pick up and creation of the cowl neck to finish the sweater. So, don't rip out anything, just continue with the instructions from where you are. Hope this helps, happy knitting!
Report Inappropriate Comment
Are you sure you would like to report this comment? It will be flagged for our moderators to take action.
Thank you for taking the time to improve the content on our site.