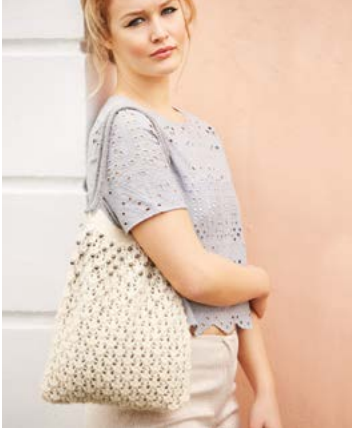
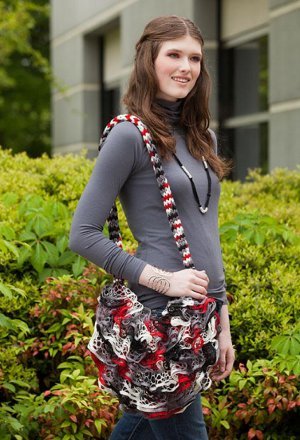
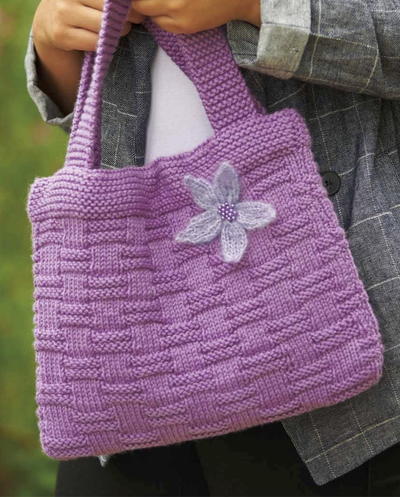
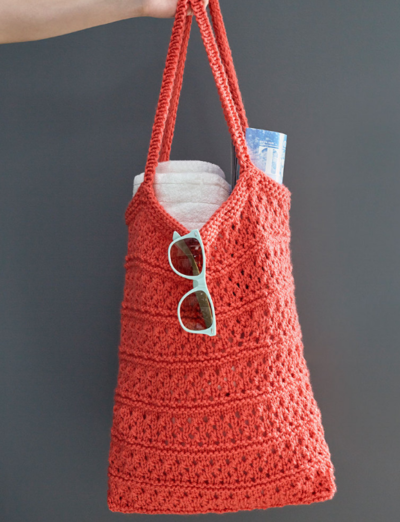
On-the-Go Knit Bag

Perfect for toting all of your daily essentials, the On-the-Go Knit Bag is an active knitter's best friend. This tote-style knit bag pattern features a comfortable shoulder strap, front pocket for smaller items, and plenty of space in the main compartment for groceries, books, and other items. If you've ever wanted to learn how to knit a bag, now is the time to start with one of our favorite easy knitting patterns that you are going to love.

Knitting Needle Size10 or 6 mm, 7 or 4.5 mm
Yarn Weight(4) Medium Weight/Worsted Weight and Aran (16-20 stitches to 4 inches)
Gauge20 sts and 26 rows = 4" [10 cm] in stocking st with smaller needles.
Materials List
- Lily Sugar 'n Cream (70 g/2.5 oz;109 m/120 yds); Main Color (MC) Mod Green (01223) - 4 balls
- Sizes 4.5 mm (U.S. 7) and 6 mm (U.S. 10) knitting needles or size needed to obtain gauge
- 3¼ yds [3 m] of contrast color webbing or ribbon for straps
Instructions
Front and Back (make 2 alike)
With smaller needles, cast on 50 sts.
Knit 12 rows (garter st), noting first row is WS.
Change to larger needles.
1st row: (WS). K2. *yo. K2tog. Rep from * to last 2 sts. K2.
2nd row: Knit.
Rep last 2 rows until work from beg measures 11½" [29 cm], ending with a 1st row.
Next 2 rows: Knit.
Cast off knitwise (WS).
Side Panel (make 1)
With smaller needles, cast on 27 sts.
Knit 12 rows (garter st), noting first row is WS.
1st row: (WS). Knit.
2nd row: Purl.
Rep last 2 rows until work from beg measures 34" [86.5 cm], ending with a 1st row.
Knit 12 rows (garter st).
Cast off knitwise (WS).
Pocket (make 2)
With smaller needles, cast on 24 sts.
Knit 12 rows (garter st), noting first row is WS.
Change to larger needles.
1st row: (WS). K2. *yo. K2tog. Rep from * to last 2 sts. K2.
2nd row: Knit.
Rep last 2 rows until work from beg measures 6" [15 cm], ending with a 2nd row.
Next 2 rows: Knit.
Cast off knitwise (WS).
Finishing
With WS tog, stitch Side Panel to front along sides and bottom. Rep for opposite side. Sew WS of Pockets to RS of either side of Side Panel, matching bottom of Pocket to bottom corners of Bag. Cut webbing or ribbon for strap in half. Machine stitch or hand sew to bag along sides and bottom as shown. Rep for opposite side.
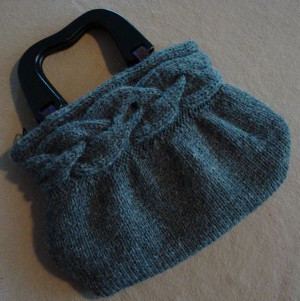
Read NextThe Ultimate Bag
Your Recently Viewed Projects
Thanks for your comment. Don't forget to share!
Ausmaler
Dec 03, 2025
The pattern does not match the photo, and vice versa. There is no side panel visible in the photo. I would have thought the side panel forms a kind of U-shape connecting the two large pieces along three of their edges, but for that it's too short. And making it longer will probably use more yarn than stated. It may be easier to start with a rectangle for the bottom, then pick up stitches around the edge and knit upward in rounds until the desired height is achieved.
lauriemanion1 5723 043
May 28, 2025
I am in the middle of making this bag and I find that the pattern is confusing. It refers to the front and back which are incorrect. Each piece forms part of both the front and back of the bag. The term "side panel" is also confusing as it is not until we are assembling all of the pieces that we realize that this panel is going down the centre front and back of the bag. The instructions for assembling this bag are also very confusing both given the terminology used and the lack of details required to assemble the bag correctly. More explanation as to what is considered the top and the bottom of the bag would also have made making the bag easier. Although this pattern is said to be Easy, any beginner would be hard pressed to make this pattern.
Hippie Chick
Nov 09, 2018
I see most of the commenters are having an issue with this pattern with either the wording or the stitch counts being off. Unfortunately since the pattern is listed in full on this page, I am not able to go to the blog page and look for more info or maybe an edit that has been made to correct the problem / problems.
Tricia108
May 14, 2018
Looking at all the comments and the pattern, it probably needs a rewrite. Shame since it really is a nice looking bag. I might give it a try anyway and try to piece it together.
cjrandall 4315589
Apr 30, 2018
very strange pattern! Unable to piece it together, I think I will rip it out and try something else.
Editor for AllFree CrochetAfghanPatte rns
Feb 14, 2017
I love this bag so much! I think I like that the straps aren't knit, so it adds a fun element to it and makes it a bit more sturdy.
achumley0003 31706 34
Oct 14, 2016
I am not sure where some are getting stitches on one side and three onthe other If the row is done correctly at the beginning the first stitches would be k k yo and the last would be yo k k It does show the side panel in the front and would make more sense for that to be renamed front back panel and the front and back be the side panels And I am pretty sure the reason the th row starts as a knit row is because the first were garter stitch so they were all knit rows and row starts the stockinette stitch pattern which would start with a knit row There would be no real reason it would have to be purled I think this pattern would benefit from having more views of the bag which would maybe make it easier on some knitters to see the…Read More pattern
achumley0003 31706 34
Oct 14, 2016
Actually, the side panel should really be named center strip or panel because I think that would possibly clear up some of the assembly issues.
3cats2love
Jan 13, 2017
Yes, I agree. Or you could switch the names around, rename "front and back" as "side panels" and "side panels" as "front and back," since that is the way the person is carrying the bag in the photo. As it is pictured you sort of have to turn it around in your mind to understand how to put it together.
ChaCha Rizzo
Feb 04, 2017
I agree, this is a great idea to rename the sections - that makes much more sense. This is a great pattern once you get the hang of it.
samie13 9730836
Apr 26, 2017
The only way you can end with YO K,K, is to cast on 51 stitches to begin with.
achumley0003 31706 34
Oct 22, 2017
I actually wrote the end wrong. It is a k2tog, then k,k. But, no, the row could still start with 50 with yo,k,k, but without the decrease it would add an extra stitch and make the next row 51, and it would continue to add an extra stitch each row.
Robbj 5233906
Aug 29, 2016
I believe there are errors in the pattern. Front/Back are slanted due to the fact that there are 3 knit stitches on one side and 2 on the other. The photo shows the bag with the side panel as the front. The side panel 1st row is WS knit 12 rows. Row 13 WS row should begin with a Purl row. Photo is not very good for being able to make the bag by site. This is not EASY
RachelAnne
Jul 08, 2016
I like how floppy and casual this bag looks. Very "everyday." I'll have to try it.
The Designing Peng uin
May 02, 2016
Looking at the pattern instructions, I gather that there is only one yarn used - the direction lists brand then colour and therein lies the confusion. I agree with rsdb that this bag looks great and roomy, with pockets to hold little things, while the shoulder straps give it style - another have to do it project, just hope it does turn out to hang gracefully as in the photo accompanying it says easy and I have been knitting for years, so..... wish me luck
rsdb
Mar 31, 2016
Although I have always wanted to knit a bag, I have not done so because the patterns seem so complicated and long. I like how this bag not only looks great but is roomy and has two pockets to hold little things as well! And the shoulder straps look very stylish, too. Has anyone made this bag successfully?
lyndaodriscoll 021 9589
Feb 09, 2018
yes, I knitted it and had no problems. It turned out really cute.
m1prema 9702079
Dec 08, 2015
I have been able to stitch...just knit and started stitching...the 12 rows of garter stitch are at the open...the other three sides of the side panel is stitched along the centre panel...you get it as you keep stitching...however, it does not look as graceful as the pic...once done
katymarysmith 9642 637
Jun 30, 2015
I found I am having similar issues as Smile Today and shannonriley09. The picture doesn't seem to look like the way the finishing instructions say it should unless I'm missing something. Also, 50 stitches for the front and back and 27 for the side panel? 11in for the front and back and 34in for the side panel? I honestly can't quite grasp how this is put together. Can you maybe clarify? This bag is so cute and I really want to finish it soon. Thanks! )
judithkamykowski 8 090195
Apr 16, 2015
It's not that I don' lie the comment by snowflake girl, it's that her commentas been cut off! Why did you change the format for comment boxes, they're often truncated and hard to read, so why did allfreeknitting change what was working fine before?
Kristina K
Apr 16, 2015
Hey there, Judith! Our new comment system shouldn't cut off anyone's comments, especially those that are less than 110 characters long. You can see through your comment, which is much longer, that it was not cut off. If snowflakegirl's comment was cut off, the most likely situation is that she accidentally hit "enter" and submitted her comment before she was done typing it. I hope that helps! Happy knitting!
snowflakegirl6390 7312116
Mar 23, 2015
Made this bag, but it is more like a big, flat circle. I was thinking of gathering the sides to make it more
taraschebil 069283 7
Jul 02, 2014
How in the world is 27 sts for the side panel going to match up the 50 stitches for the fronts& back panels...? I'm thinking I'll rip it up and start over the side panel with 50 stitches. Anyone have suggestions???
Lisa
Jul 24, 2014
The side panel is supposed to be narrower than the front and back and long enough to fit the length and sides of the bag. The 27 stitches is the width-you knit the length and fit it up the middle of the panels to construct the bag. hope this helps.
taraschebil 069283 7
Jul 02, 2014
I'm finding the same thing happening, very disappointing...the picture looks so cute. I've got a lot of time in this & of course money on yarn & straps.
gofetch49 2948770
Jun 14, 2014
To make pockets, either cast on 26 stitches or knit two together at end of row.
Smile Today
Jun 08, 2014
I haven't finished this yet, but it isn't coming out straight, it's pulling to the side. While I'm sure I can block it straight, I'm concerned it will continue to pull. Has anyone tried this yet? Any advice?
Report Inappropriate Comment
Are you sure you would like to report this comment? It will be flagged for our moderators to take action.
Thank you for taking the time to improve the content on our site.