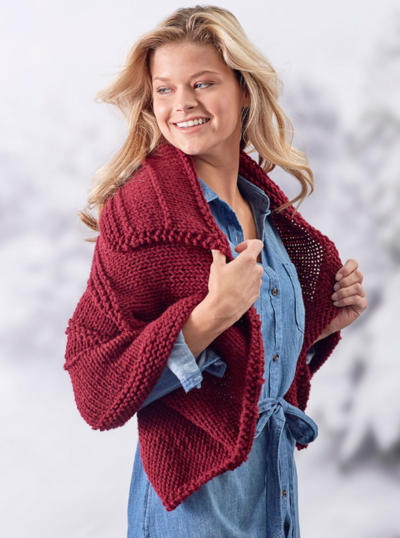
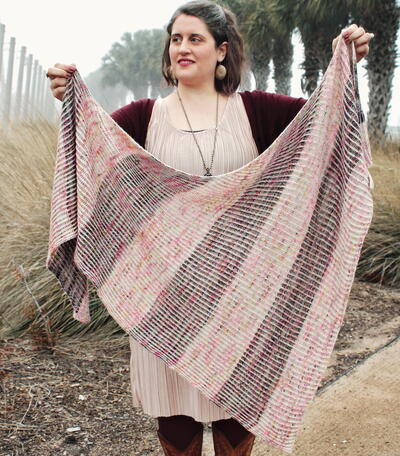
Poppy Knit Triangle Shawl
Learn how to knit a triangular shawl with no lace for the colder months!

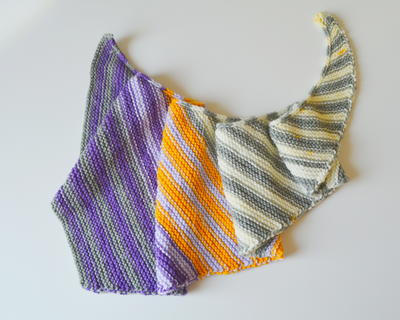
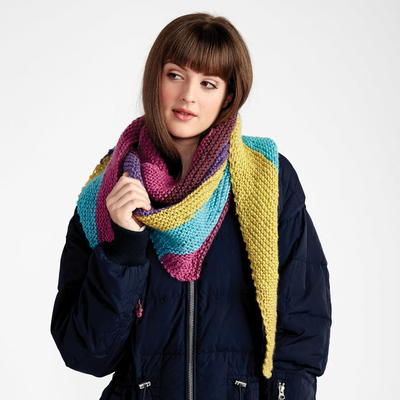
It's easy to knit up a pop of color for your wardrobe! The Poppy Knit Triangle Shawl is a super easy way to do it. Since this shawl is knit on the bias, it doesn't have any of those pesky lacy openings down the middle. This makes it a great neck warmer for the winter, as well as a great way to layer up in the spring time. We love this quick knit shawl for first-time shawl knitters, since you get to create a fantastic, uniquely wearable piece with minimal effort due to the self-striping nature of the yarn.

Knitting Needle Size8 or 5 mm, Circular Knitting Needles
Yarn Weight(4) Medium Weight/Worsted Weight and Aran (16-20 stitches to 4 inches)
Gauge13 sts and 26 rows = 4" [10 cm] in garter st.
Finished SizeAppro x 16" [40.5 cm] deep x 70" [178 cm] long.
Materials List
- Bernat® Pop!™ (5 oz/140 g; 280 yds/256 m): Paisley Pop (84009) - 2 balls
- Size U.S. 8 (5 mm) circular knitting needle 36" [90 cm] long or size needed to obtain gauge
- Stitch marker
Instructions
Cast on 2 sts.
1st row: (RS). Kfb. K1.
2nd row: K2. Kfb.
3rd row: Kfb. K2tog. K1.
4th and alt rows: Knit to last st. Kfb.
5th row: Kfb. K2tog. K2.
7th row: Kfb. K2tog. K3.
9th row: Kfb. K2tog. K4.
11th row: Kfb. Knit to last 6 sts. Place marker. K2tog. K4.
Note: From this point on, keep marker in position before last 6 sts.
12th row: Knit to last st. Kfb.
13th row: Kfb. Knit to last 6 sts. Slip marker. K2tog. K4.
Rep 12th and 13th rows until work across longer side edge measures 70" [178 cm].
Cast off.
Abbreviations
- Alt
- Alternate(ing)
- Approx
- Approximate(ly)
- K
- Knit
- Kfb
- Increase 1 stitch by knitting into front and back of next stitch
- K2tog
- Knit next 2 stitches together
- Rep
- Repeat(s)
- RS
- Right side
- St(s)
- Stitch(es)
Read NextCute Knit Shawlette
Your Recently Viewed Projects
Thanks for your comment. Don't forget to share!
Lisa
Feb 01, 2019
There is no way to keep the marker in place before the last 6 stitches, there are increases and decreases occurring every row, that just will not allow the marker to stay in place. Best bet is to drop the marker after that instruction, it's unnecessary at that point.
Report Inappropriate Comment
Are you sure you would like to report this comment? It will be flagged for our moderators to take action.
Thank you for taking the time to improve the content on our site.