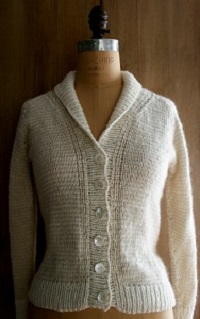
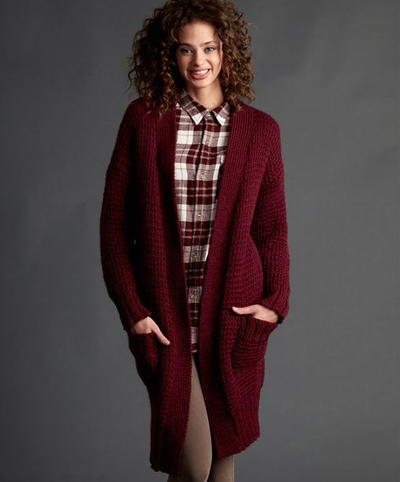
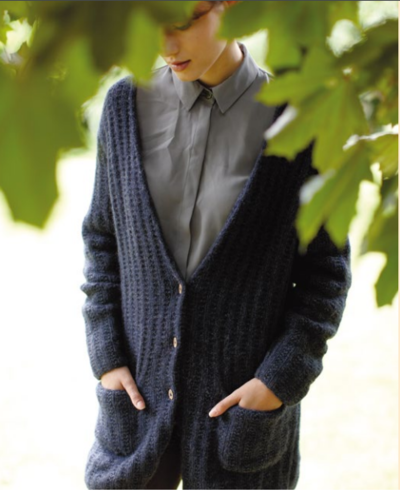
Eleni Cozy Cardigan

The Eleni Cozy Cardigan features a deep v-neck and pockets. This free cardigan knitting pattern is made using very soft yarn which creates the perfect casual cover-up when the temperature begins to drop. The neutral navy blue color of this knitted cardigan fits perfectly with your wardrobe, because you can effortlessly wear it with so many different outfits. If you are just starting to knit cardigans and don't consider yourself an expert by any means, then this is a great pattern to practice your skills and become more comfortable knitting such a fabulous wearable.
NotesSize Small - to fit bust 81-86 cm, 32-34 in,
Size Medium - to fit bust 91-97 cm, 36-38 in,
Size Large - to fit bust 102-107 cm, 40-42 in,
Size XL - to fit bust 112-117 cm, 44-46 in,
Size XXL - to fit bust 122-127 cm, 48-50 in

Knitting Needle Size7 or 4.5 mm, 8 or 5 mm
Yarn Weight(5) Bulky/Chunky (12-15 stitches for 4 inches)
Gauge18 sts and 27 rows to 10 cm measured over patt using 5mm (US 8) needles.
Materials List
- Rowan Selects Soffili Yak in Nightly 004 - S: 8, M: 8, L: 9, XL: 10, XXL: 11 x 50 gm
- 1 pair 4½mm (no 7) (US 7) needles, 1 pair 5mm (no 6) (US 8) needles
- 5 x 18mm buttons
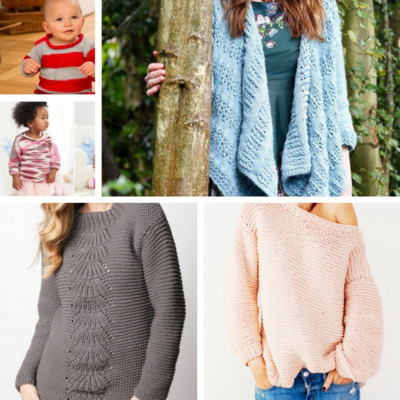
Find even more wonderful sweater and cardigan knitting patterns by checking out our collection of22 Knit Sweaters and Cardigans for Winter
Instructions
Back
Using 4½mm (US 7) needles cast on 90 [100: 110: 120: 134] sts.
Work in patt as folls:
Row 1 (RS): P0 [0: 0: 1: 0], K0 [1: 2: 2: 2], *P2, K2, rep from * to last 2 [3: 0: 1: 0] sts, P2 [2: 0: 1: 0], K0 [1: 0: 0: 0].
Row 2: Purl.
These 2 rows form patt.
Cont in patt for a further 10 rows, ending with RS facing for next row. Change to 5mm (US 8) needles.
Cont in patt until back meas 56 [57: 58: 59: 60] cm, ending with RS facing for next row.
Shape armholes
Keeping patt correct, cast off 4 [4: 5: 6: 7] sts at beg of next 2 rows. 82 [92: 100: 108: 120] sts.
Dec 1 st at each end of next 3 [5: 5: 7: 7] rows, then on foll 4 [5: 6: 6: 8] alt rows. 68 [72: 78: 82: 90] sts.
Cont straight until armhole meas 22 [23: 24: 25: 26] cm, ending with RS facing for next row.
Shape shoulders and back neck
Next row (RS): Cast off 4 [5: 5: 6: 7] sts, patt until there are 19 [20: 22: 23: 25] sts on right needle and turn, leaving rem sts on a holder.
Work each side of neck separately.
Keeping patt correct, dec 1 st at neck edge of next 4 rows and at same time cast off 5 [5: 6: 6: 7] sts at beg of 2nd and foll alt row.
Work 1 row.
Cast off rem 5 [6: 6: 7: 7] sts.
With RS facing, rejoin yarn to sts on holder, cast off centre 22 [22: 24: 24: 26] sts, patt to end.
Complete to match first side, reversing shapings.
Pocket Linings (make 2)
Using 5mm (US 8) needles cast on 24 [24: 24: 28: 28] sts.
Work in patt as folls:
Row 1 (RS): P1, K2, *P2, K2, rep from * to last st, P1.
Row 2: Purl.
These 2 rows form patt.
Cont in patt for a further 41 [41: 41: 43: 43] rows, ending with WS facing for next row.
Break yarn and leave sts on a holder.
Left Front
Using 4½mm (US 7) needles cast on 50 [55: 60: 65: 72] sts. Work in patt as folls:
Row 1 (RS): P0 [0: 0: 1: 0], K0 [1: 2: 2: 2], *P2, K2, rep from * to last 2 sts, P2.
Row 2: Purl.
These 2 rows form patt.
Cont in patt for a further 10 rows, ending with RS facing for next row.
Change to 5mm (US 8) needles.
Cont in patt until left front meas 25 [25: 26: 27: 27] cm, ending with RS facing for next row.
Place pocket
Next row (RS): Patt 9 [10: 11: 12: 15] sts, cast off next 24 [24: 24: 28: 28] sts in patt, patt to end.
Next row: P17 [21: 25: 25: 29], then P across WS of 24 [24: 24: 28: 28] sts of first pocket lining, P rem 9 [10: 11: 12: 15] sts.
Cont straight until 30 rows less have been worked than on back to beg of armhole shaping, ending with RS facing for next row.
Shape front slope
Next row (RS): Patt to last 5 sts K2tog, K1, P2.
Next row: Purl.
Next row: Patt to last 4 sts, K2, P2.
Next row: Purl.
Working all front slope decreases as set by first of last 4 rows and keeping front opening edge 4 sts in patt as set by last 4 rows, dec 1 st at front slope edge of next and 1 [0: 2: 0: 2] foll 4th rows, then on 3 [4: 2: 4: 2] foll 6th rows. 44 [49: 54: 59: 66] sts.
Work 3 [1: 5: 1: 5] rows, ending with RS facing for next row.
Shape armhole
Keeping patt correct, cast off 4 [4: 5: 6: 7] sts at beg and dec 0 [0: 1: 0: 1] st as set at end of next row.
40 [45: 48: 53: 58] sts.
Work 1 row.
Dec 1 st at armhole edge of next 3 [5: 5: 7: 7] rows, then on foll 4 [5: 6: 6: 8] alt rows and at same time dec 1 st at front slope edge as set on next [3rd: 5th: 3rd: 5th] and 1 [2: 2: 2: 3] foll 6th rows. 31 [32: 34: 37: 39] sts.
Dec 1 st at front slope edge only on 2nd [6th: 6th: 2nd: 6th] and 6 [5: 5: 6: 5] foll 6th rows.
24 [26: 28: 30: 33] sts.
Cont straight until left front matches back to beg of shoulder shaping, ending with RS facing for next row.
Shape shoulder
Cast off 4 [5: 5: 6: 7] sts at beg of next and foll 0 [2: 0: 2: 3] alt rows, then 5 [6: 6: 7: -] sts at beg of foll 3 [1: 3: 1: -] alt rows. 5 sts.
Cont in patt on these 5 sts only (for back neck border extension) until this strip meas 8 [8: 8.5: 8.5: 9] cm, ending with RS facing for next row.
Cast off.
Mark positions for 5 buttons along left front opening edge – first button to come level with row 13, last button to come just below beg of front slope shaping, and rem 3 buttons evenly spaced between.
Right Front
Using 4½mm (US 7) needles cast on
50 [55: 60: 65: 72] sts.
Work in patt as folls:
Row 1 (RS): *P2, K2, rep from * to last 2 [3: 0: 1: 0] sts, P2 [2: 0: 1: 0], K0 [1: 0: 0: 0].
Row 2: Purl.
These 2 rows form patt.
Cont in patt for a further 10 rows, ending with RS facing for next row.
Change to 5mm (US 8) needles.
Row 13 (buttonhole row) (RS): P2, K1, sl 1, K1, psso, yfrn (to make a buttonhole), patt to end.
Making a further 4 buttonholes in this way to correspond with positions marked for buttons on left front and noting that no further reference will be made to buttonholes, cont as folls: Cont in patt until right front meas 25 [25: 26: 27: 27] cm, ending with RS facing for next row.
Place pocket
Next row (RS): Patt 17 [21: 25: 25: 29] sts, cast off next 24 [24: 24: 28: 28] sts in patt, patt to end.
Next row: P9 [10: 11: 12: 15], then P across WS of 24 [24: 24: 28: 28] sts of second pocket lining, P rem 17 [21: 25: 25: 29] sts. Cont straight until 30 rows less have been worked than on back to beg of armhole shaping, ending with RS facing for next row.
Shape front slope
Next row (RS): P2, K1, sl 1, K1, psso, patt to end.
Next row: Purl.
Next row: P2, K2, patt to end.
Next row: Purl.
Working all front slope decreases as set by first of last 4 rows and keeping front opening edge 4 sts in patt as set by last 4 rows, complete to match left front, reversing shapings.
Sleeves
Using 4½mm (US 7) needles cast on 40 [42: 44: 44: 46] sts. Work in patt as folls:
Row 1 (RS): P1 [0: 0: 0: 0], K2 [0: 1: 1: 2], *P2, K2, rep from * to last 1 [2: 3: 3: 0] sts, P1 [2: 2: 2: 0], K0 [0: 1: 1: 0].
Row 2: Purl.
These 2 rows form patt.
Cont in patt for a further 10 rows, ending with RS facing for next row.
Change to 5mm (US 8) needles.
Cont in patt, shaping sides by inc 1 st at each end of next and every foll 8th row to 50 [50: 48: 68: 70] sts, then on every foll 10th row until there are 62 [64: 66: 70: 72] sts, taking inc sts into patt.
Cont straight until sleeve meas 44 [45: 46: 46: 46] cm, ending with RS facing for next row.
Shape top
Keeping patt correct, cast off 4 [4: 5: 6: 7] sts at beg of next 2 rows. 54 [56: 56: 58: 58] sts.
Dec 1 st at each end of next 3 rows, then on foll 2 alt rows, then on 5 [5: 6: 6: 7] foll 4th rows.
34 [36: 34: 36: 34] sts.
Work 1 row, ending with RS facing for next row.
Dec 1 st at each end of next and every foll alt row until 26 sts rem, then on foll 5 rows, ending with RS facing for next row. Cast off rem 16 sts.
Making Up
Press as described on the information page.
Join both shoulder seams using back stitch, or mattress stitch if preferred. Join cast-off ends of back neck border extensions, then sew one edge to back neck.
See information page for finishing instructions, setting in sleeves using the set-in method.
-
Click image to enlarge

What's the best part about knitting a cardigan?
Read NextSense and Sensibility Knit Cardigan
Your Recently Viewed Projects
Thanks for your comment. Don't forget to share!
schiebet
Mar 06, 2017
If you've never knit a sweater before but have some knitting experience, this would be a good first sweater to try. It looks like a good basic sweater pattern that isn't too complicated.
Linda
Feb 06, 2017
I like the simple design of the this cardigan from Rowan. I plan to knit in the yarn specified in the pattern.
Report Inappropriate Comment
Are you sure you would like to report this comment? It will be flagged for our moderators to take action.
Thank you for taking the time to improve the content on our site.