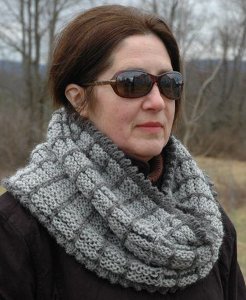
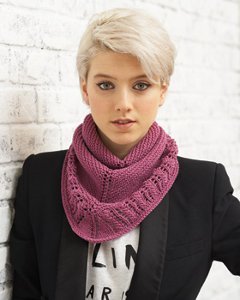
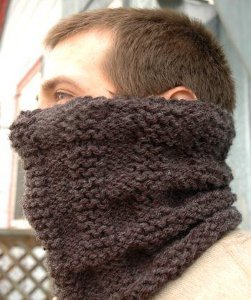
Mystic Vines Cable Cowl
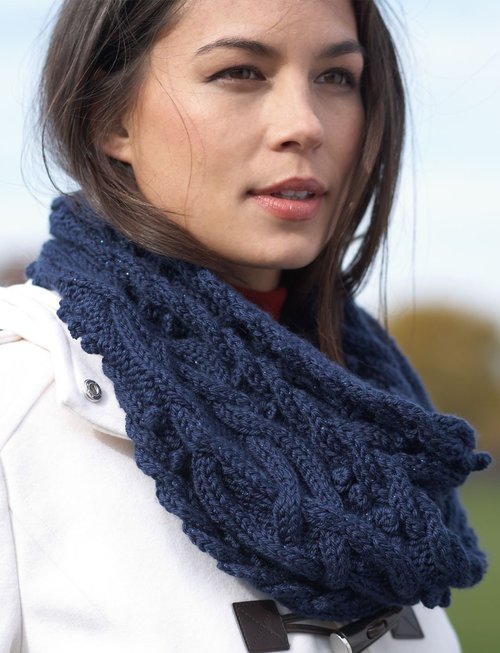
Get tangled up in the Mystic Vines Cable Cowl. This intricate cable knit cowl pattern is a beautiful cold weather knit to add to your fall and winter wardrobe. The pattern uses Bernat Satin Sparkle, which adds an extra shimmer to your knitting and makes this cowl even more mystical. We love the deep blue color of this cowl, but feel free to use any other worsted weight sparkly yarn for that ethereal look. So next time you're in a magical mood, get out your needles and knit up the Mystic Vines Cable Cowl.

Knitting Needle Size8 or 5 mm
Yarn Weight(4) Medium Weight/Worsted Weight and Aran (16-20 stitches to 4 inches)
Materials:
- Bernat® Satin Sparkle™ (80 g/2.8 oz: 146 m/160 yds)
- Sapphire (53110) 2 balls
- Size 5 mm (U.S. 8) knitting needles or size needed to obtain gauge
- Cable needle
GAUGE
18 sts and 24 rows = 4" [10 cm] in stocking st.
ABBREVIATIONS
Alt = Alternate(ing)
Approx = Approximately
Beg = Beginning
C4B = Slip next 2 stitches onto a cable needle and leave at back of work. K2, then K2 from cable needle.
C4F = Slip next 2 stitches onto a cable needle and leave at front of work. K2, then K2 from cable needle.
C6B = Slip next 3 stitches onto a cable needle and leave at back of work. K3, then K3 from cable needle.
C6F = Slip next 3 stitches onto a cable needle and leave at front of work. K3, then K3 from cable needle.
Cont = Continue
K = Knit
MB = [(K1. P1) 3 times. K1] all in next stitch. Slip 6th, 5th, 4th, 3rd, 2nd and first stitches separately over 7th stitch. 1 stitch remains -Bobble complete.
P = Purl
Pat = Pattern
Rep = Repeat(s)
RS = Right side
St(s) = Stitch(es)
Tog = Together
T4B = Slip next stitch onto a cable needle and leave at back of work. K3, then P1 from cable needle.
T4F = Slip next 3 stitches onto a cable needle and leave at front of work. P1, then K3 from cable needle.
MEASUREMENTS
Approx 6" x 46" [15 x 117 cm].
INSTRUCTIONS
Cable Panel A (worked over 30 sts). (See Chart)
1st row: (RS). P2. MB. P2. C6F. P8. C6F. P2. MB. P2.
2nd and alt rows: Knit all knit sts and purl all purl sts as they appear.
3rd and 5th rows: P5. K6. P8. K6. P5.
7th row: P2. MB. P2. C6F. P8. C6F. P2. MB. P2.
9th row: P4. T4B. T4F. P6. T4B. T4F. P4.
11th row: P3. T4B. P2. T4F. P4. T4B. P2. T4F. P3.
13th row: P3. K3. P4. T4F. P2. T4B. P4. K3. P3.
15th row: P3. T4F. P4. T4F. T4B. P4. T4B. P3.
17th row: P4. T4F. P4. C6B. P4. T4B. P4.
19th row: P2. MB. P2. (T4F. P2. T4B) twice. P2. MB. P2.
21st row: P6. (T4F. T4B. P2) twice. P6.
23rd row: P2. MB. P4. (C6F. P4) twice. P4. MB. P2.
25th row: P6. (T4B. T4F. P2) twice. P4.
27th row: P2. MB. P2. (T4B. P2. T4F) twice. P2. MB. P2.
29th row: P4. T4B. P4. C6B. P4. T4F. P4.
31st row: P3. T4B. P4. T4B. T4F. P4. T4F. P3.
33rd row: P3. K3. P4. T4B. P2. T4F. P4. K3. P3.
35th row: P3. T4F. P2. T4B. P4. T4F. P2. T4B. P3.
37th row: P4. T4F. T4B. P6. T4F. T4B. P4.
38th row: As 2nd row.
These 38 rows form Cable Panel A.
Cable Panel B (worked over 6 sts). (See Chart)
1st row: (RS). C6B.
2nd and alt rows: P6.
3rd and 5th rows: K6.
6th row: P6.
These 6 rows form Cable Panel B.
Cable Panel C (worked over 6 sts). (See Chart)
1st row: (RS). C6F.
2nd and alt rows: P6.
3rd and 5th rows: K6.
6th row: P6.
These 6 rows form Cable Panel B.
Cast on 42 sts.
1st row: (RS). K6. P5. K6. P8. K6. P5. K6.
2nd row: P6. K5. P6. K8. P6. K5. P6.
Proceed in pat as follows:
1st row: (RS). Work 1st row of Cable Panel B. Work 1st row of Cable Panel A. Work 1st row of Cable Panel C.
2nd row: Work 2nd row of Cable Panel C. Work 2nd row of Cable Panel A. Work 2nd row of Cable Panel B.
3rd row: Work 3rd row of Cable Panel B. Work 3rd row of Cable Panel A. Work 3rd row of Cable Panel C.
4th row: Work 4th row of Cable Panel C. Work 4th row of Cable Panel A. Work 4th row of Cable Panel B.
Cabel Panels A, B and C are now in position.
Cont in pat until work from beg measures approx 46" [117 cm], ending on a 38th row of Cable Panel A. Cast off.
Sew cast on and cast off edges tog.
Read NextBeginner Eiffel Knit Cowl
Your Recently Viewed Projects

Thanks for your comment. Don't forget to share!
The Designing Peng uin
May 31, 2016
a fun knit that results in a dramatic cowl or neckwarmer... could double the length or knit it half as long again and have an equally dramatic infinity scarf ?? any thoughts??
carol 0738465
Nov 07, 2015
This is a complicated pattern for my level, but I want to try it. I'm confused about what happens after the first 4 rows of the pattern. Do I continue with Rows 5 and 6 of A,B,and C?
Lisa
Jun 03, 2016
This is an intermediate pattern but it is well wrtitten so a new knitter can follow it easily, the instructions are written line by line so any knitter can complete the pattern if they follow the directions completely and carefully. My best suggestion for you is toead the pattern over many times until you can visualize what you'll be doing, you are using multiple instructions for each row and you may find stitch markers, lots of them helpful. Happy knitting.
ngocminh95 2441979
Jul 14, 2015
Thanks for the pattern of the nice scarf. I will try some time. N. Minh
wdavis9 8945695
Apr 21, 2015
I am really enjoying knitting this cowl. Since the pattern is informal, i.e. wandering vines, if I make a mistake, I just drift the vines back into place in later rows rather than rip out rows. I'm also deliberately adding bobbles where they're not supposed to be , and ignoring it when i forget to produce one where it's not supposed to be. I'm really enjoying using artistic license to create a beautiful wandering vines cowl. I think I'll knit several more in different colors and types of yarn.
piebirdsue 9905477
Dec 31, 2013
Your name for this cowl in my email was "Milky Way" cowl. It has another name once you search for the pattern. I have seen this happen before, and it makes it harder for me to locate the pattern in the future.
Report Inappropriate Comment
Are you sure you would like to report this comment? It will be flagged for our moderators to take action.
Thank you for taking the time to improve the content on our site.