Stockings in a Row Pillow
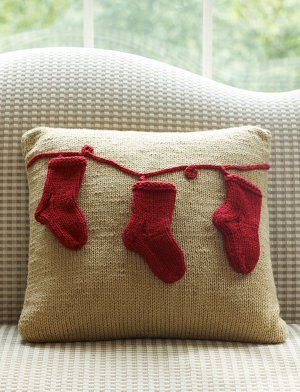
Decorating the house for Christmas is not only a time of excitement and anticipation for the coming celebrations, but an emotional time of reflection. The Stockings in a Row Pillow is one of those timeless knit Christmas patterns that will bring a smile to your face as you take it down from the attic. This charming knitted pillow pattern features a simple stockinette stitch base with an appliqued row of deep red stockings. Festive enough to bring holiday cheer to any room, yet subtle enough to blend in with a number of different color palettes, the Stockings in a Row Pillow is a timeless Christmas knit you're sure to treasure for years.

Knitting Needle Size8 or 5 mm
Yarn Weight(4) Medium Weight/Worsted Weight and Aran (16-20 stitches to 4 inches)
Materials:
- RED HEART® With Love® (Art. E400 available in solid color 7 oz (198g), 370 yd (338m) and multicolor 5 oz (141g), 230 yd (211m) skeins) : 2 skeins 1308 Tan A, 1 skein 1914 Berry Red B.
- Susan Bates Knitting Needles: 5mm [US 8] and 5mm [US 8]
- crochet hook
- Yarn needle, Sewing needle and thread to match B
- 1 - 18” x 18” [46 cm x 46 cm] poly pillow form
GAUGE: 16 sts = 4” [10 cm]; 24 rows = 4” [10 cm]; in Stockinette stitch.
CHECK YOUR GAUGE. Use any size needles to obtain the gauge.
ABBREVIATIONS
A = Color A
B = Color B
K= knit
mm = millimeters
P = Purl
sl = slip
sl st = slip stitch
st(s) = stitch(es)
St st = Stockinette stitch
tog = together
[ ] = work directions in brackets the number of times specified
* or ** = repeat whatever follows the * or ** as indicated.
Special Stitches
K2tog/P2tog = Knit 2 stitches together/purl 2 stitches together. To knit/purl 2 stitches together, insert the right needle into two stitches at the same time and knit or purl. This will result in a decrease of one stitch. This decrease will slant to the right.
Sl 1 = Slip 1. To slip one stitch, insert the right needle into the next stitch on the left needle as if you were knitting the stitch. Pull this stitch off the left needle. The stitch is now on the right needle and twisted.
SSK = Slip, slip, knit. Slip the first stitch as if to knit, then slip the next stitch as if to knit. Insert the left needle into the front of both slipped stitches and knit them together. This decrease will slant to the left.
TBL = Through the back loop. Knit into the back of the stitch instead of the front of the stitch.
Pillow measures: 18” x 18” [46 cm x 46 cm]
NOTES
1. Stocking embellishments are knit flat and sewn together.
2. To make an I-Cord Cast on 3 sts. Slide stitches to opposite side of needle. The yarn should be coming out of the left stitch. Pull the yarn from behind. *K3. Slide stitches across needle. Repeat from * until desired length. To bind off, thread yarn through yarn needle and pull it through all
3 stitches 2 or 3 times, fasten off.
PILLOW
Make 2 (Front and Back)
With A, cast on 72 sts.
Row 1 (Right Side): Knit.
Row 2 (Wrong Side): Purl.
Continue working in Stockinette st (knit on right side, purl on wrong side) until piece measures 18” [46 cm] from beginning.
Bind off all sts.
STOCKINGS
Make 3
Cuff
With B, cast on 23 sts.
Rows 1-4: Knit.
Rows 5 (Right Side): Knit.
Row 6 (Wrong Side): Purl.
Continue working in Stockinette st (knit on right side, purl on wrong side) until piece measures 3” [7.5 cm] from beginning, ending on a wrong side row.
Heel Flap
Next Row (Right Side): K6, turn, leaving remaining sts unworked.
Work 9 rows in Stockinette st on the 6 sts, ending on a wrong side row.
Next Row (Right Side): K2, k2tog, k2, turn.
Next Row (Wrong Side): Sl 1, p4, turn.
Next Row (Right Side): K2, k2tog, k1, turn.
Next Row (Wrong Side): Sl 1, p3, turn.
Next Row (Right Side): K1, k2tog, k1, don’t turn.
Pick up and knit 7 sts along side of heel flap, knit across all remaining sts – 27 sts.
Next Row (Wrong Side): P6, turn.
Work 9 rows in Stockinette st on the 6 sts, ending on a right side row.
Next Row (Wrong Side): P2, p2tog, p2, turn.
Next Row (Right Side): Sl 1, k4, turn.
Next Row (Wrong Side): P2. P2tog, p1, turn.
Next Row (Right Side): Sl 1. K3, turn.
Next Row (Wrong Side): P1, p2tog, p1, don’t turn.
Pick up and purl 7 sts along side of heel flap, purl across remaining sts – 31 sts.
Instep
Row 1: K8, k2tog, k11, ssk, k8 – 29 sts.
Row 2: P7, p2tog tbl, p11, p2tog, p7 – 27 sts.
Row 3: K6, k2tog, k11, ssk, k6 – 25 sts.
Row 4: P5, p2tog tbl, p11, p2tog, p5 – 23 sts.
Row 5: K4, k2tog, k11, ssk, k4 – 21 sts.
Work even in Stockinette st for 2” [5 cm], ending on a wrong side row.
Toe
Next Row (Right Side): K1, k2tog, k5, k2tog, k1, ssk, k5, ssk, k1 – 17 sts.
Next Row (Wrong Side): Purl.
Next Row (Right Side): Knit.
Next Row (Wrong Side): Purl.
New Row (Right Side): K1, k2tog, k3, k2tog, k1, ssk, k3, ssk, k1 – 13 sts.
Cut yarn leaving a 15” [38 cm] tail. With yarn needle, draw tail through remaining sts twice, fasten securely. Sew bottom and side seam.
With crochet hook, chain 6 and attach at top of stocking near seam. Fasten to stocking to form a loop. Fasten off. Weave in ends.
Chain
With B and crochet hook, make a chain that measures 28” [71 cm]. I-cord may be substituted for chain, see instructions under NOTES.)
FINISHING
Block front and back pillow pieces lightly to remove all wrinkles and flatten curling edges. With matching thread and sewing needle, sew chain or I-cord to pillow front using photo as a guide. Sew stocking loops to chain/I-cord using photo as a guide. Tack down toe on stockings to pillow top. With right sides facing, place front and back pieces together. Using yarn needle, stitch seams together on three sides. Turn piece right side out and insert poly pillow form. Stitch the fourth side seam closed. Weave in all ends.
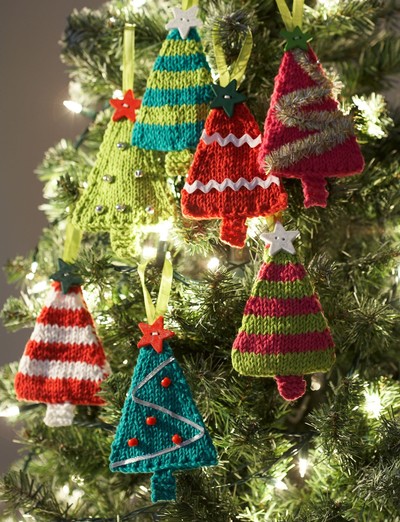
Read NextTiny Tree Ornaments