Glam Ruffled Cardigan
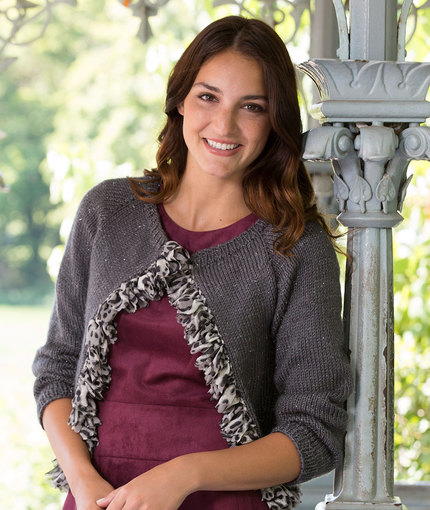
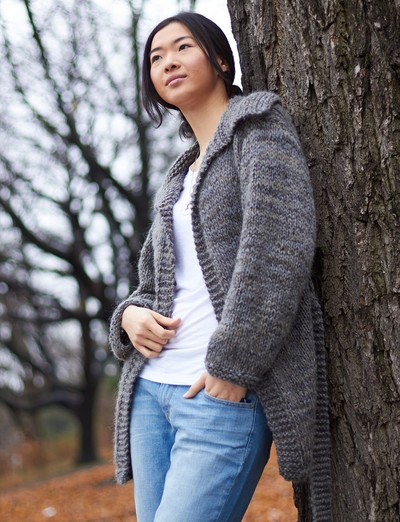
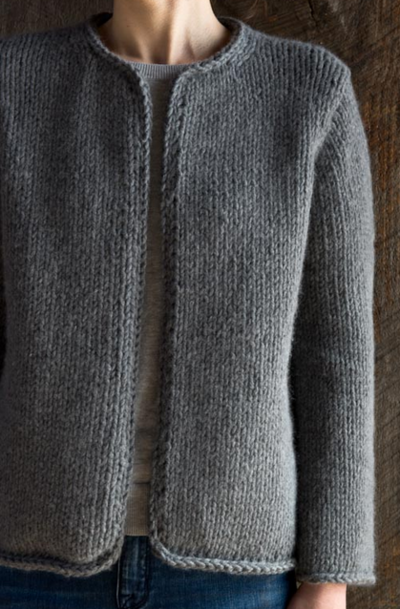
Add some sparkle and shine to your wardrobe with the stylish Glam Ruffled Cardigan. You are sure to turn heads when you wear this ruffled knit cardigan. The subtle sparkle and leopard print gives this free knit pattern an extra special touch. You can dress up this piece or wear it in a more casual fashion. This knitted cardigan uses circular needles and features raglan sleeve styling, so it can easily fit a wide variety of body types. Work up this beautiful sweater for yourself and prepare to receive many, many compliments. Looking glamorous has never been so easy.
NotesGAUGE: 17 sts = 4” (10 cm); 23 rows = 4”
(10 cm) in Stockinette st on larger needles.
CHECK YOUR GAUGE. Use any size needles to obtain the gauge.
Directions are for size Small. Changes for sizes Medium, Large, XL and 2XL are in parentheses.
Finished Measurements:
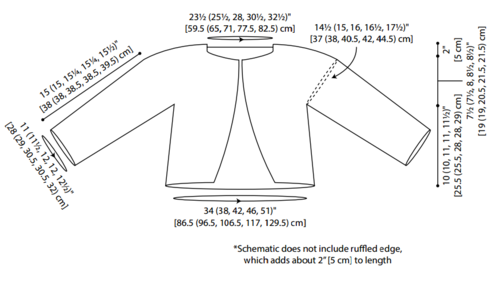
To Fit Bust: 34 (38, 42, 46, 50)” [86.5 (96.5, 106.5, 117, 129.5) cm].
Length: 21½ (21½, 23, 23½, 24)” [54.5 (54.5,
58.5, 59.5, 61) cm], including ruffled edging
1. Cardigan is worked in one piece from
neck down.
2. No increases are made at the front
edging, decreases are worked for the
fronts on body part.
3. At the underarms, stitches are placed
on holders for sleeves, then the body is
continued in one piece.
4. When body has been completed, stitches
on holders are picked up for the sleeves,
then sleeves are worked in rows down to
lower edge. Sleeves are designed to end
a few inches (cm’s) above wrist. If desired,
continue in Stockinette Stitch to make
longer sleeves.
5. Boutique Sassy Fabric has holes running
along one side. You will be knitting into
each hole.
Special Stitches
ssk (slip, slip, knit) = Slip next 2 stitches, one at a time as if to knit, to right needle, insert point of left needle through front of stitches, knit these sts together through back loop – 1 st decreased.

Knitting Needle Size8 or 5 mm, 9 or 5.5 mm, Circular Knitting Needles
Yarn Weight(4) Medium Weight/Worsted Weight and Aran (16-20 stitches to 4 inches)
Materials List
- RED HEART® Sparkle Soft™: 3 (4, 4, 5, 5) balls 9404 Charcoal A
- RED HEART® Boutique Sassy Fabric™: 1 (1, 1, 1, 1) ball 9942 Snow Leopard B
- Susan Bates® Circular Knitting Needles: 5mm [US 8] 16” and 5.5mm [US 9] 32”
- 4 stitch markers, 2 stitch holders, yarn needle
Pattern Stitches
1x1 Rib (over an odd number of stitches)
Row 1: K1, *p1, k1; repeat from * to end of row.
Row 2: P1, *k1, p1; repeat from * to end of row. Repeat Rows 1-2 for 1x1 Rib
1x1 Rib (over an even number of stitches)
Row 1: *K1, p1; repeat from * to end of row. Repeat Row 1 for 1x1 Rib.
Cardigan
Yoke
Neckband: With A and smaller size needles, cast on 99 (109, 119, 129, 139) sts. Work in 1x1 Rib until neckband measures ¾” (2 cm) from cast on edge.
Next Row (right side): K1, p1, knit to last 2 sts increasing 13 (15, 17, 19, 21) sts evenly, p1, k1—112 (124, 136, 148, 160) sts.
Raglan Set-up Row
Change to larger needles.
Row 1 (wrong side): Work first 2 sts in established Rib pattern, p20 (23, 26, 29, 32), place marker, yo, p18, yo, place marker, p2, yo, p28 (34, 40, 46, 52), yo, place marker, p2, yo, p18, yo, place marker, p20 (23, 26, 29, 32), work last 2 sts in established Rib—118 (130, 142, 154,166) sts.
Row 2 (right side): Work 2 Rib sts, knit all purl sts, and knit yo’s through the back loop to last 2 sts, work 2 Rib sts.
Row 3: Work 2 Rib sts, purl to marker, slip marker, yo, [purl to next marker, yo, slip marker, p2, yo] 2 times, purl to next marker, yo, slip marker, purl to last 2 sts, work 2 Rib sts—124 (136, 148, 160, 172) sts.
Row 4: Repeat Row 2.
Repeat Rows 3 and 4 until there are 220 (238, 256, 274, 292) sts on needle, ending with a right side row, removing markers on last row.
Body
Divide for Body and Sleeves
Next Row (wrong side): Work 2 Rib sts, p19 (22, 25, 28, 31) for front, slip 56 (58, 60, 62, 64) sts to stitch holder for sleeve, cast on 3 (3, 4, 4, 5) sts, place marker, cast on 3 (3, 4, 4, 5) sts for underarm, p66 (74, 82, 90, 98) for back, slip next 56 (58, 60, 62, 64) sts to holder for sleeve, cast on 3 (3, 4, 4, 5) sts, place marker, cast on 3 (3, 4, 4, 5) sts for underarm, p19 (22, 25, 28, 31), work 2 Rib sts—120 (134, 152, 166, 184) sts.
Rows 1-5: Work these 120 (134, 152, 166, 184) body sts in established pattern (Stockinette Stitch with edge sts in Rib).
Row 6 (wrong side): Work to 2 sts before marker, p2tog, slip marker, work to next marker, slip marker, p2tog, work to end— 118 (132, 150, 164, 182) sts.
Rows 7-24: Repeat Rows 1-6, 3 times—112 (126, 144, 158, 176) sts.
Rows 25-27: Repeat Row 1.
Row 28: Repeat Row 6—110 (124, 142, 156, 174) sts.
Rows 29-56 (29-56, 29-60, 29-60, 29-64): Repeat last 4 rows 7 (7, 8, 8, 9) times—96 (110, 126, 140, 156) sts.
Rows 57 (57, 61, 61, 65): Work 1 row in Rib pattern.
Bind off all sts in Rib pattern.
Sleeves (make 2)
Set Up Row: From right side using larger size needles, cast on 3 (3, 4, 4, 5) sts, k56 (58, 60, 62, 64) sleeve sts from holder, cast on 3 (3, 4, 4, 5) sts—62 (64, 68, 70, 74) sts.
Rows 1-9: Work in Stockinette st.
Row 10 (Decrease Row): K1, k2tog, knit to last 3 sts, ssk, k1—60 (62, 66, 68, 72) sts. Repeat last 10 Rows 7 (7, 8, 8, 9) times—46 (48, 50, 52, 54) sts.
Work even in Stockinette st until sleeve measures 15 (15, 15¼, 15¼, 15½)” [38 (38, 38.5, 38.5, 39.5) cm] from underarm or to desired length. Change to smaller needles and work in rib for ¾” [2 cm]. Bind off in Rib
Ruffled Edging
With right side facing, larger size needles and B, beginning at left front neck edge, pick up 1 purl st in rib edging every 2nd row; for back, *pick up 1 st in each of next 3 sts, skip next st; repeat from * to next corner, at right front edge, pick up 1 purl st in rib edging every 2nd row.
Bind off all sts
Finishing
With Yarn Needle and using Mattress Stitch, neatly sew sleeve and underarm seams together. Weave in ends.
Abbreviations
- A, B
- Color A, Color B
- k
- knit
- k2tog
- knit next 2 stitches together
- p
- purl
- p2tog
- purl next 2 stitches together
- st(s)
- stitch(es)
- yo
- yarn over
- []
- work directions in brackets the number of times specified
- *
- repeat whatever follows the * as indicated
Read NextMagical Top Down Cardigan
Your Recently Viewed Projects
Lisa
Dec 08, 2016
I was wondering what else I could use that ruffled yarn for. I've made so many potato chip scarves with it that I'm definitely ready for something new! This is cute and different. Being made top down is a plus so it can be tried on before it's finished. Thanks for including the schematic. It really helps me visualize the project.
Report Inappropriate Comment
Are you sure you would like to report this comment? It will be flagged for our moderators to take action.
Thank you for taking the time to improve the content on our site.

