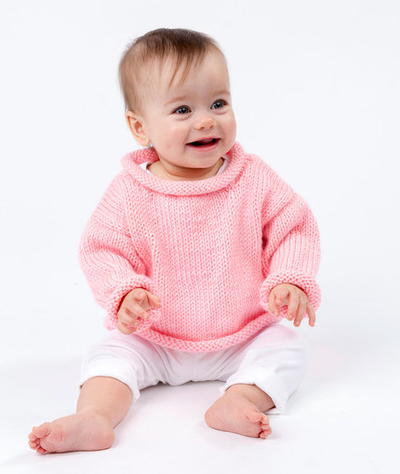
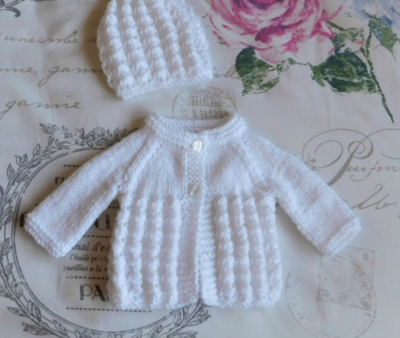
Fairy Lace Baby Cardi

Watch baby as she floats around the garden in this pretty feather and fan lace knit cardigan. The Fairy Lace Baby Cardi is a beautiful light-weight cardigan pattern perfect for spring and summer. This adorable pattern features raglan sleeves and three little buttons on the upper portion of the sweater. The Fairy Lace Baby Cardi is dressy enough for an Easter outfit, but casual enough for your little fairy to wear to the park.

Knitting Needle Size4 or 3.5 mm, 6 or 4 mm, Circular Knitting Needles, Double-Pointed Knitting Needles (DPNs)
Yarn Weight(3) Light/DK (21-24 stitches to 4 inches)
Materials:
- Bernat® Baby Coordinates™ (Ombres: 120 g/4.25 oz; 358 m/392 yds)
- Sizes 6 12 18 24 mos
- Pink Parade (49303) 1 1 2 2 ball(s)
- Sizes 3.5 mm (U.S. 4) and 4 mm (U.S. 6) circular knitting needles 24" [60 cm] long
- Sets of four sizes 3.5 mm (U.S. 4) and 4 mm (U.S. 6) double-pointed needles or size needed to obtain gauge
- 4 stitch markers
- 3 buttons
- 2 stitch holders
GAUGE
22 sts and 30 rows = 4" [10 cm] in stocking st with larger needles.
ABBREVIATIONS
Approx = Approximately
Beg = Beginning
Cont = Continue(ity)
Inc = Increase 1 stitch by knitting into front and back of next stitch
K = Knit
K2tog = Knit next 2 stitches together
M1 = Make 1 stitch by picking up horizontal loop lying before next stitch and knitting into back of loop
P = Purl
Pat = Pattern
Rem = Remain(ing)
Rep = Repeat
RS = Right side
Rnd(s) = Round(s)
St(s) = Stitch(es)
Ssk = Slip next 2 stitches knitwise one at a time. Pass them back onto left-hand needle, then knit through back loops together
WS = Wrong side
Yo = Yarn over
SIZES
To fit chest measurement
6 mos 17" [ 43 cm ]
12 mos 18" [ 45.5 cm ]
18 mos 19" [ 48 cm ]
24 mos 20" [ 51 cm ]
Finished chest
6 mos 19" [ 48 cm ]
12 mos 20" [ 51 cm ]
18 mos 21½" [ 54.5 cm ]
24 mos 23½" [ 59.5 cm ]
Instructions
The instructions are written for smallest size. If changes are necessary for larger sizes the instructions will be written thus ( ). Numbers for each size are shown in the same color throughout the pattern. When only one number is given in black, it applies to all sizes.
Note: Cardigan is worked in one piece beg at neck edge. When yoke shaping is complete, sleeves are worked in rnds on set of four double-pointed needles.
With larger circular needle, cast on 38 (38-38-44) sts. Do not join.
Working back and forth across needle in rows, proceed as follows:
Foundation row: (WS). P3. Place marker. P4 (4-4-6). Place marker. P24 (24-24-26). Place marker. P4 (4-4-6). Place marker. P3.
1st row: (RS). K1. M1. K1. yo. K1. Slip marker. K1. yo. *Knit to 1 st before next marker. yo. K1. Slip marker. K1. yo. Rep from * twice more. K1. M1. K1. 10 sts increased.
2nd row: Purl.
3rd row: K1. M1. (Knit to 1 st before next marker. yo. K1. Slip marker. K1. yo) 4 times. Knit to last st. M1. K1. 10 sts increased.
4th row: Purl.
Rep last 2 rows 4 (4-4-5) times more. 98 (98-98-114) sts. Neck shaping is now complete.
1st row: (RS). (Knit to 1 st before next marker. yo. K1. Slip marker. K1. yo) 4 times. Knit to end of row. 8 sts increased.
2nd row: Purl.
Rep last 2 rows 6 (7-8-9) times more. 154 (162-170-194) sts. Raglan shaping is now complete.
Dividing row: (RS). K22 (23-24-27) (Left Front). Place next 30 (32- 34-40) Sleeve sts on a st holder. Cast on 6 (6-8-8) sts. K50 (52-54-60) (Back). Place next 30 (32-34-40) Sleeve sts on a st holder. Cast on 6 (6-8-8) sts. K22 (23-24-27) (Right Front). 106 (110-118-130) sts for Body.
Beg with a purl row, work 6 (6-8-8) rows in stocking st.
**Next row: (WS). Knit.
Next 2 rows: Knit.
Next row: (RS). K1. *yo. K2tog. Rep from * to last st. K1.
Next 2 rows: Knit.**
Sizes 6 mos, 12 mos and 24 mos only: Next row: (WS). [K5 (6-4). M1] 21 (17-31) times. K1 (8-6). 127 (127-161) sts. Place marker at each end of last row.
Size 18 mos only: Next row: (WS). (K4. M1. K5. M1) 13 times. K1. 144 sts. Place marker at each end of last row.
All sizes: Proceed in Lace Pat as follows:
(See Chart on page 3).
1st row: (RS). P3. K2tog. yo. P2. *(K2tog) twice. (yo. K1) 3 times. yo. (ssk) twice. P2. K2tog. yo. P2. Rep from * to last st. P1.
2nd row: K3. P2. K2. *P11. K2. P2. K2. Rep from * to last st. K1.
3rd row: P3. yo. ssk. P2. *K11. P2. yo. ssk. P2. Rep from * to last st. P1.
4th row: K3. P2. K2. *K13. P2. K2. Rep from * to last st. K1.
These 4 rows form Lace Pat.
Cont in Lace Pat until work from marked row measures approx 5½ (6-7½-8½)" [14 (15-19-21.5) cm], ending on a 2nd row of Lace Pat.
Next row: Knit, inc 1 (1-0-1) st in center of row. 128 (128-144-162) sts.
Work from ** to ** as given above.
Cast off knitwise (WS).
Sleeves: With set of 4 larger double-pointed needles, beg at center of underarm cast on sts, pick up and knit 3 (3-4-4) sts. K30 (32-34-40) Sleeve sts. Pick up and knit 3 (3-4-4) sts across rem of underarm cast on edge. 36 (38-42-48) sts. Join in rnd, placing a marker on first st.
Knit in rnds until Sleeve measures 4 (5-5½-6)" [10 (12.5-14-15) cm].
Change to set of 4 smaller double-pointed needles.
Next rnd: Purl.
Next rnd: Knit.
Next rnd: Purl.
Next rnd: K1. *yo. K2tog. Rep from * to last st. K1.
Next rnd: Purl.
Next rnd: Knit.
Cast off purlwise.
Edging: With RS facing and smaller circular needle, beg at cast off edge, pick up and knit 47 (50-54-60) sts up Right Front edge to end of neck shaping, 10 (11-11-13) sts up neck edge, 36 (36-36-42) sts across cast on edge, 10 (11-11-13) sts down neck edge and 47 (50-54-60) sts down Left Front edge. 150 (158-166-188) sts. Do not join. Working back and forth across needle in rows, proceed as follows:
1st and 2nd rows: Knit.
3rd row: (WS). Knit to last 48 (50-54-60) sts. *Cast off 2 sts. K5 (5-6-6) (including st on needle after cast off). Rep from * once more. Cast off 2 sts. Knit to end of row. 3 buttonholes made.
4th row: Knit, casting on 2 sts over cast off sts.
Cast off knitwise (WS). Sew on buttons to correspond to buttonholes.
Read NextEasy Baby Cardigan
Your Recently Viewed Projects
Thanks for your comment. Don't forget to share!
Member 5276562
Nov 27, 2016
The marker placing in the set up row doesn't match the marker placing it in the next row. This wouldnt be such a big deal if the following rows didn't rely on the marker placing. . .like "knit until the 1st stitch before the next marker". . .but since the markers are in the wrong place, this pattern needs to be edited.
anabelleberry 9251 538
Sep 13, 2016
Are there any corrections for this pattern? Following the instructions, after dividing for sleeves, there are more stitches on the right front than on the left front. Is this correct??
quanahs 5032097
Jun 01, 2016
Pretty little baby sweater that starts off with a simple raglan yoke knit in stockinette stitch and becomes more challenging when you reach the lovely lace elements. The good news is the lace pattern is only four rows so it should not be too difficult to memorize. One thing I've learned about lace knits it to finish the pattern repeats before putting the garment down. In this case, knit all four rows before stopping. This will mean you can always pick up your knitting and start with the first row of the pattern repeat instead of trying to figure out where you are.
Lynne
Jan 22, 2017
I just learned this same lesson. Finish the lace pattern or don't start it if you don't have time. I've had to rip out twice because I stopped midway through the lace pattern. Wish I'd read your comment a week ago!
susieq29
Mar 29, 2017
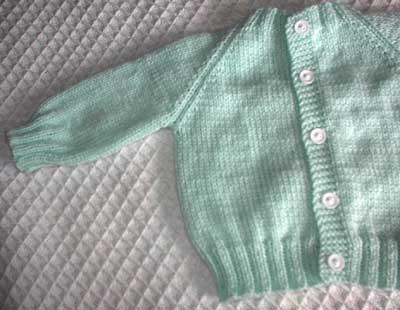
I use a counter to count rows. I have a sheet with 1-100 lines that has the count of rows repeated. Like it would look like 1-4 repeated for 100 rows. I can put my knitting down anytime anywhere and I know where it left off. Also the fronts always match the backs exactly. See photo
Report Inappropriate Comment
Are you sure you would like to report this comment? It will be flagged for our moderators to take action.
Thank you for taking the time to improve the content on our site.