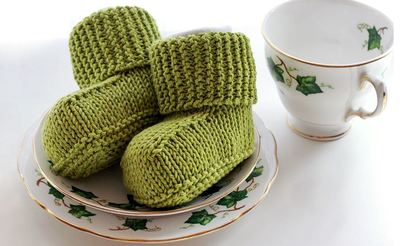
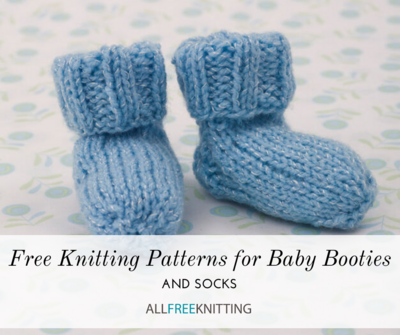
Basic Knit Baby Booties Pattern
Learn how to knit baby booties this adorable pattern. Any little one would be lucky to receive such a beautiful handmade knit baby pattern.

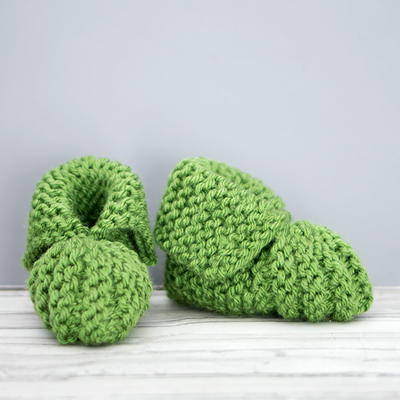
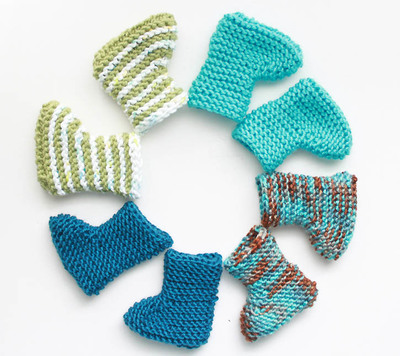
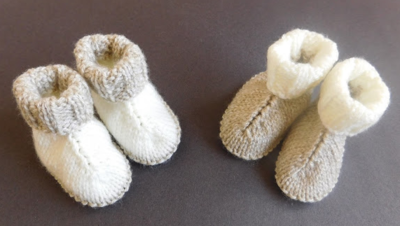
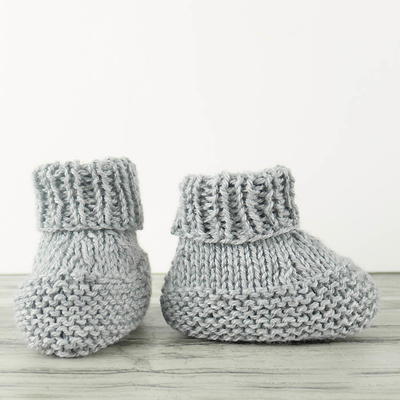
These Basic Knit Baby Booties are sure to delight everyone who lays eyes on them. This pattern is perfect when it comes to beginner knitting and you won't believe how quickly you finish these easy knit baby booties. Once you learn how to knit baby booties as easy as these, you will be set for DIY baby gifts and other basic knitting patterns.
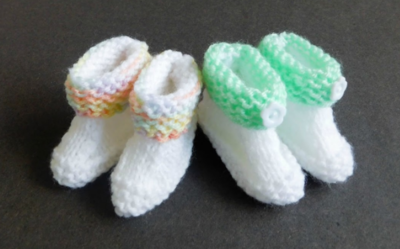
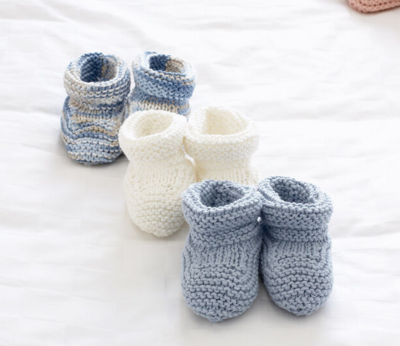
After all, there is a lot of room for creative touches with this pattern. Add a bow for some additional decoration, or leave the booties as is for a classic, streamlined look. You will be able to complete this pattern in no time, so you can make a pair for every little angel you know.
When you're done with these adorable booties, check out our favorite Butterfly Garden Dress pattern for baby!
Note: This project is from I Like Knitting digital magazine. Non-members can access 3 free patterns every month. Subscribe to the I Like Knitting Gold Club for unlimited access to their entire pattern archive, featuring hundreds of exclusive patterns.

Knitting Needle Size7 or 4.5 mm
Yarn Weight(4) Medium Weight/Worsted Weight and Aran (16-20 stitches to 4 inches)
Gauge19 sts and 25 rows = 4 ins [10 cm] in stocking st.
Finished SizeTo fit infant 3 ( 6-12) mos.
Materials List
- Bernat® Handicrafter Cotton (50 g / 1.75 oz/73 m/80 yds) or Bernat® Satin (100 g / 3.5 oz/149 m/163 yds), 55 (65-75) m OR 60 (75-85) yds
- Size 4.5 mm (U.S. 7) knitting needles or size needed to obtain gauge.
Pattern
Download the Pattern
The instructions are written for smallest size. If changes are necessary for larger sizes the instructions will be written thus ( ).
Sizes: 3 mos (6 mos-12 mos)
Knit Baby Booties
Cast on 27 (35-43) sts.
1st and alt rows: (WS). Knit.
2nd row: K1. yfwd. K12 (16-20). yfwd. K1. yfwd. K12 (16-20). yfwd. K1. 31 (39-47) sts.
4th row: K1. yfwd. K14 (18-22). yfwd. K1. yfwd. K14 (18-22). yfwd. K1. 35 (43-51) sts.
6th row: K1. yfwd. K16 (20-24). yfwd. K1. yfwd. K16 (20-24). yfwd. K1. 39 (47-55) sts.
Knit 11 rows (garter st).
Shape Toe
1st row: K15 (19-23). K2tog. K5. Sl1. K1. psso. Sl1. yf. Turn.
2nd row: K2tog. K5. Sl1. K1. psso. yf. Sl1P. Turn.
3rd row: K2tog. K5. Sl1. K1. psso. Sl1. yf. Turn.
4th row: As 2nd row.
5th row: K2tog. K5. Sl1. K1. psso. Sl1. Turn.
6th row: P2togtbl. P5. P2tog. Sl1P. Turn.
7th and 8th rows: As 5th and 6th rows once more.
9th row: K2tog. K5. Sl1. K1. psso. Knit to end of row. 21 (29-37) sts.
10th row: Purl.
Cont in garter st for 2 (2½-2½) ins [5 (6-6) cm], ending with a WS row. Cast off.
Finishing
Sew sole seam. Sew back seam, reversing seam 1½ ins [4 cm] from cast off edge for turn back.
Did You Know?
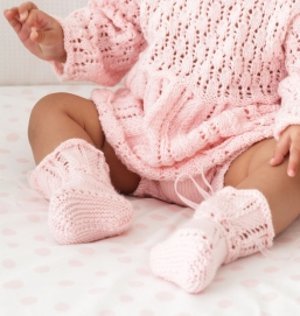
These easy baby booties are the perfect DIY gift for anyone in your life that is expecting a little bundle of joy. Tiny baby toes need to be kept warm! Booties are an ideal footwear for babies in the first year of life because their feet grow so quickly. Feet grow the quickest during the first three years of life, so enjoy the time that they aren't yet walking when you can get away with thick socks and booties to cover your baby's toes!
When babies start learning to walk, they actually flex their feet upwards of 25,000 times day. They should be wearing shoes that mimic bare feet during this time (like non-slip booties) to help their muscles develop correctly. Children's feet take about three times the stress as adult feet, so once they've learned to walk properly, a well-supported shoe is recommended. Since they are growing so quickly, it's also recommended that their feet get resized for shoes every three months.
Abbreviations
- K
- knit
- k2tog
- knit next 2 stitches together
- K2togtbl
- knit 2 stitches together through back loops
- P2tog
- purl two stitches together
- P2togtbl
- purl 2 stitches together through back loops
- psso
- pass slipped stitch over
- Sl1
- slip next stitch knitwise
- Sl1P
- slip next stitch purlwise
- yf
- bring yarn into front of work
- yfwd
- yarn forward (makes 1 extra stitch)
Up Next:
More Knit Baby Booties Patterns
Have you made these booties?
Show us in the comments
Read NextBasic Knit Baby Booties Pattern
Your Recently Viewed Projects
Thanks for your comment. Don't forget to share!
rachaiza97 8770969
Feb 11, 2021
when shaping the toe, row 1 says to first knit 15 stitches, but the other rows dont mention these 15 stitches. when i follow step 2 and onwards, i still had many stitches left with no instructions about them. it seems to only mention the first 10 stitches and then, wht do we do with the rest?
Lisa
Feb 17, 2021
This is what is known as short row shaping in knitting, it's a fairly common technique, if you read through the rest of the rows, you will see that all the stitches not reduced by the shaping are eventually incorporated back into the pattern to complete it.
vanessaozzie 05184 32
Nov 09, 2020
Sorry it keeps rejecting my photo but then submits the comment anyway! Trying again.
vanessaozzie 05184 32
Nov 09, 2020
Just wanted to include a picture to go with my question below.
vanessaozzie 05184 32
Nov 09, 2020
I am busy making this and find it easy to follow. Just want to ask, mine have little holes in the toe area but can't see them in your pictures. Is this correct? Thanks.
Lisa
Jan 21, 2021
Yes, if you do the yfwd too loosely it will create a tiny hole, yfwd is one of those stitches that you can pull tight to compensate and not create the tiny hole.
Camivb
Apr 15, 2020
Hey, ive had problems with this pattern, i dont seem to have enough stitches to complete the 2nd row, has anyone had a problem like this? or know how to fix it?
Lisa
Oct 04, 2020
I've made about half a dozen of these booties and the pattern is correct and works as written, if you are missing stitches, look to your yfwd, since it is making the 4 extra stitches you will need to complete the next row.
donnabrewster 4381 168
Feb 23, 2019
What a cute little bootie - just follow the directions - I was skeptical since I didn't know where I was starting, but as I went along, I realized I was starting at the bottom and working my way up. I am not a great knitter, but these came out great!!
dmstone7 5081662
Nov 28, 2018
I have been knitting for 50 years but am struggling a little with this pattern. Can somebody please explain to me how, when every row is knit, there is a patch of stocking stitch on the bootie??
karenkaren18 51743 35
Sep 25, 2018
I have completed the first part of the bootie and left with 39 stitches as per pattern. When I start on shaping the toe it only accounts for 25 stitches in row 1 what do I do with the rest of the stitches
Lisa
Oct 04, 2020
This is what is known as short row shaping in knitting, you will leave the rest of the stitches unworked until they are incorporated back into the pattern at the end.
monicamsoliman 910 4509
May 24, 2018
I feel like I may have messed up the proportions of this. The top part looks right by the area for the foot seems huge. Is that the way its supposed to be?
arnoldr 5483866
Dec 22, 2017
I love the scarf on the left side of the video - is there a pattern available?
mamac1457 1151330
Mar 26, 2017
I was doing well till 1st row of shape toe What does turn mean ? I still have stitches on needle.
Lisa
Jun 20, 2017
Turn means exactly that, you will turn and go back the other way whether you are finished the row or not. If you look up short row shaping, I think it will be easier to understand.
craftedbyfox
Feb 24, 2017
As an advanced knitter I found the instructions really easy to follow as I understand all the abbreviations and how to use stitches such as yf an psso however this is stated as an easy knit and it would be useful to have links to instructional videos / tutorials on these stitches for beginners. They are easy to make but I did find that the 4.5mm needle is too large for DK weight yarn and had to reduce the size to a 4mm which made a better fit bootie whilst still keeping the stretch. I also made a newborn pair by using sport weight yarn and 2.75mm needle following the 3 mos size.
MelioraFaery 26611 81
Nov 23, 2017
I am a fairly experienced knitter but despite repeated efforts have been unable to complete a bootee due to the instructions when you shape the toe. At the end of the row when it says yf turn it does not explain whether the yf is then part of the following knit 2 together. If anyone can enlighten me it would be useful. A video of it may help.
Elaine M Smith
Feb 12, 2018
yf Means bring the yarn to the front right after you do that you knit the next 2 together. yf will leave a hole . You will see it after you knit 2 together.
craftedbyfox
Jan 21, 2017
Being an experienced knitter I found the instructions fairly straight forward to follow however, although it starts 'easy' I would find it difficult as a beginner to follow the shaping instructions, it would be useful to have included some images to show how it looks. The finished item is cute and once you have mastered all the stitches they are quick and easy to make. I had to use a slightly smaller needle to get the right gauge as my first pair ended up far too big.
Perkid
Jan 09, 2017
this pattern was easy for an experienced knitter to follow, however more clarification maybe needed for a beginner. I love this pattern, it is one of my go to bootie patterns when making baby gifts.
jeanhalliday 95661 16
Jun 30, 2016
Rubbish instructions when you start shaping. This appears to be shared by all others. Pity the easy knitters.
valeriani16 716366 0
Mar 20, 2016
What does yf stand for in a pattern please
drummer77 6091570
Mar 31, 2016
it means before you knit the next stitch bring wool over needle as though you were going to do a purl stitch...but knit your next stitch if this is what you have been following...in other words it is making an extra stitch....
KathrynAllison
Mar 31, 2016
Hello valeriani16 716366 0! "yf" stands for "yarn forward." Hope this helps! - Editors of AllFreeKnitting
cadd13 1063296
Jan 24, 2016
I am totally lost when it comes to shaping the toe. What happened to all the other stitches? cadd13@yahoo.ca
Lisa
Mar 07, 2017
This pattern is using what is called short row shaping, all the stitches are eventually incorporated into the pattern after the shaping is done.
juneholmes49 99276 91
Jan 05, 2016
I used pattern for bobble hat and was very impressed with my finished product many thanks.
twilkins 1680703
Dec 10, 2015
Thanks Dorothy, but unless there is something missing (see above) there is no reference to K2togtbl and P2tog in the pattern above?
DrDotty
Dec 11, 2015
Hm, Twilkins, I can't seem to find K2togtbl either. But I have found P2tog under 'Shape toe', 6th row. I'm wondering if it should be K2togtbl instead of K2tog in row 5? Hopefully Bernat Design Team will see the thread and shed some light on this!
DrDotty
Dec 10, 2015
Super cute booties which knit up quickly I altered the pattern slightly as one does and knitted mine in blue with a white cream sole and seam and white cream top The only think I'd say is to knit the top last part rather loosely as mine came out a bit tight at first and I had to re-knit the last part For any new knitters - each bootie is knitted in one piece starting with the sole As you knit your way 'up' the bootie you will see that the sole is in two parts you will need to sew these together later Where it says 'turn' literally turn in the middle of the row and follow the pattern It'll all make sense If you look under 'Images from other crafters' there is a photo of the booties half way through before sewing them together I then stitched them together…Read More from toe to heel and then from the back of the heel up to from the top I turned it inside out and stitched together the last so that I could fold down the top without exposing the seam Lovely booties to go with a cardigan I knitted in the same colourway Thanks for a great pattern
twilkins 1680703
Dec 09, 2015
I would like to know if there is any any instructions missing from the pattern. At the beginning the "abbreviations" are given for K2togtbl and P2tog but nowhere is there any reference to these stitches being used in the pattern. I am wondering if there is instructions for the "sole" missing. Thanks for your quickest response as I have only a few days to complete this.
DrDotty
Dec 10, 2015
twilkins - I've just completed the booties, and you'll find that those abbreviations are found in the 'toe' part of the pattern. The instructions for the sole are not missing, in fact, you start off with the sole. You knit the bootie in one piece, and then sew the sole together afterwards (and the back of the ankle!). I'm attaching a photo of one complete bootie (but now sewn together), and one where I've gone from the sole to the toe. Hope this helps! D.
cachobot
Dec 03, 2015
How do I transition from the first part to the second part of this pattern. I have 47 stitches on my needle (for 6 month old) Is this knitted in two sections and sewn together?
DrDotty
Dec 10, 2015
cachobot - you don't knit the booties in two parts but in one part and sew the middle of the sole back of the ankle together after binding off You actually start with the sole and work your way 'upwards' so to speak When it comes to knitting the toe part turn where it says to turn in the pattern - i e do not knit to the end of the row but turn in the middle of the row That way the stitches at either end of the needle will become the side of the bootie while the stitches in the middle of the needle will form the toe A 'bulge' will start to form as you follow the pattern - this is the toe As you then start knitting the whole row again the ankle will form I've attached a photo of one complete but now sewn together bootie…Read More and one where the toe has started to form I've knitted the sole and the top part in cream the rest in blue Hope this helps D
josefinepremberg 5 108698
Oct 27, 2015
I am knitting for a 6months old baby, can someone please advice which would be the correct size to go for? Thanks!
Sophielouisemurphy 2853754
Sep 24, 2015
For the first part do you end up with 17 rows altogether? Or after you've done the first 6 you do 5 more to make it up to eleven rows?
mjnoel1 4558010
Sep 15, 2015
I feel really silly, but I can't for the life of me figure out how to sew these together? I think maybe I have missed a step or two of the knitting pattern, and the shaping of the toe doesn't seem to fit into the sewing together of the bootie - any suggestions?
LazyAvocado
Nov 07, 2015
Did you figure it out by any chance? I'm turning it every which way, but I just don't see it. I'd love to see a picture of the bottom!
The madhatter
Aug 26, 2015
Has anyone tried to knit thee in the our day? I would like to elevate the seam. Seems like a seasoned knitter could make the adjustment.
Yolandeweston 5866 180
Jul 01, 2015
Hi, the instructions below are for increasing the amount of stitches from 2nd row after casting on. The original instuctions made holes in the bottom of the bootie. Hope that helps
sueannbowen 981804 3
Oct 11, 2015
I can't see your instructions. Do I need to click on something? (Feeling daft).
wanderingalbatross 6630881
Jun 20, 2015
Thank you for the tips. Are these new directions for shaping the toe?
Yolandeweston 5866 180
Jun 07, 2015
To knit without hokes in the bottom try Row 2, K1,M1 (make 1 by knitting into front and back of stitch),K10,M1,K1,M1,K10,M1,K1 31sts Row 4, K1,M1,K12,M1,K1,M1,K12,M1,K1 35sts Row 6, K1,M1,K14,M1,K1,M1,K14,M1,K1 39sts Hope that helps
Yolandeweston 5866 180
Jun 07, 2015
After trying twice and unpicking twice I have finally figured out how to do the increases without ending up with holes row 1, K1, Make 1 (M1) by knitting into front and back of stitch, K10, M1,K1,M1,K10,M1,K1 31sts. Row 3, K1,M1,K12,M1,K1,M1,K12,M1,K1 35sts Row 5, K1,M1,K14,M1,K1,M1,K14,M1,K1 39sts Hope that helps anyone struggling with first part
wanderingalbatross 6630881
Apr 01, 2015
I have knitted these twice without success. I have big holes in the sides of them. Any tips or tricks?
butterflymeadowgif ts 6554736
Feb 23, 2015
sorry but y in front leaves a hole Make 1 doesnt I dont want the holes unless its for ribbon to go through and you don't mention if they are top down or toe ups so if yarn in front is at the bottom I don't want the holes so going to make 1 stictch which is pick up stitch from the last stictch and work it. or do old fashioned inscrease knit part way then purl rest of stitch.
aqsaafzal 9711667
Jan 28, 2015
There are 2 types of PSSO (single decrease double decrese).Which one is required here?
rosewoodgirl
Jan 07, 2015
Thanks for the pattern! So cute! But what do you mean by reversing seam for turn back? And also, is there a reason for the holes (lace) on the bottom of the shoe? I was thinking it was decorative for lace or a ribbon, but that doesn't make sense if it's on the bottom. Is it just for increasing? Thanks!
superbubble
Dec 03, 2014
hi I'm new to knitting and have knitted the first section ending up with the 39 stitches. as i read below you carry on with part 2 (shape toe). i don't understand how to continue as the 1st row has a lot less stitches than the 39 from the previous section. if i continue straight on to part 2 there will be a lot of excess stitched left form part 1?
Editor JD
Dec 04, 2014
Hi superbubble, It looks as if the section you're referring to includes a lot of short row shaping. As a beginning knitter, you may want to check out some tutorials on how to short row knit before continuing with this pattern. Hope this helps! -Editors of AllFreeKnitting
melissacormackphot ography 8911883
Nov 16, 2014
I am new to knitting, please help! Are these two pieces that you must sew together? Or does the shape toe section continue on from the first (as one piece)? It needs more instructions for beginners.
Editor JD
Nov 17, 2014
Hi melissacormackphotography 8911883, The booties are worked in one piece and then sewn together. Hope this helps! -Editors of AllFreeKnitting
natalyaroberts1999 9080967
Sep 22, 2014
What do the numbers in the brackets mean cause I'm kinda confused now?
Editor JD
Sep 24, 2014
Hi natalyaroberts1999 9080967, The instructions are written for smallest size. If changes are necessary for larger sizes the instructions will be written thus ( ). Hope this helps! -Editors of AllFreeKnitting
cynthiasarendse 88 23850
Jul 30, 2014
Knitting for more than 50 years and knitted just about everything and very involved patterns, but this little pair of booties is the most confusing pattern I've ever attempted.
Nana2 4386694
Jul 21, 2014
I have been a knitter for 50 plus years, and this is one of the few times that I am sooooo confused with a pattern starting with the toe shaping. What on earth is Tu r n. The word is separated so what does it mean? Also, what is done with the remaining stitches from each row? Are they put on a stitch holder or left on the needle? Really frustrating...a little help from anyone would be very appreciated.
Member 0760282
Jul 21, 2014
In knitting the toe I seem to be leaving a hole where the pssos are happening. What am I doing wrong?
peijuun 3578727
Jul 03, 2014
Does it mean to turn and work on these stitches only following the pattern? what about the remaining stitches on the left needles? Do I leave them on a stitch holder? and Please could you enlighten me? thank you
Editor AH
Jul 03, 2014
The toe of the bootie is shaped using short rows-- so you do not finish an entire row before turning and knitting back the way you came. Editors of AllFreeKnitting
gailtrafton 470583 6
Jul 01, 2014
What is meant by Tu r n at the end of line instruction 'shaping the toe' Can't find the meaning anywhere.
ahuggett712013 916 9731
Jul 01, 2014
The "turn" instruction means that you turn your knitting and work back the way you came. You see this sort of instruction most often when designers are describing short rows. Editors of AllFreeKnitting
peijuun 3578727
Jul 01, 2014
Hi, can I know what does Tu r n means. I was stuck at that point. thanks
ahuggett662014 435 9573
Jun 06, 2014
Hi, If you don't mind your final project looking a little different (in a very minor way) from the photo, go ahead and just p2tog. P2tog tbl is an abbreviation for "purl 2 together through the back loops" -- it's just a different way of decreasing. Editors of AllFreeKnitting
leblancfamily 0557 344
Jun 05, 2014
I made my first bootie .. it was easy until I came to the P2togtbl part, this was very hard to do. Will the pattern still work if I just P2tog?? Karen
Report Inappropriate Comment
Are you sure you would like to report this comment? It will be flagged for our moderators to take action.
Thank you for taking the time to improve the content on our site.