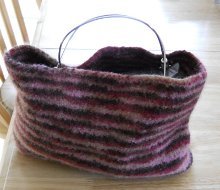
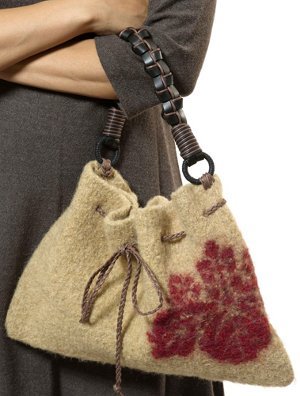
Pretty Paisley Purse
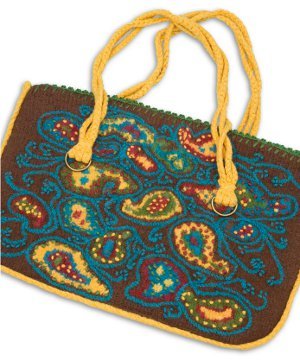
Hit the town with this gorgeous knit bag pattern. The Pretty Paisley Purse is a one-of-a-kind accessory you'll love toting around wherever you go. Stash all of your daily essentials in this beautiful and practical knit purse. With a little knowledge of embroidery and crochet, you can create this truly timeless Pretty Paisley Bag. Perfect for intermediate knitters, this project is a great way to mix up your normal knitting routine.

Knitting Needle Size10 or 6 mm
Yarn Weight(4) Medium Weight/Worsted Weight and Aran (16-20 stitches to 4 inches)
Materials:
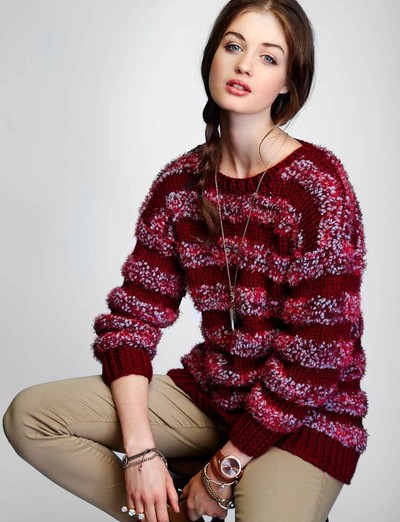
- RED HEART® “Bamboo Wool”: 8 balls 3365 Cocoa A, 2 balls each 3265 Gold B, 3650 Dill C, 3920 Cayenne D, and 3525 Peacock E
- Knitting Needles: 6mm [US 10]
- Crochet Hook: H
- Embroidery needle, yarn needle, 4 D-Rings, magnetic snap closure
Optional Materials:
- Lining: 1 piece 22” x 26” fabric
- Interfacing: 2 pieces 17” x 10½” fabric and 1 piece 17” x 3”
- plastic canvas
GAUGE: 18 sts = 4”; 22 rows = 4” in St st unfelted
CHECK YOUR GAUGE. Use any size needle to obtain the gauge. Make sure your sts are loose and airy
ABBREVIATIONS:
A, B, C, D, E = color A, B, C, D, E
ch = chain
k= knit
mm = millimeters
p = purl
st(s) = stitch(es)
sc = single crochet
st st = Stockinette st (k on right side rows, p on wrong side rows)
* or ** = repeat whatever follows the * or ** as indicated
Finished bag measures 12½” tall x 18” wide.
NOTES
Wind off separate balls of yarn for each color. Twist yarns on wrong side to prevent holes.
Felting is not an exact science due to the many different variables, however up to 25% of the height and 15% of the width may be lost in the felting process.
PURSE
Front
With A, cast on 90 sts.
Begin with a k row, work 4 rows even in St st.
Begin Color Pattern
Begin with Row 1, work color pattern from chart until Row 92 has been completed.
With A, work 4 rows in St st. Bind off.
Back
With A, cast on 90 sts.
Begin with a k row, work even in St st until piece measures same as front. Bind off.
Sides and Bottom of Purse
With A, cast on 25 sts.
Begin with a k row, work even in St st until piece fits down one side edge, across bottom edge and up opposite side edge of back piece. Bind off.
FINISHING
Embroidery
Stem Stitch vines and make French knots following chart for placement. Weave in yarn ends.
Crochet Handles and Trim
Holding 4 strands of B together, crochet 3 chains, each 6’ long.
Seam and Prepare for Felting
Pin bottom and sides to front and back pieces, leaving top 2” on each side unattached (will be trimmed after felting).
With A, sew in place.
FELTING
Place chains in a mesh laundry bag or a pillow case. Set a washer to hot, heavy-duty cycle, and low water. Add the purse and bag with chains. Run one wash (agitation only) cycle, removing pieces several times during process to check progress. Two or more cycles may be needed before satisfied results are achieved. Remove pieces when measurements are correct, pieces are stiff to the touch, and the stitch definition is nearly invisible. Rinse in cool water to stop the felting process. Flatten out chains so they are uniform in size and length. Shape the purse by squaring off the bottom and sides. If possible, dry the purse on a form that is the correct proportion, like a cardboard box. This will help ensure the purse maintains its crisp edges. Dry pieces thoroughly away from heat.
Trim excess (if necessary) from side pieces left unattached when seaming. Fold pieces in half toward inside of purse at top edge to form a pleat, whip stitch together. Whip stitch front and back pieces together from top edge of purse to pleat.
With B, whip stitch length of chain around sides and bottom of front and back of purse beginning at top edge working down side, across bottom and up opposite side to top edge.
With C, embroider blanket stitch across top edges of front and back of purse. With crochet hook, make 1 sc in first blanket st, * ch 3, 1 sc in same ch as last sc, 1 sc in next blanket st; repeat from * across.
Attach Handles
* Holding 3 strands of chain together, each approximately 30” long, thread one end through first D-Ring 1½”. Wrap an 8” length of B around chains and ends to secure and close pocket. Repeat for second D-Ring. Attach these 2 D-Rings to purse front. Repeat for purse back.
Optional Interfacing
For Interfacing, whip stitch each 17” x 10½” piece of plastic canvas (front and back) to 17” x 3” piece (bottom) to make purse form. Insert form into purse. Tack pieces into place, being sure bottom fits correctly and securely before tacking in place.
Optional Lining
Fold fabric in half lengthwise. Stitch ½” side seams from the top down on each side. Turn top raw edge over ½” and press. Insert lining into purse, folding bottom side edges into a triangle to form flat bottom. Tack top of triangle to side seam on each side.
Insert magnetic closures following manufacturer’s instructions to center top edges of lining. Sew around top edges to attach lining to purse.
Read NextBraided Cable Tote