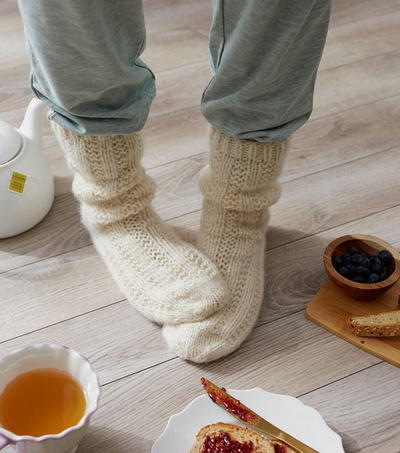
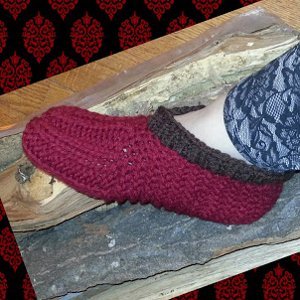
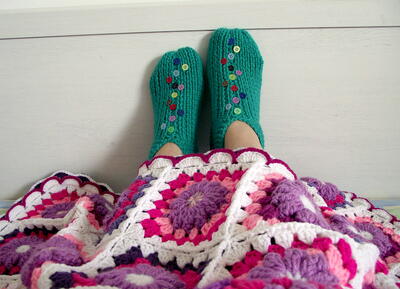
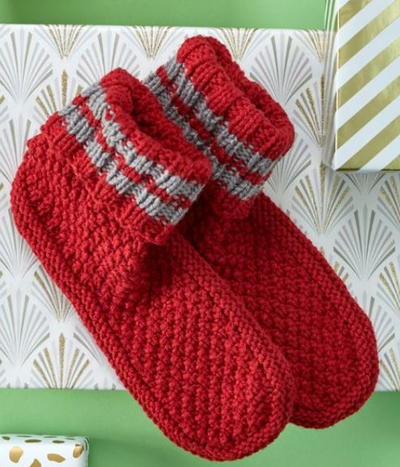
Relaxation Slipper Socks
These are the best knitted slippers for when you want to look like you're not wearing slippers.

The Relaxation Slipper Socks are the perfect addition to your winter wardrobe. When the floor gets chilly as the temperature outside drops, but chunky slippers feel too bulky and unnatural, these will get the job done. Since these slippers are light and fitted enough to masquerade as socks, they're the best knitted slippers for wearing when you have company over. To boot, you can just wear them in your shoes if you ever need to slip out to the grocery store or into the car to take the kids to school.

Knitting Needle Size7 or 4.5 mm, 8 or 5 mm, Double-Pointed Knitting Needles (DPNs)
Yarn Weight(5) Bulky/Chunky (12-15 stitches for 4 inches)
Gauge18 sts = 4" [10 cm]; 24 rows = 4" [10 cm] in Stockinette stitch (knit on right side, purl on wrong side) with smaller needles.
15 sts = 4" [10 cm]; 23 rows = 4" [10 cm] in Garter Rib pattern with larger needles.
CHECK YOUR GAUGE. Use any size needles to obtain the gauge.
Finished SizeFinished Leg Circumference: 7½ (8½, 9½)" [19 (21.5, 24) cm], unstretched; Finished Leg Length: 9 (9½, 10)" [23 (24, 25.5) cm], including ribbed cuff; Finished Foot Circumference: 6 (6, 8)" [15 (15, 20.5) cm], unstretched; Finished Foot Length: 7½ (8, 8½
Materials List
- RED HEART® Dreamy™: 1 ball 8311 Ivory
- Susan Bates® Knitting Needles: 4.5mm [US 7] double-pointed needles (set of 5), 5mm [US 8] double pointed needles (set of 5)
- Stitch marker
- Waste yarn
- Yarn needle
Slippers
Notes
-
Each sock is worked in rounds, beginning at top of leg.
-
The sock begins as a simple tube with decreases worked on end to form toe. Then an "after thought" heel is worked, only after the rest of the sock is completed.
-
As the sock tube is worked and the heel location is reached, waste yarn is knit into about one-half of the stitches to "mark" the stitches onto which the heel will be worked later.
-
When the sock tube is completed, the waste yarn is carefully removed and the stitches above and below the waste yarn are placed back onto needles to begin the heel.
-
To make it easy to see and remove the waste yarn, we recommend using a smooth yarn of the same weight but different color from the working yarn.
Stitch Guide
-
ssk (slip, slip, knit) = Slip next 2 stitches, one at a time, as if to knit to right needle, insert point of left needle through front of stitches, knit these sts together through back loop – 1 st decreased.
-
1x1 Rib (worked over an even number of sts)
Round 1: *K1, p1; repeat from * to end of round.
Repeat Round 1 for 1x1 Rib pattern. -
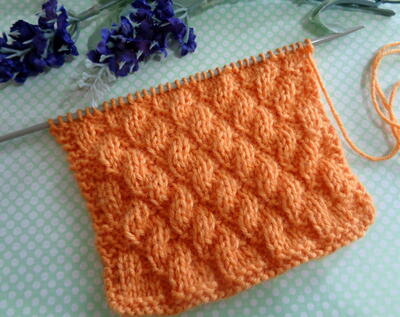
Garter Rib (multiple of 4 sts)
Round 1: Knit.
Round 2: *K2, p2; repeat from * to end of round.
Repeat Rounds 1 and 2 for Garter Rib pattern.
Sock (make 2)
-
Ribbed Cuff
With smaller double pointed needles, loosely cast on 28 (32, 36) sts, placing 7 (8, 9) sts on each of 4 needles. Place marker for beginning of round. Taking care not to twist sts, prepare to work in rounds.
Work in 1x1 Rib until piece measures about 1 (1, 1¼)" [2.5 (2.5, 3) cm] from beginning. -
Leg
Change to larger double pointed needles.
Work in Garter Rib pattern until piece measures about 9 (9½, 10)" [23 (24, 25.5) cm] from beginning, end with a Round 1 of pattern.
Sizes Small and Large Only: Work Round 2 of Garter Rib pattern.
Size Medium Only: *K2, p2, k2tog, p2; repeat from * 3 more times—28 sts. -
Heel Placement
Drop, but do not cut, working yarn.
With smaller needles and waste yarn, knit the first 14 (14, 18) sts. Slip these 14 (14, 18) sts back to left needles (where you began using the waste yarn). Drop the waste yarn and pick up the working yarn again. -
Foot
Continue with smaller needles and working yarn.
Round 1: Knit.
Round 2: K14 (14, 18), *p2, k2; repeat from * to last 2 sts, p2.
Repeat Rounds 1 and 2 until foot measures about 6 (6½, 7)" [15 (16.5, 18) cm], measuring from waste yarn, end with a Round 2.
If needed, redistribute sts so that you have 7 (7, 9) sts on each of 4 needles. -
Toe
Round 1:
needle #1: K1, ssk, knit to end of needle.
needle #2: Knit to last 3 sts, k2tog, k1.
needle #3: K1, ssk, knit to end of needle.
needle #4: Knit to last 3 sts, k2tog, k1—6 (6, 8) sts on each needle (24 (24, 32) sts total).
Round 2: Knit all sts on all 4 needles.
Repeat Rounds 1 and 2 until a total of 16 (16, 24) sts remain (4 (4, 6) sts on each of 4 needles).
Repeat Round 1 until a total of 8 (8, 12) sts remain (2 (2, 3) sts on each of 4 needles). -
Graft Toe
Redistribute sts onto 2 needles, placing sts of first 2 needles onto a single needle and all sts of last 2 needles onto another single needle—4 (4, 6) sts on each of 2 needles
Cut the working yarn, leaving a long tail for grafting.
Thread yarn needle with the long tail.
Hold the 2 needles in the left hand with wrong sides together. Keeping the yarn needle and yarn under the points of the knitting needles, graft the stitches together as follows:
*1. Insert yarn needle through first st of front needle as if to knit and slip the st off.
2. Insert needle through 2nd st of front needle as if to purl, but leave the st on the needle.
3. Insert yarn through first st on back needle as if to purl and slip the st off.
4. Insert yarn through 2nd stitch on back needle as if to knit, but leave st on needle. Repeat from * until all the sts are joined. Take care to draw yarn up so that gauge of grafting equals gauge of knitting. Fasten off. Weave in ends on wrong side. -
Afterthought Heel
With smaller needles, insert one needle through the right leg of the first 7 (7, 9) working yarn sts immediately below the waste yarn. Insert a second needle through the right leg of the remaining 7 (7, 9) working yarn sts immediately below the waste yarn. Rotate the sock so that the needles you just inserted are now above the waste yarn. With 2 more smaller needles, repeat the process of inserting needles below the waste yarn. Carefully remove the waste yarn.
Next Round: Join working yarn at either side of the sts you have just placed on needles and knit around—28 (28, 36) sts -
Shape Heel
Round 1:
needle #1: K1, ssk, knit to end of needle.
needle #2: Knit to last 3 sts, k2tog, k1.
needle #3: K1, ssk, knit to end of needle.
needle #4: Knit to last 3 sts, k2tog, k1—6 (6, 8) sts on each needle (24 (24, 32) sts total).
Round 2: Knit all sts on all 4 needles. Repeat Rounds 1 and 2 until a total of 16 (16, 20) sts remain (4 (4, 5) sts on each of 4 needles).
Repeat Round 1 once more—12 (12, 16) sts (3 (3, 4) sts on each of 4 needles).
Redistribute sts onto 2 needles, placing sts of first 2 needles onto a single needle and all sts of last 2 needles onto another single needle—6 (6, 8) sts on each of 2 needles. -
Graft Heel
Cut the working yarn, leaving a long tail for grafting. Graft stitches together (use same grafting steps as when grafting toe). -
Finishing
Weave in ends.
Abbreviations
- k
- knit
- k2tog
- knit next 2 sts together
- p
- purl
- st(s)
- stitch(es)
- *
- repeat whatever follows the * as indicated.
Read NextGrandma's Simple Knit Slippers