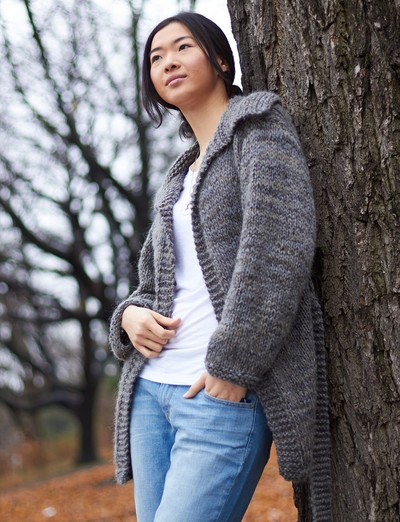
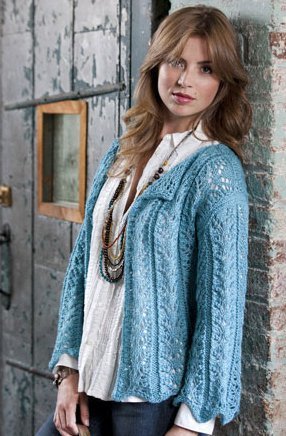
Early Morning Meadow Sweater Pattern
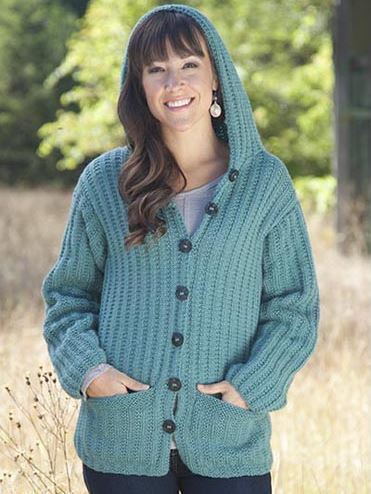
Spring and summer days are warm and gorgeous, but those early mornings can sure get chilly. When you have plenty of hikes and early-morning walks planned for the warmer months, this Early Morning Meadow Sweater Pattern could sure come in handy. This hooded knitted cardigan will keep you cozy as you walk through the dew-littered grass when the sun has not yet warmed the ground. The best part is that it makes a wonderful all-day sweater for when the colder months come around. You'll be wearing this knit cardigan all the time.

Knitting Needle Size8 or 5 mm, Double-Pointed Knitting Needles (DPNs)
Yarn Weight(4) Medium Weight/Worsted Weight and Aran (16-20 stitches to 4 inches)
Gauge1 stitches, 2 rows, 3 inches. stockinette stitch
Materials:
- Willow Yarns™ Rustic (100% wool; 50g/115yd) - 732241-0017 Sea Glass - 13 (14, 15, 16, 17) balls
- US size 8 (5mm) straight needles or size needed to obtain gauge
- US size 8 (5mm) dpn
- Stitch holders
- Locking stitch markers
- Yarn needle
- Seven 1" (2.5cm) buttons
Measurements:
Small (Medium, Large, 1X, 2X)
Chest: 34½ (38, 41, 44, 47)" [88 (97, 104, 112, 119)cm]
Length: 26 (26, 26½, 26½, 27)" [66 (66, 67, 67, 69)cm]
Abbreviations:
Knitting abbreviations here.
Gauge: 20 sts x 28 rows = 4" (10.2cm) in Garter Rib. Save time, check your gauge.
Stitch Guide:
Garter Rib: (multiple of 4 sts + 2)
Row 1 (RS): *P2, k2; rep from * to last 2 sts, p2.
Row 2: P.
Rep Rows 1-2 for pat.
Instructions
Back
CO 86 (94, 102, 110, 118) sts. Work in Garter Rib until the piece measures 16½" (42cm) from beg, ending after WS row.
Shape Armholes
BO 8 (8, 12, 12, 16) sts at beg of next 2 rows— 70 (78, 78, 86, 86) sts rem.
Work even in pat until back measures 25 (25, 25½, 25½, 26)" [64 (64, 65, 65, 66)cm] from beg, ending after WS row.
Shape Shoulders
BO 5 (6, 6, 7, 7) sts at beg of next 6 rows, then BO 3 (4, 4, 5, 5) sts at beg of next 2 rows—34 sts rem.
BO all sts.
Pocket Lining (make 2)
CO 30 sts.
Work in Garter Rib until pocket measures 5" (12.7cm) from beg, ending after a WS row.
Sl sts onto st holder.
Left Front
CO 46 (50, 54, 58, 62) sts.
Work in Garter Rib until the piece measures 6" (15.2cm) from beg, ending after RS row.
Place Pocket Lining
Work across first 8 (8, 12, 12, 16) sts, with RS facing cont in pat across 30 sts of 1 pocket lining, sl the next 30 sts of left front onto a holder, work rem sts of front to end row.
Cont even in pat until piece measures 16½" (42cm) from beg, ending after WS row.
Shape Armhole
BO 8 (8, 12, 12, 16) sts at the armhole edge—38 (42, 42, 46, 46) sts rem.
Cont even until front measures 23 (23, 23½, 23½, 24)" [58 (58, 60, 60, 61)cm] from the beg, ending after RS row.
Shape Neck
Sl 8 sts onto holder, cont across to end row.
BO 6 sts at neck edge once, BO 2 sts at neck edge twice, then dec 1 st at neck edge every row twice—18 (22, 22, 26, 26) sts rem.
Cont even until front measures 25 (25, 25½, 25½, 26)" [64 (64, 65, 65, 66)cm] from beg, ending after WS row.
Shape Shoulders
BO 5 (6, 6, 7, 7) sts at beg of next 3 RS rows—3 (4, 4, 5, 5) sts rem.
Work 1 row even.
BO all sts.
Place m for 7 buttons, making the first ¾" (1.9cm) from beg of front neck shaping and the last 4" (10.2cm) from lower edge.
Right Front
Work as for left front, reversing all shaping. Make buttonholes opposite button m on RS rows as follows: P2, BO 2 sts, work to end of row.
Next Row: Work to BO sts, CO 2 sts, work to end.
Sleeves
CO 50 sts.
Work in Garter Rib for 1" (2.5cm), ending after a WS row.
Inc Row (RS): P1, M1, work to last st, M1, p1—2 sts inc’d.
Rep Inc Row every fourth row 0 (0, 0, 0, 5) times, every sixth row 5 (7, 16, 16, 16) times, then every eighth row 12 (10, 3, 3, 0) times, working new sts into pat—86 (86, 90, 90, 94) sts.
Work even until sleeve measures 19½ (20, 20, 20, 20½)" [50 (51, 51, 51, 52)cm], ending after a WS row.
BO all sts.
Finishing
Sew shoulder seams.
Hood:
With RS facing, pick up and k94 sts along neckline including sts from both front neck st holders.
Work in Garter Rib until hood measures 12½" (32cm), ending after WS row.
Divide sts onto 2 dpn, 47 sts on each needle. Hold with WS tog. Graft top of hood closed.
Pocket Edging:
With RS facing, place sts from pocket st holder onto needle.
K 8 rows. BO all sts.
Sew linings to WS of fronts. Sew in sleeve caps. Sew slide and sleeve seams. Sew buttons where marked.


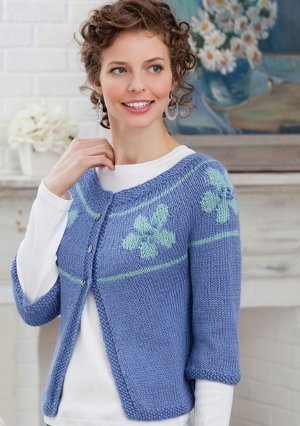
Read NextFloral Yoke Cardigan
Your Recently Viewed Projects
Thanks for your comment. Don't forget to share!
Suzanne
Jan 14, 2018
now I have another question...what do you do with the 8 stitches on holder on the front pieces..looks like I have them on the wrong edge but I thought I followed directions
Lisa
Jan 05, 2021
They are incorporated back into the pattern later, but if they are on the wrong side explaining this will not help you, sorry, that error will need to be corrected to fix and finish the project.
Suzanne
Jan 09, 2018
Well, a little light bulb went on and the sleeve increases no longer problem as you simply keep the pattern going from the edges!!
3cats2love
Oct 03, 2017
I love hoodies and this pattern looks just right for me. I sometimes have a hard with store-bought sweaters fitting well. Making a sweater helps because I can adjust the length of the sleeves or overall length, and this pattern provides stitch counts for several different sizes. Pinned this one to make!
achamber 7998526
Oct 03, 2017
I dont understand how to increase the sleeves and still keep the pattern
Lisa
Jan 09, 2018
To increase the sleeves and keeping the pattern is a rather common technique in knitting. When you do the sleeve increases, make them according to what you will need on the flip side of the garment, if they should be a knit on
Lisa
Jan 09, 2018
sorry, my whole answer wasn't published-if they should be knit on the next row, increase purlwise, if they should be purl then increase knitwise.
jeannegale154 4539 165
Sep 27, 2017
This pattern looks like a breeze. It's one of the first things I'll be making for myself, after all the Christmas gifts I'm working on now!
Tricia108
May 23, 2017
I was never a fan of hoods until I moved back to NYC. On a windy day hoods work better than hats. Also if it starts to rain lightly. You just pull up that hood and you are good to go. I love sweaters like this because they are so classy looking. They go with everything. It is not fast project but it is one project that you can keep for years and it never gets outdated. I also like the fact that it has pockets. Thank you for the pattern.
dl8895 6618262
Dec 25, 2016
I don't understand something. When working the left front, what do you do with the stitches in the stitch holder?
paver2
Aug 07, 2017
Leave them on the stitch holder until you are ready to make the pocket edging (one of the last things you do in this pattern). It tells you how to deal with them under that heading. Most of the time, if you follow a pattern step by step, even when it doesn't make sense, it will work out.
RachelAnne
Oct 14, 2016
I love the cozy, relaxed look of the sweater. Adding it to my list to knit one day!
pbkarat 7197412
Mar 26, 2016
Made this sweater and love it. I get lots of compliments on it. Thanks for sharing the pattern.
Report Inappropriate Comment
Are you sure you would like to report this comment? It will be flagged for our moderators to take action.
Thank you for taking the time to improve the content on our site.