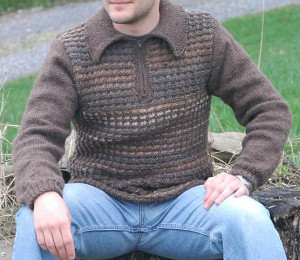
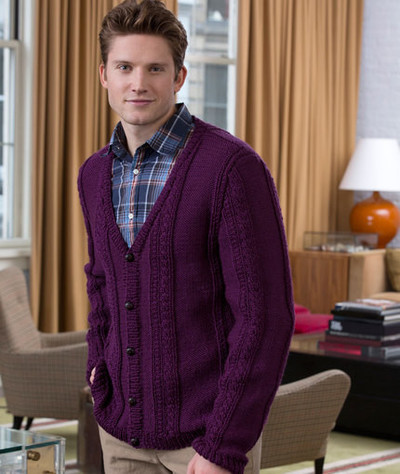
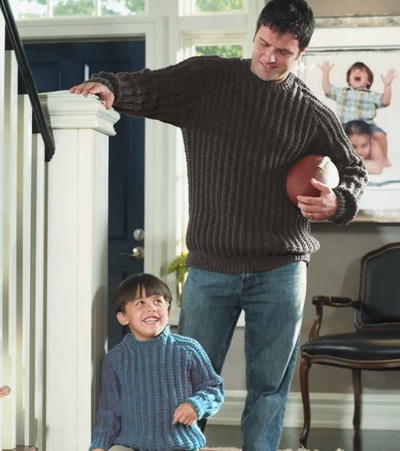
Easy Crewneck Pullover
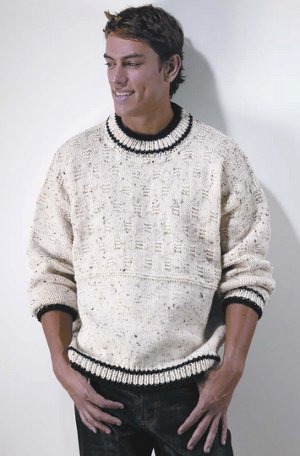
The Easy Crewneck Pullover is a timeless garment your man will love wearing any day of the year. This simple yet stylish knit sweater pattern features a subtle stitch texture and contrasting-colored edging. This casual knit pullover is perfect for layering over a t-shirt and jeans on a chilly spring or summer evening. It's also the perfect garment to wear while doing some yard work on a brisk autumn day.

Knitting Needle Size6 or 4 mm, 9 or 5.5 mm
Yarn Weight(4) Medium Weight/Worsted Weight and Aran (16-20 stitches to 4 inches)
Materials:
- RED HEART® "Super Saver®": 17 (20, 22, 25, 28) Ounces No. 4313 Aran Fleck CA and 2 ounces No. 312 Black CB
- Knitting Needles: 4mm [US 6] and 5.5mm [US 9]
- 2 Stitch holders
- Yarn needle
GAUGE: 16 sts = 4"; 22 rows = 4" with larger needles in St st.
CHECK YOUR GAUGE. Use any size needles to obtain the gauge.
To Fit Chest: 32-34 (36-38, 40-42, 44-46, 48-50)"
Finished Chest Measurement: 41 1/2 (45 1/2, 49 1/2, 53 1/2, 571/2)"
BACK
With smaller needles and CB, cast on 75 (83, 91, 99, 107) sts. Work in ribbing as follows:
Row 1 (Right Side): K1, * P1, K1; rep from * across.
Row 2: P1, * K1, P1; rep from * across.
Rep Rows 1 and 2 for ribbing and work 6 rows CA, 2 rows CB, and 2 rows CA inc 8 sts evenly on last row, end Row 2 – 83 (91, 99, 107, 115) sts. Continue with CA only.
Change to larger needles and work in St st until 9 1/2 (10 1/2, 11 1/2, 12 1/2, 13 1/2)" from beg, end P row. K 4 rows. Begin Yoke Pat as follows:
Row 1 (Right Side): Knit.
Row 2 AND EVERY WRONG SIDE ROW: Purl.
Row 3: Knit.
Rows 5, 7 and 9: P3, * K5, P3; rep from * across.
Rows 11-14: Rep Rows 1-4.
Rows 15, 17 and 19: K4, P3, * K5, P3; rep from * to last 4 sts; K4.
Row 20: Purl.
Rep Rows 1-20 until 24 1/2 (25 1/2, 26 1/2, 27 1/2, 28 1/2)" from beg, end P row. K 4 rows.
Shape Shoulders
Working all in St st, bind off 9 (10, 11, 12, 13) sts beg of next 6 rows. Put rem 29 (31, 33, 35, 37) sts on a holder.
FRONT
Work same as Back until 22 (23, 24, 25, 26)" from beg, end P row.
Divide for Neck
Keeping continuity of pat, work across first 33 (36, 39, 42, 45) sts, turn and put rem sts on a holder. Dec 1 st at neck edge every row until 30 (33, 36, 39, 42) sts rem, then every right side row until 27 (30, 33, 36, 39) sts rem. Work even in pat until Front measures 24 1/2 (25 1/2, 26 1/2, 27 1/2, 28 1/2)" from beg, end P row.
K 4 rows.
Shape Shoulder
Working all in St st, bind off 9 (10, 11, 12, 13) sts beg of next 3 right side rows.
With right side facing, leave center 17 (19, 21, 23, 25) sts on a holder, join yarn to rem sts and work in pat to end. Complete to correspond to first side, reversing shapings.
SLEEVES
With smaller needles and CB, cast on 33 (35, 35, 37, 37) sts. Work in ribbing same as for Back inc 14 (14, 16, 16, 18) sts evenly on last row, end Row 2 – 47 (49, 51, 53, 55) sts. Continue with CA only.
Change to larger needles and work in St st shaping sides by inc 1 st each end of 5th row, then every 4th row until there are 65 (69, 73, 77, 81) sts. P 1 row. K 4 rows. Beg Yoke Pat and inc 1 st each end of next row, then every 6th row until there are 79 (83, 87, 91, 95) sts, establishing pat on first Yoke Pat Row 5 as follows: K0 (2, 0, 2, 0), P3, * K5, P3; rep from * to last 0 (2, 0, 2, 0) sts, K0 (2, 0, 2, 0). Work even in pat until 19 (19 1/2, 20, 20 1/2, 21 1/2)" from beg, end P row. Bind off.
FINISHING
Neckband
Sew right shoulder seam. With right side facing, smaller needles and CA, pick up and K17 (17, 18, 18, 19) sts down left neck edge, K across sts on front holder, pick up and K17 (17, 18, 18, 19) sts up right neck edge, K across 29 (31, 33, 35, 37) sts on back holder inc 1 st at center – 81 (85, 91, 95, 101) sts.
Work in ribbing same as for Back, beg Row 2, working 1 more row CA, 2 rows CB, 6 rows CA, 14 rows CB. Bind off loosely in ribbing. Sew rem shoulder and neckband seam. Fold neckband in half to wrong side and loosely sl st in place.
Mark each side 10 (10 1/2, 11, 11 1/2, 12)" down from shoulder seams. Place center of sleeve top at shoulder seam and sew in place between markers. Sew side and sleeve seams.
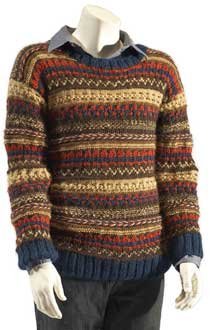
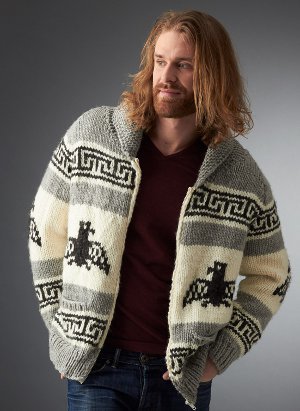
Read NextMen's Cowichan Cardigan Pattern
Your Recently Viewed Projects


Thanks for your comment. Don't forget to share!
annedelaney54 6406 083
Aug 02, 2017
I have just finished knitting this for my husband it's the first jumper i have knit in a long time , It is easy to knit and my husband loves it .
JKYechout
Jun 10, 2017
I made this sweater last Christmas in charcoal with black trim for my 12-year-old grandson and it turned out even better than I expected. And, he loved it!
Lynn K
Jan 12, 2017
Now this is a sweater the wonderful man in my life is just going to LOVE! And the colors shown are going to be just right for him too. He loves chunky, hand knitted sweaters but nothing too fussy, as he calls it, so this sweater is going to be exactly the perfect birthday gift for him, YAY!
Report Inappropriate Comment
Are you sure you would like to report this comment? It will be flagged for our moderators to take action.
Thank you for taking the time to improve the content on our site.