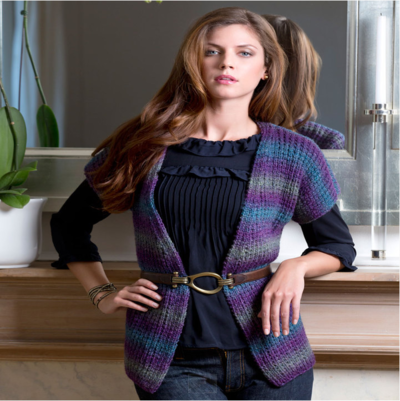
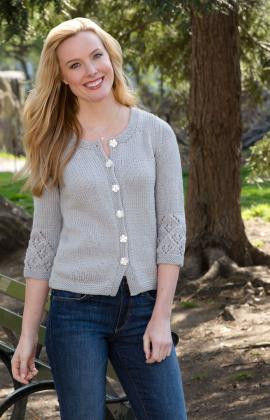
Sense and Sensibility Knit Cardigan
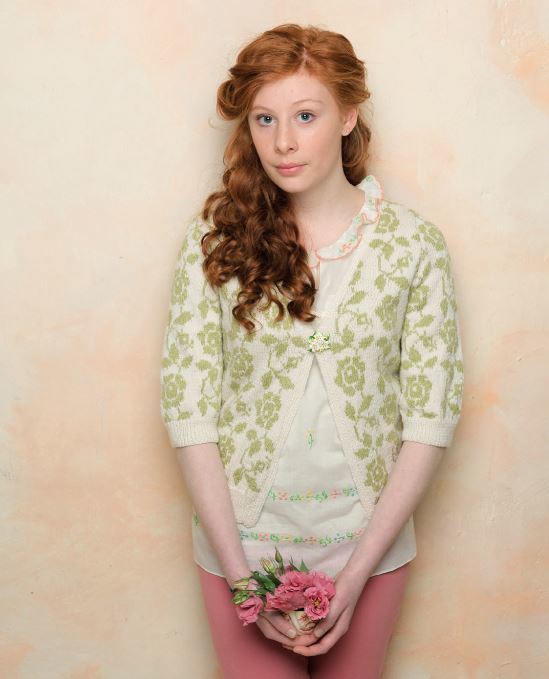
We bet Jane Austen herself would want to wear this beautiful floral knit cardigan. You can make your own Sense and Sensibility Knit Cardigan for the perfect extra layer this season. This cardigan knitting pattern will show you how to knit a cardigan from your Austen-dreams, and it includes multiple sizes for the ideal fit. This free knitting pattern also shows you how to create this pretty floral design that's fit for any romantic adventure. Which character will you be when wearing this romantic knit cardigan: the sensible Elinor or the sensitive Marianne?

Knitting Needle Size2 or 2.75 mm, 3 or 3.25 mm
Yarn Weight(1) Super Fine (27-32 stitches to 4 inches)
Gauge1 stitches, 2 rows, 3 inches. stockinette stitch
Materials:
Wool Cotton 4ply: A Antique 480 - 5, 6, 6, 7, 8 x 50gm
Wool Cotton 4ply: B Leaf 491 - 4, 4, 5, 5, 6 x 50gm
1 pair 23/4mm (no 12) (US 2) needles
1 pair 31/4mm (no 10) (US 3) needles
Pattern
Measurements:
Fit to bust
S: 81-86 cm/32-34 in
M: 91-97 cm/36-38 in
L: 102-107 cm/40-42 in
XL: 112-117 cm/44-46 in
XXL: 122-127 cm/48-50 in
Gauge:
28 sts and 38 rows to 10 cm measured over patterned st st using 31/4mm (US 3) needles.
Abbreviations:
Alt = Alternate(ing)
Beg = Beginning
Cont = Continue(ity)
Dec = Decrease(ing)
Foll = follow(s)(ing)
G st = garter stitch (knit every row)
Inc = Increase(ing)
K = Knit
K2tog = Knit next 2 stitches together
P = Purl
P2sso = pass 2 slipped stitches over
P2tog = Purl next 2 stitches together
P2togtbl = Purl next 2 stitches together through back loops
Patt(s) = pattern(s)
Psso = pass slip stitch over
Rem = Remaining
Rep = Repeat
RS = Right side
Sl2tog = slip 2 together
Ssk = Slip next 2 stitches knitwise one at a time, pass them back onto left-hand needle, then knit through back loops together.
St(s) = Stitch(es)
WS = Wrong side
Yfwd = yarn forward
Instructions:
BACK
Using 23/4mm (US 2) needles and yarn A cast on 121 [135: 151:169: 187] sts.
Row 1 (RS): K1, *P1, K1, rep from * to end.
Row 2: P1, *K1, P1, rep from * to end.
These 2 rows form rib.
Cont in rib, dec 1 st at each end of 13th and foll 6th row.
117 [131: 147: 165: 183] sts.
Work in rib for one row more, ending with RS facing for next row.
Change to 31/4mm (US 3) needles.
Beg and ending rows as indicated and using the intarsia technique as described on the information page, repeating the 38 st patt rep 2 [2: 2: 4: 4] times across each row and repeating the 52 row patt rep throughout, cont in patt from chart, which is worked entirely in st st beg with a K row, as folls:
Keeping patt correct, dec 1 st at each end of 5th and 3 foll 6th rows. 109 [123: 139: 157: 175] sts.
Work 15 [15: 17: 17: 19] rows, ending with RS facing for next row.
Inc 1 st at each end of next and 5 foll 10th rows, taking inc sts into patt. 121 [135: 151: 169: 187] sts.
Cont straight until back meas 35 [36: 37: 38: 39] cm, ending with RS facing for next row.
Shape armholes
Keeping patt correct, cast off 6 [7: 8: 9: 10] sts at beg of next 2 rows. 109 [121: 135: 151: 167] sts.
Dec 1 st at each end of next 5 [7: 9: 11: 13] rows, then on foll 5 [6: 7: 8: 10] alt rows. 89 [95: 103: 113: 121] sts.
Cont straight until armhole meas 17 [18: 19: 20: 21] cm, ending with RS facing for next row.
Shape back neck
Next row (RS): Patt 22 [25: 28: 33: 36] sts and turn, leaving rem sts on a holder.
Work each side of neck separately.
Keeping patt correct, dec 1 st at neck edge of next 3 rows, ending with RS facing for next row.
19 [22: 25: 30: 33] sts.
Shape shoulder
Cast off 5 [6: 7: 9: 10] sts at beg of next and foll alt row and at same time dec 1 st at neck edge of next 3 rows.
Work 1 row.
Cast off rem 6 [7: 8: 9: 10] sts.
With RS facing, rejoin yarns to rem sts, cast off centre 45 [45: 47: 47: 49] sts, patt to end.
Complete to match first side, reversing shapings.
45 [45: 47: 47: 49] sts, patt to end.
Complete to match first side, reversing shapings.
LEFT FRONT
Using 23/4mm (US 2) needles and yarn A cast on 62 [68: 76:86: 94] sts.
Row 1 (RS): *K1, P1, rep from * to last 2 sts, K2.
Row 2: *K1, P1, rep from * to end.
These 2 rows form rib.
Cont in rib, dec 1 st at beg of 13th and foll 6th row.
60 [66: 74: 84: 92] sts.
Work in rib for one row more, dec 1 [0: 0: 1: 0] st at end of row and ending with RS facing for next row.
59 [66: 74: 83: 92] sts.
Change to 31/4mm (US 3) needles.
Beg and ending rows as indicated and repeating the 38 st patt rep 1 [1: 1: 2: 2] times across each row, cont in patt from chart as folls:
Keeping patt correct, dec 1 st at beg of 5th and 3 foll 6th rows.
55 [62: 70: 79: 88] sts.
Work 15 [15: 17: 17: 19] rows, ending with RS facing for next row.
Inc 1 st at beg of next and 5 foll 10th rows, taking inc sts into patt.
61 [68: 76: 85: 94] sts.
Cont straight until 4 rows less have been worked than on back to beg of armhole shaping, ending with RS facing for next row.
Shape front slope
Keeping patt correct, dec 1 st at end of next and foll alt row.
59 [66: 74: 83: 92] sts.
Work 1 row, ending with RS facing for next row.
Shape armholes
Keeping patt correct, cast off 6 [7: 8: 9: 10] sts at beg and dec 1 st at end of next row. 52 [58: 65: 73: 81] sts.
Work 1 row.
Dec 1 st at armhole edge of next 5 [7: 9: 11: 13] rows, then on foll 5 [6: 7: 8: 10] alt rows and at same time dec 1 st at front slope edge of next and foll 7 [9: 11: 13: 16] alt rows.
34 [35: 37: 40: 41] sts.
Dec 1 st at front slope edge only on 2nd and foll 15 [11: 9: 5: 2] alt rows, then on 2 [4: 5: 7: 8] foll 4th rows.
16 [19: 22: 27: 30] sts.
Cont straight until left front matches back to beg of shoulder shaping, ending with RS facing for next row.
Shape shoulder
Cast off 5 [6: 7: 9: 10] sts at beg of next and foll alt row.
Work 1 row.
Cast off rem 6 [7: 8: 9: 10] sts.
RIGHT FRONT
Using 23/4mm (US 2) needles and yarn A cast on 62 [68: 76:86: 94] sts.
Row 1 (RS): K2, *P1, K1, rep from * to end.
Row 2: *P1, K1, rep from * to end.
These 2 rows form rib.
Cont in rib, dec 1 st at end of 13th and foll 6th row.
60 [66: 74: 84: 92] sts.
Work in rib for one row more, dec 1 [0: 0: 1: 0] st at beg of row and ending with RS facing for next row.
59 [66: 74: 83: 92] sts.
Change to 31/4mm (US 3) needles.
Beg and ending rows as indicated and repeating the 38 st patt rep 1 [1: 1: 2: 2] times across each row, cont in patt from chart as folls:
Keeping patt correct, dec 1 st at end of 5th and 3 foll 6th rows.
55 [62: 70: 79: 88] sts.
Complete to match left front, reversing shapings.
SLEEVES
Using 23/4mm (US 2) needles and yarn A cast on 85 [89: 93:97: 101] sts.
Work in rib as given for back for 16 rows, ending with RS facing for next row.
Change to 31/4mm (US 3) needles.
Beg and ending rows as indicated and repeating the 38 st patt rep twice across each row, cont in patt from chart as folls:
Inc 1 st at each end of 5th and every foll 12th row until there are 95 [99: 103: 107: 111] sts, taking inc sts into patt.
Cont straight until sleeve meas 24 [25: 26: 26: 26] cm, ending with RS facing for next row.
Shape top
Keeping patt correct, cast off 6 [7: 8: 9: 10] sts at beg of next 2 rows.
83 [85: 87: 89: 91] sts.
Dec 1 st at each end of next 5 rows, then on every foll alt row until 45 sts rem, then on foll 7 rows, ending with RS facing for next row. 31 sts.
Cast off 4 sts at beg of next 4 rows.
Cast off rem 15 sts.
MAKING UP
Press.
Join both shoulder seams using back stitch, or mattress stitch if preferred.
Front band
Using 23/4mm (US 2) needles and yarn A cast on 7 sts.
Row 1 (RS): K2, P1, K1, P1, K2.
Row 2: K1, (P1, K1) 3 times.
These 2 rows form rib.
Cont in rib until band, when slightly stretched and beg and ending at front cast-on edges, fits up right front opening edge, up right front slope, across back neck, down left front slope, then down left front opening edge, ending with RS facing for next row.
Cast off in rib.
Slip st band in position.
Set in sleeves using the set-in method.
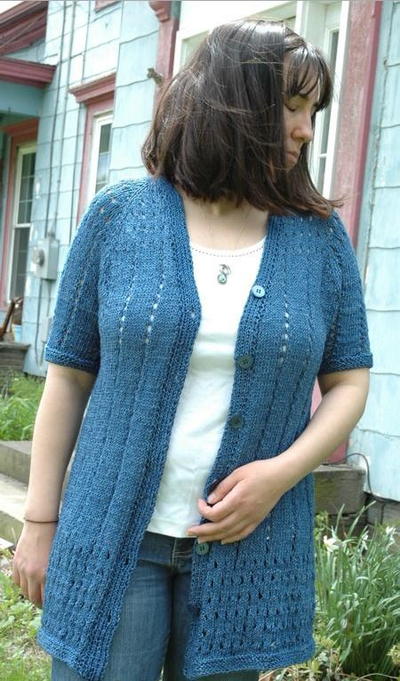
Read NextWandering Cables Cardigan


Thanks for your comment. Don't forget to share!
schiebet
Mar 29, 2017
This pattern is gorgeous. I have attempted Fair Isle knitting with a degree of success but I tend to pull my tension a little tight. Does the intarsia avoid this situation? Is it easier? I would love any tips from someone who is an expert at it!! Thanks
Lisa
Mar 30, 2021
The intarsia technique is the more complicated of the two techniques you mentioned, however it is only two colors in this pattern, so I think it could be successfully completed, as long as you are mindful of your tension and join correctly, so as not to leave any holes. Pulling the yarn too tight can make or break either of these techniques, hope this helps, happy knitting.
lohiareshma 310109 5
Dec 06, 2016
A vert interesting but challenging. Project. I learnt intarsia just for this but am stumped with how to begin and end the rows. It's not mentioned and a few stitches remain with the the 38 stitch pattern. Please help
MKnapp
Apr 09, 2016
Very nice. I would love to do on my knitting machine which is great with fine yarns. If the author has the schematics with the measurements, I can make it using the schematics and the gauge.
Kate Abbey
Mar 23, 2016
What a beautiful pattern, this will definitely be a challenge for me but I'm looking forward to it! I can't wait to have to finished product!
quanahs 5032097
Mar 18, 2016
What a complex but gorgeous pattern. Not for the faint of heart though. The tiny needles and fine yarn along with the beautiful pattern work will create an heirloom sweater. I think I would lengthen the sleeves a bit and choose brighter colors but there is no doubt that this is a knit to aspire to.
lsharr 7593530
Apr 27, 2015
Lovely shaping pattern -- too bad you don't give us the intarsia pattern to enable us to actually make the floral cardi pictured.
Pam 8477643
Apr 27, 2015
Click on the 'pattern' link, just under the 'materials' section. It is all st.st., just change color following the chart given there.
Report Inappropriate Comment
Are you sure you would like to report this comment? It will be flagged for our moderators to take action.
Thank you for taking the time to improve the content on our site.