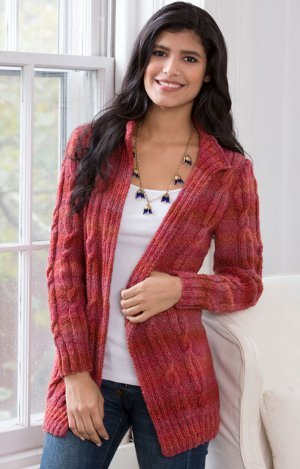
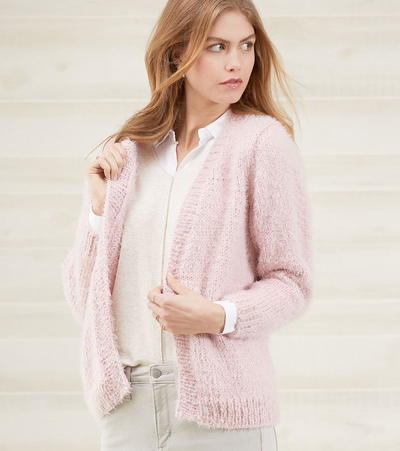
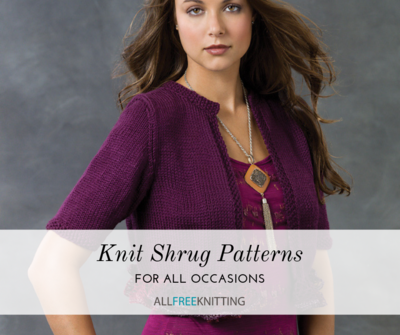
Long and Lean Cardi
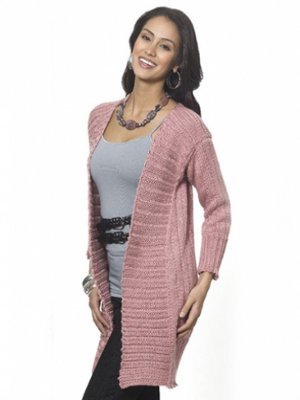
A flattering silhouette collides with beautiful, simple stitchwork in the Long and Lean Cardi. This dusty rose-colored knit cardigan pattern features an open construction, making it quintessential layering piece. The beaded rib stitch offers this feminine knit cardigan pattern an interesting texture and subtle appearance. Feel comfortable and creative while wearing this pretty pink cardi.

Knitting Needle Size7 or 4.5 mm, 9 or 5.5 mm, Circular Knitting Needles
Yarn Weight(4) Medium Weight/Worsted Weight and Aran (16-20 stitches to 4 inches)
Gauge1 stitches, 2 rows, 3 inches. stockinette stitch
Materials:
- Simply Soft (170 g/6. oz;288 m/315 yds); Main Color (MC) Victorian Rose (9721)
- Sizes: S, M, L, XL, 2XL - 4, 5, 5, 6, 6, balls
- One pair size U.S. 9 (5.5mm) needles, or size to obtain gauge
- One pair size U.S. 7 (4.5mm) needles
- One circular size U.S. 7 (4.5mm) needle, 29"/73.5cm long
- Stitch markers
- Stitch holders
- Yarn needle
GAUGE
In Main Rib pattern, using larger needles, 18 sts and 23 rows = 4"/10 cm
MEASUREMENTS
Bust Measurements
S 38 ins [96.5 cm]
M 42 ins [106.5 cm]
L 46 ins [117 cm]]
XL 50 ins [127 cm]
2XL 54 ins [137cm]
Length Measurements
S 32 ins [81.5 cm]
M 32.25 ins [83 cm ]
L 32.5 ins [82.5 cm]
XL 32.75 ins [83 cm]
2XL 33 ins [84 cm]
ABBREVIATIONS
Beg = beginning
K = knit
P = purl
rep = repeat
ssk = Slip next 2 stitches knitwise one at a time. Pass them back onto left-hand needle, then knit through back loops together.
st(s) = stitch(es)
WS = wrong side
INSTRUCTIONS
PATTERN STITCHES
Beaded Rib (multiple of 5 sts)
Row 1 (RS): K2, p1, k1, *p2, k1, p1, k1, rep from * across, end k1,
Row 2: P4, *k2, p3, rep from * across, p1.
Rep Rows 1-2 for Beaded Rib.
Main Pattern Stitch (multiple of 5 sts)
Row 1 (RS): K2, p1,* k4, p1, rep from * across, end k2.
Row 2: Purl.
Rep Rows 1-2 for Main Patt st.
NOTES
Back and partial fronts are worked together as one piece to armholes.
Wide front ribs that make up most of the front width are picked up and worked later.
HELPFUL TIPS
Knitting-on Cast On: Make a slip knot on left needle (counts as 1 st) *insert right needle as if to knit, draw the yarn through to make a new st, place new st on left needle, rep from * for each st.
BODY
Picot Cast On--using smaller needle and knitting-on CO, CO 4 sts, BO 1 st, slip st from right needle back to left needle, (CO 6 sts, BO 1 st, slip st from right needle back to left needle) 23 (25, 28, 30, 33) times, CO 2 sts--120 (130, 145, 155, 170) sts.
Work in Beaded Rib until piece measures 6". Change to larger needle and Main Patt st. Work even until piece measures 15" from beg.
Shape Neck
Dec Row (RS): K1, ssk, work in patt across to last 3 sts, k2tog, k1.
Rep dec row every 6 rows 14 (13, 8, 9, 4) more times, then every 4 rows 0 ( 2, 10, 9, 17) times; AT same time, when piece measures 24 ½ (24 ¼, 24, 23 ¾, 23 ½)" from beg end with a WS row and divide for armholes as follows:
Mark center 86 (94, 103, 113, 122) sts for back.
RS Row: Work across to first marker and place these sts on holder for right front, BO 1 st for armhole, work across to within 1 st of next marker, place rem sts on holder for left front.
Back: Work even in Main Patt on center 84 (92, 101, 111, 120) back sts until piece measures 3 ½ (4, 4 ½, 5, 5 ½)" above armhole ending with a WS row.
Shape shoulders
Next row (RS): BO 27 (29, 31, 33, 35) sts at beg of row.
Next row (WS): BO 27 (29, 31, 33, 35) sts st beg of row—30 (34, 39, 45, 50) sts.
Sizes Small, XLarge and XXLarge Only, continue across rem sts in patt.
Sizes Medium and Large, work across next 17 (20) sts, purl into front and back of next st, purl across rem sts--30 (35, 40, 45, 50) sts for back neck.
Work in Beaded Rib patt for 4" above shoulder BO, ending with a WS row. BO all sts in patt.
Right Front
With WS facing, reattach yarn at armhole, continue as established dec at neck edge until 2 sts rem. Work even until piece measures 7 ½ (8, 8 ½, 9, 9 ½)" above armhole ending with a WS row.
BO rem 2 sts.
Left Front
With RS facing, reattach yarn at armhole, BO 1 st, work left front as for right front reversing shaping.
Right Front Band
With RS facing, using circular needle, beg at lower edge, pick up and k140 (140, 145, 145, 145) sts, then using knit-on CO, CO 25 sts--165 (165, 170, 170, 170) sts. Beg with Row 2, work beaded rib until band measures 6 (6 ½, 7, 7 ½, 8)", ending with a WS row. BO as follows: BO 2 sts, slip st from right needle to left needle, *CO 1 st, BO 6 sts, slip st from right needle to left needle, rep from * across to last 25 sts, BO 25 sts.
Left Front Band
Using circular needle, CO 25 sts, with RS facing, beg at front neck edge, pick up and k140 (140, 145, 145, 145) sts--165 (165, 170, 170, 170) sts. Work as for right front band, however BO as follows: BO 27 sts, slip st from right needle to left needle, *CO 1 st, BO 6 sts, rep from * across to last 3 sts, end CO 1 st, BO 4 sts.
SLEEVES
With smaller needles, using knit-on CO, CO 4 sts, BO 1 st, slip st on right needle back to left needle, (CO 6 sts, BO 1 st, slip st on right needle back to left needle) 8 (8, 9, 9, 9) times, CO 2 sts--45 (45, 50, 50, 50) sts. Work Beaded Ribbing until piece measures 5", ending with a WS row.
Change to larger needle and Main Patt st. Work 2 rows even.
Inc 1 st each end of this row and every 4 rows 0 (7, 6, 12, 17) times, then every 6 rows 10 (5, 6, 2, 0) times working added sts into patt--67 (71, 76, 80, 86) sts.
Work even until piece measures 17 (17, 17 ½, 17 ½,18)" from beg, ending with a WS row. BO all sts.
FINISHING
Sew each front band to back shoulder and back neck. Set in sleeves. Sew sleeve seams.
Using yarn needle, weave in ends.

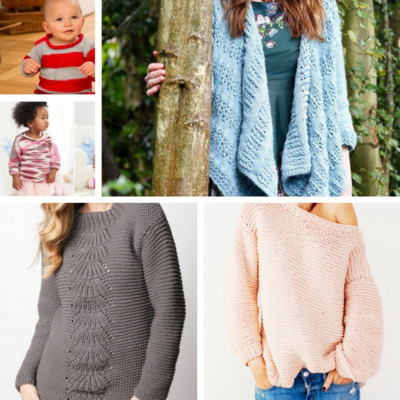
Looking for more springtime knitting patterns? Check out 24 Spring Sweater Knitting Patterns!
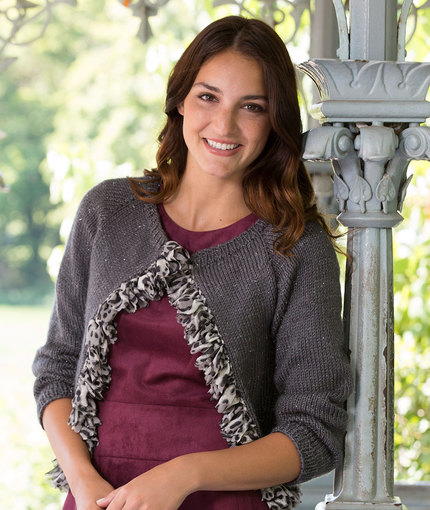
Read NextGlam Ruffled Cardigan
Thanks for your comment. Don't forget to share!
Robbj 5233906
Nov 09, 2019
Having trouble figuring out how to sew the back and neck together. Is there a diagram or schematic for this.
Kristina K
Nov 12, 2019
Hi Robbj, unfortunately there is no schematic available from the source pattern. We recommend contacting Yarnspirations directly for any pattern-specific questions you may have. Happy knitting! -Editors of AllFreeKnitting
jsmale 9453047
Nov 12, 2017
Good question. I can't find the save pattern button either!
KathrynAllison
Nov 13, 2017
Hi jsmale 9453047, the "Save Pattern" button can be found at the bottom of the written pattern (underneath the diagram). It's a gray button that says, "+Save" on it. Hope this helps! -Editors of AllFreeKnitting
pclark21 4108278
Nov 12, 2017
Where is the "save pattern" button/bar? Does anyone know?
KathrynAllison
Nov 13, 2017
Hi pclark21 4108278, the "Save Pattern" button can be found at the bottom of the written pattern (underneath the diagram). It's a gray button that says, "+Save" on it. Hope this helps! -Editors of AllFreeKnitting
derksnl 4445978
Oct 09, 2017
I knitted the 1st picot row, but ended with almost double the amount of stitches. Does the slip st. from R to L needle count as your 1st stitch with the CO's. I did not knit it this way. I knitted the pattern 25 times, is that both CO's , CO 4 CO 6 ? Please help with understanding this beautiful pattern.
Lisa
Nov 13, 2017
Yes, all stitches slipped back to the left hand needle are counted as cast on stitches for picot cast on.
lcarr
Mar 01, 2017
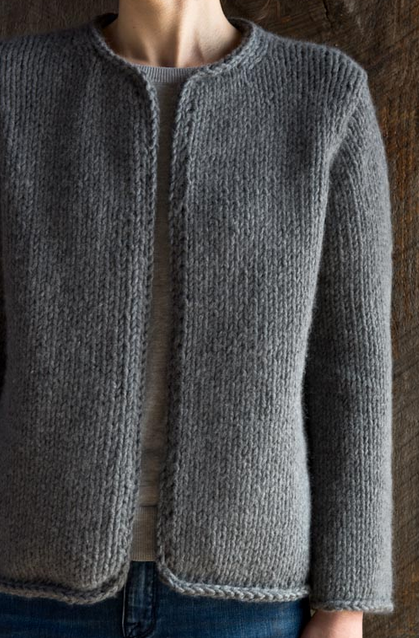
Very nice! I love the horizontal ribbing at the front too. It is difficult to tell just by looking at the picture, but does the horizontal ribbing end at the shoulder, or does it go around the neck as well? Either way, it is a beautiful cardigan. I love the longer styles like this one.
schiebet
Feb 28, 2017
The horizontal rib on the front of this is unique. I really like how it looks. Has anyone made it with yarn that wasn't Simply Soft? I am wondering if a cotton yarn would work for it.
3cats2love
Feb 28, 2017
I haven't made it but since it calls for medium weight or worsted you certainly could make it with cotton in that weight. There are some lovely cottons and cotton blends that I'm sure would make this pattern look lovely. I prefer cotton anyway so if I would make it that's what I would use.
Linda
Feb 06, 2017
I would like to make this long cardigan in midi length, once I have made one precisely as instructedbin the pattern.
Pegasus62
Jun 15, 2015
Hi. I am just finishing the right front band on this sweater, but I don't see where I should attach it at the shoulder and back. There doesn't seem to be a 'shouldedr'. Help!
Jenabertawe
Aug 31, 2014
I was wondering what the BO means in the instructions. Can you help please?
Report Inappropriate Comment
Are you sure you would like to report this comment? It will be flagged for our moderators to take action.
Thank you for taking the time to improve the content on our site.