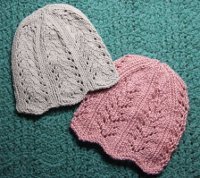
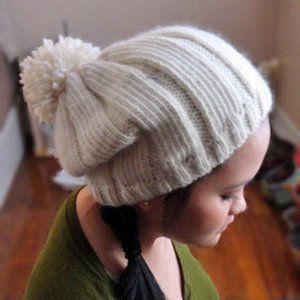
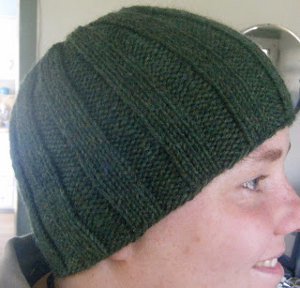
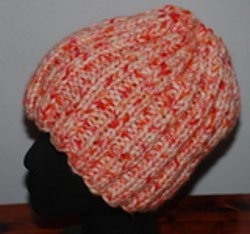
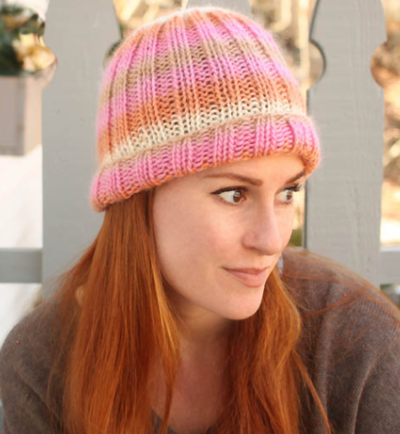
Orange Sherbet Easy-Fit Hat
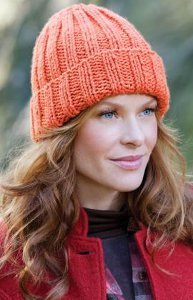
Do you remember your first bite of ice cream? Chances are you don't, but you'll never forget your first knitting project. You'll be proud no matter how bad it looks, and you'll wear it every chance you get. The Orange Sherbet Easy Fit Hat is the perfect pattern for beginning knitters. This easy knit hat pattern features a simple ribbed stitch, fold-over brim, and a yarn the color of one of our favorite summer treats. Good luck and happy knitting!

Knitting Needle Size10 or 6 mm
Yarn Weight(4) Medium Weight/Worsted Weight and Aran (16-20 stitches to 4 inches)
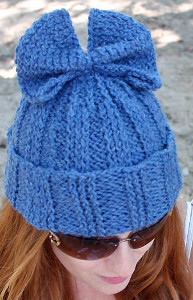
Note: Add a cute Addicitve Knit Bow to give your hat a little femine flair!
Materials:
- Red Heart® With Love™: 1 skein 1252 Mango
- Knitting Needles: 6mm [US 10]
- Yarn needle
GAUGE: 16 sts = 4”; 20 rows = 4” in ribbing, slightly stretched. CHECK YOUR GAUGE. Use any size needles to obtain the gauge.
ABBREVIATIONS:
mm = millimeters
st(s) = stitch (es)
* = repeat whatever follows the * as indicated.
HAT
Cast on 70 sts.
Row 1 (Wrong Side): *Purl 2, knit 2; repeat from * to last 2 stitches, purl 2.
Row 2 (Right Side): *Knit 2, purl 2; repeat from * to last 2 stitches, knit 2.
Repeat Rows 1 and 2 until work measures 10 inches from beginning, ending with a wrong side row.
Shape Crown
Row 1 (Right Side): *Knit 2, purl 2 together (decrease 1 stitch); repeat from * to last 2 stitches, knit 2 – 53 stitches.
Row 2 (Wrong Side): *Purl 2, knit 1; repeat from * to last 2 stitches, purl 2.
Row 3: *Knit 2, purl 1; repeat from * to last 2 stitches, knit 2.
Row 4: Repeat Row 2.
Next Row: *Knit 2 together, purl 1; repeat from * to last 2 stitches, knit 2 – 36 stitches.
Next Row: Purl 2, *knit 1, purl 1; repeat from * to end.
Next Row: *Knit 2 together; repeat from * to end – 18 stitches.
Next Row: Purl.
Last Row: *Knit 2 together; repeat from * to end – 9 sts.
Cut yarn leaving a long end for seaming.
Weave yarn through remaining stitches; gather stitches up firmly and secure. Sew the back seam. Starting about 3 inches from the bottom, sew the seam on the reverse side, as this will be turned up for the brim.
Hat measures 18 inches around (slightly stretched).
Fits most adults.
Read NextOrange Sherbet Easy-Fit Hat
Your Recently Viewed Projects
Thanks for your comment. Don't forget to share!
Hippie Chick
Mar 06, 2018
This is a very pretty color for a hat, and it such a great Fall / Autumn color. I am afraid that I just dont have anything that would match that color, but luckily since it was made using Red Heart yarn I dont have to worry because they have lots of yarns colors and textures to choose from. Cant wait to start.
arianamoreno268 78 77934
Nov 26, 2016
a
arianamoreno268 78 77934
Nov 26, 2016
One for a 3 yr old and another for a 6 yr old
lschrier 6746053
Nov 27, 2016
My suggestion would be to start with down sizing your needles. I would use a Size 8 with a worsted weight yarn and that should give you the 6 year old. I would work it until it measured 8 inches and start your decreases. For the 3 year old. I would try taking out 2 repeats. So instead of starting with 70, I would start with 62 because it is worked in multiples of 4. For the 3 year old, I would work it until it measured 6 1/2 and then start your decreases. Good luck!
Member 4512323
Oct 26, 2016
I have just started knitting about a month ago. I wanted to knit a hat and as I'm only a beginner and only using straight needles, this pattern was actually very easy. It looks perfect like something I'd buy at a boutique. It makes a great basic beanie and am excited to wear it out.
Deanna125
Oct 24, 2016
This was my first hat that I made before I learned to use the cable needles and DPNs. I made it in an oatmeal color and it turned out beautifully. I was so impressed that it helped me to continue to learn after re-teaching myself to knit which I had done as a child. I think this would be a great pattern to teach a child to knit.
charlotteh2o 32246 04
Apr 11, 2019
It was my first hat, too. I made at least 3 in different colors.
Cranberry
Feb 12, 2016
There's no way that I can see to seam this hat without greatly disrupting the rib pattern. I knit the whole hat but found out from another source that the edges need to be set up differently in order to seam this properly (since it's on straight knitting needles).
Lisa
Sep 20, 2017
I and my knitter's group have been making hats like this for over 40 years with great success. Not sure what you mean by set up special in order to seam, it's simply not true. There is no special set up to apply a seam to a hat, you simply knit the hat as instructed and sew the seam as instructed.
lcarr
Oct 22, 2018
I see what you are saying. The edges are the same, so when it is sewn together the rib pattern is not consistent at the seam. It is easy to change this though. Add or reduce by 2 stitches so that the last two stitches are not the same as the first two stitches.
Report Inappropriate Comment
Are you sure you would like to report this comment? It will be flagged for our moderators to take action.
Thank you for taking the time to improve the content on our site.