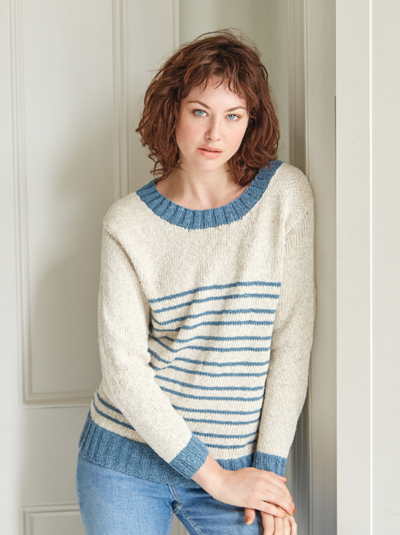
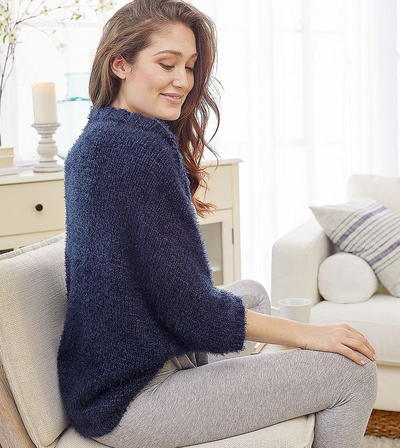
Elegant Evening Sweater
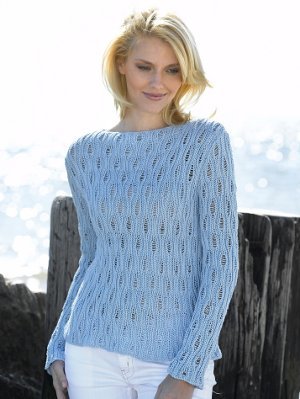
Make dreams come true with a feminine, knit sweater pattern adorned with patches of lace. The Elegant Evening Sweater, made in an enticing, pale shade of blue, features diamond-shaped portions of lace that resemble snowshoe footprints in freshly fallen snow. Pair this beauty with a muted tank top and jeans, and you've created the perfect outfit to wear out to all your holiday events.

Knitting Needle Size6 or 4 mm
Yarn Weight(3) Light/DK (21-24 stitches to 4 inches)
SIZES: Small (Medium, Large, XL)
MATERIALS
- 9 (10, 11, 12) skeins Tahki Yarns COTTON CLASSIC 100% mercerized cotton (1.75oz/50g; 108yd/110m) in color #3812 light blue
- One pair size 6 (4mm) needles OR SIZE TO OBTAIN GAUGE
- Split-ring stitch markers (optional)
- Yarn needle
- Pattern Schematics
ABBREVIATIONS
beg begin(ning)
cm centimeter
dec decrease(d)(s)(ing)
inc increase(d)(s)(ing)
k knit
LH left-hand
mm millimeters
p purl
RS right side
st(s) stitch(es)
WS wrong side
SPECIAL ABBREVIATIONS
M1: Make 1 (inc) – Lift strand between needles to LH needle and work strand through the back loop, twisting it to prevent a hole, [knit or purl as indicated by pattern stitch].
KNITTED MEASUREMENTS
Bust 37 (40, 43, 46½)”/94 (102, 109, 118) cm
Length 22 (22½, 22½, 23)”/56 (57, 57, 58) cm
GAUGE: 20 sts and 26 rows = 4”/10cm in pattern. TAKE TIME TO CHECK GAUGE
PATTERN STITCH
Snowshoe Pattern (multiple of 8 sts + 4)
NOTE: Stitch count does not remain consistent;
stitches should only be counted after Rows 8, 9, 10,18, 19 and 20.
Row 1 (RS) K2, M1, * k1, p2, k2, p2, k1, M1; repeat from * across to last 2 sts, k2.
Row 2 P4, k2, p2, k2, * p3, k2, p2, k2; repeat from * across to last 4 sts, p4.
Row 3 K4, p2, k2, p2, * k3, p2, k2, p2; repeat from * across to last 4 sts, k4.
Rows 4-7 Repeat Rows 2 and 3.
Row 8 P2, drop next st down 7 rows, * p1, k2, p2, k2, p1, drop next st down 7 rows; repeat from * across to last 2 sts, p2.
Row 9 K3, p2, * k2, p2; repeat from * across to last 3 sts, k3.
Row 10 P3, k2, * p2, k2; repeat from * across to last 3 sts, p3.
Row 11 K3, p2, k1, M1, k1, p2, * k2, p2, k1, M1, k1, p2; repeat from * across to last 3 sts, k3.
Row 12 P3, k2, p3, k2, * p2, k2, p3, k2; repeat from * across to last 3 sts, p3.
Row 13 K3, p2, k3, p2, * k2, p2, k3, p2; repeat from * across to last 3 sts, k3.
Rows 14-17 Repeat Rows 12 and 13.
Row 18 P3, k2, p1, drop next st down 7 rows, p1, k2, * p2, k2, p1, drop next st down 7 rows, p1, k2; repeat from * across to last 3 sts, p3.
Row 19 K3, p2, * k2, p2; repeat from * across to last 3 sts, k3.
Row 20 P3, k2, * p2, k2; repeat from * across to last 3 sts, p3.
Repeat Rows 1-20 for Snowshoe pattern.
NOTE: It may be helpful, when working shaping, to place a marker on sts which are temporary (sts that are dropped on Rows 8 and 18 of Snowshoe pattern), as they are not included in the stitch counts given in the instructions.
BACK and FRONT (both alike)
Cast on 92 (100, 108, 116) sts.
(WS) Purl 1 row.
(RS) Begin Snowshoe pattern; work even until piece measures 14” from beg, end with Row 8 (WS row) of pattern.
Shape Armhole
(RS) Bind off 5 (5, 6, 7) sts at beg of next 2 rows – 82 (88, 96, 102) sts remain.
(RS) Dec 1 st each side every other row 5 (6, 8, 8) times – 72 (76, 80, 86) sts remain, (not counting sts which will be dropped).
Work even until Armholes measure 8 (8½, 8½, 9)” from beg of shaping, end with Row 8, 9, 18 or 19 of pattern.
Bind off all sts.
SLEEVES
Cast on 44 sts.
(WS) Purl 1 row.
(RS) Begin Snowshoe pattern; work even for 12 (8, 8, 10) rows, end with a WS row.
Shape Sleeve
(RS) Continue in pattern; inc 1 st each side this row, then every 10 (10, 10, 8) rows 7 (10, 10, 12) times, working increased sts in pattern – 60 (66, 66, 70) sts.
Work even until piece measures 18” from beg, end with Row 8 (WS row) of pattern.
Shape Cap
(RS) Bind off 5 (6, 6, 7) sts at beg of next 2 rows – 50 (54, 54, 56) sts remain.
(RS) Dec 1 st each side every other row 14 times – 22 (26, 26, 28) sts remain, end Row 18 of pattern.
Bind off 6 (7, 7, 8) sts at beg of next 2 rows – 10 (12, 12, 12) sts remain.
Bind off remaining sts.
FINISHING
Block pieces to measurements. Sew Shoulders, leaving 9½” open for neck. Set in SLEEVES; sew side and sleeve seams.
Using yarn needle, weave in all ends
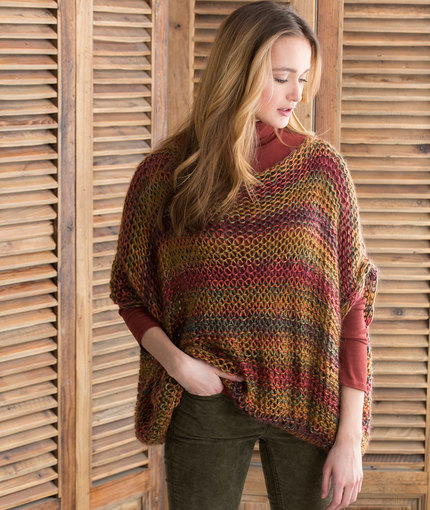
Read NextRelaxed Spring Pullover
Your Recently Viewed Projects
Thanks for your comment. Don't forget to share!
Lisa
May 13, 2024
Many knitter's are asking about the drop stitch in the pattern. The dropped stitch is going to be created from the M1 in a previous row, therefore, when it is dropped, it will only unravel/ladder itself back to the row it was created. The M1 in this pattern is considered a temporary stitch since it is going to be dropped later to create the lacey pattern in the garment. Hope this helps someone, happy knitting.
rcsldm 3408826
Nov 06, 2017
I haven't made this yet, i just joined. But reading the patters i don't understand the drop stitch, what keeps it from running down further. please can you explain. Thanks
catherineblackwood 1003429
Oct 22, 2015
I haven't made this, but isn't the dropped stitch in row 8 the stitch you make in row 1, therefore the ladder will stop when it undoes the made stitch and not ladder further.
ejcon3841 0831391
Jul 18, 2015
Like everyone else what happens to the dropped stitch. Need more info as to how it works when dropping the stitch.
redkelly
May 06, 2015
After dropping a stitch 7 rows, what keeps the stitches from laddering down further? It looks beautiful, but I cannot understand how it works. Pls explain. Tks
pinkypahwa 1566530
Apr 27, 2015
I am not able to understnad m1 stick in your pattern. Have you any video tutorial for this ??? I am not very use to of knitting written pattern.
jet68 6126105
Sep 06, 2014
elegant evening sweater. Instructions say to drop next stitch down 7 rows then repeat pattern p1,k2p2,k2,p1. What keeps the stitches from laddering down further
lizturner 4544432
Aug 04, 2014
I used pink baby yarn & it turned out beautifully (& cheap too)
aganita
Mar 08, 2014
Question; why does this pattern not give a 'cast on' number of stitches?
hamneggs
Mar 19, 2014
BACK and FRONT (both alike) Cast on 92 (100, 108, 116) sts. It's right underneath "Notes" section where pattern begins.
hamneggs
Mar 19, 2014
Cast on is right underneath the "Note" section where the pattern begins. Cast on 92(100,108,116)
Ddipsy
Feb 20, 2014
I made this sweater last year. I dress very modestly, so I lined the sweater with a very light (sheer) muslin. The affect was quite pleasing. I wanted the contrast between a mellow watermelon colored yarn and the white muslin. This is a pattern, which I will again add to my "favorites."
nellierust 7881656
Aug 17, 2013
Thank you for this site. I am so tired of my patterns but all of you thank you, I like it
Alchemist
Aug 06, 2013
Pattern for front and back of the sweater ends at bottom of armhole. No directions for continuing the back and front of the sweater. It says to bind off all stitches at bottom of armhole.
jlaesq 0974781
Sep 26, 2013
The pattern is knit from the bottom up, so the bind off is the neck line/shoulders.
Report Inappropriate Comment
Are you sure you would like to report this comment? It will be flagged for our moderators to take action.
Thank you for taking the time to improve the content on our site.