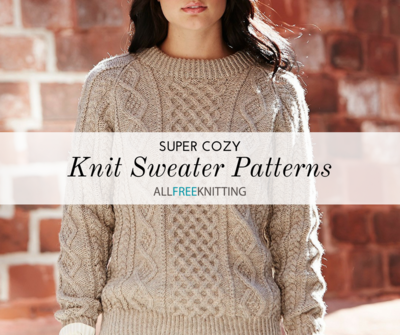
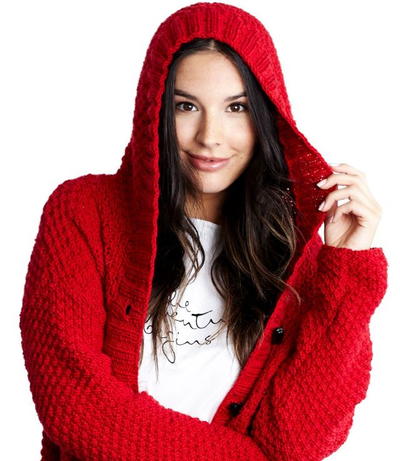
Scallops and Lace Sweater Pattern
This short-sleeve lace sweater pattern is simply precious and would make a great gift!

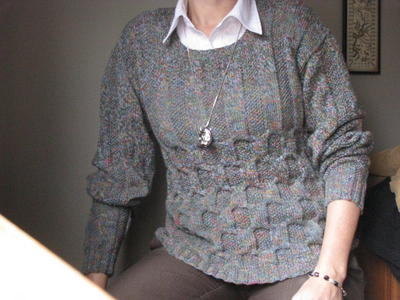
Fit for a goddess, the Scallops and Lace Sweater is a gorgeous option for any day of the year. The bottom half of this beautiful knit sweater pattern features elegant, scalloped stitch work that gives the piece a feminine flair.
The scallops are echoed in the cuffs of the three-quarter length sleeves and are balanced nicely by a simple, round neckline. This charming, lightweight sweater would look great with jeans as well as a skirt.

Knitting Needle Size6 or 4 mm, 8 or 5 mm
Yarn Weight(4) Medium Weight/Worsted Weight and Aran (16-20 stitches to 4 inches)
Gauge22 sts = 4” [10 cm]; 26 rows = 4” [10 cm] in Lace Pattern
with smaller needles; 16 sts = 4” [10 cm]; 24 rows = 4” [10 cm] in St st with larger needles.
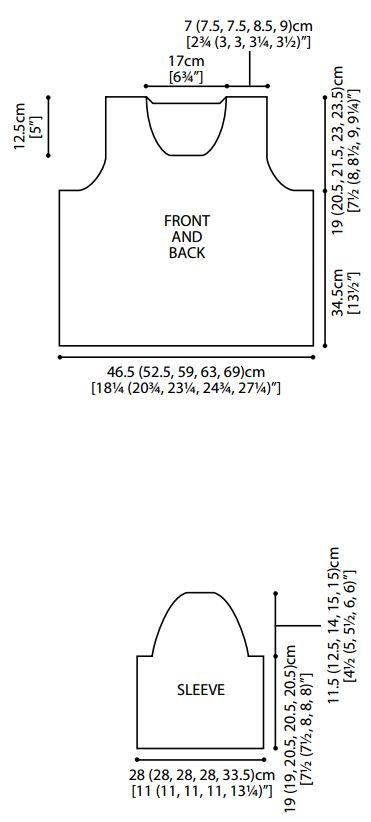
Finished Size36½ (41½, 46½, 49½, 54½)”, [92.5 (105.5, 118, 125.5,138.5) cm]
Materials List
- RED HEART® Shimmer®: 3 (4, 4, 5, 5) balls 1536 Purple Susan Bates®
- Knitting Needles: 4mm [US 6] and 5mm [US 8]
- Yarn needle
Pattern
Directions are for size Small; changes for sizes Medium, Large, 1X, and 2X are in parentheses as necessary.
Lace Pattern
Row 1 (Right Side): Knit.
Rows 2-4: Knit.
Row 5: K1, * [K2tog] twice, [yo, K1] 3 times, yo, [SSK] twice, K1; repeat from * across.
Row 6: Purl.
Rows 7-12: Repeat Rows 5 and 6 three more
times.
Repeat Rows 1-12 for Lace Pattern.
Pattern Note
For fully-fashioned decreases: On right side rows: K3, SSK, work to last 5 sts; K2tog, K3; on wrong side rows: P3, P2tog, work to last 5 sts; P2togtbl, P3.
Back
With smaller needles, cast on 97 (109, 121, 133, 145) sts. Work Rows 1-12 of Lace Pattern 4 times, then work Rows 1-4 once more. Change to larger needles and St st, begin knit row, and decrease 24 (26, 28, 34, 36) sts evenly spaced across first row – 73 (83, 93, 99, 109) sts. Work even until 13½” [34.5cm] from beginning, end purl row.
Shape Armholes
Bind off 4 (5, 6, 6, 7) sts at beginning of next 2 rows, then 2 (2, 3, 3, 4) sts at beginning of next 2 rows, then decrease 1 st each end of every row 4 (8, 12, 14, 16) times, then every other row 2 (1, 0, 0, 0) times – 49 (51, 51, 53, 55) sts. Work even until 20½ (21, 21½, 22, 22¼)”, [52 (53,5, 54,5, 56, 56.5) cm] from beginning, end purl row.
Shape Neck
K12 (13, 13, 14, 15) sts, join 2nd ball of yarn and bind off center 25 sts, knit to end. Work both sides at once with separate balls of yarn and decrease 1 st at each neck edge every row once – 11 (12, 12, 13, 14) sts each side. Work even, if necessary, until 21 (21½, 22, 22½, 22¾)” [53.5 (54.5, 56, 57, 58) cm] from beginning, end purl row.
Shape Shoulders
Work both sides at once with separate balls of yarn and bind off 4 (4, 4, 4, 5) sts at beginning of next 4 rows, then 3 (4, 4, 5, 4) sts at beginning of next 2 rows.
Front
Work same as back until 16 (16½, 17, 17½, 17¾)”, [40.5 (42, 43, 44.5, 45) cm] from beginning, end purl row.
Shape Neck
K18 (19, 19, 20, 21) sts, join 2nd ball of yarn and bind off center 13 sts, knit to end. Work both sides at once with separate balls of yarn, and bind off 2 sts each neck edge twice, then decrease 1 st each neck edge every row three times – 11 (12, 12, 13, 14) sts each side. Work even until piece measures same as back to shoulders. Shape shoulders same as back.
Sleeves
With smaller needles, cast on 61 (61, 73, 73, 85) sts. Work Rows 1-12 of Lace Pattern once, then work Rows 1-4 once more. Change to larger needles and St st, begin knit row and decrease 14 (12, 18, 14, 18) sts evenly spaced across first row – 47 (49, 55, 59, 67) sts. Work even until 7½ (7½, 8, 8, 8)”, [19 (19, 20,5, 20.5, 20.5) cm] from beginning, end purl row.
Shape Cap
Bind off 4 (5, 6, 6, 7) sts at beginning of next 2 rows, then decrease 1 st each side every 4th row 1 (4, 4, 4, 2) times, then every other row 9 (6, 8, 10, 15) times – 19 sts. Work 1 (0, 1, 0, 0) row even. Bind off 2 sts at beginning of next 4 rows. Bind off remaining 11 sts.
Finishing-Neckband
Sew right shoulder seam. With right side facing and smaller needles, pick up and K83 sts evenly along neckline. Knit every row for ½” [1.5 cm]
Next Row: Knit and decrease 12 sts evenly across – 71 sts.
Knit every row until band measures 1” [2.5 cm]. Bind off.
Sew left shoulder and neckband seam. Set in sleeves. Sew sleeve and side seams.
Abbreviations
- SSK
- slip next 2 sts knitwise, one at a time, then insert tip of opposite needle into the fronts of these 2 sts and knit them together in this position.
- St st
- Stockinette stitch (Knit on right side rows; Purl on wrong side rows)
- Tbl
- through back loops
- []
- work directions in brackets the number of times specified.
- *
- repeat whatever follows the * as indicated
Read NextNordic-Inspired Knit Sweater
Your Recently Viewed Projects
Thanks for your comment. Don't forget to share!
Gilly
Jul 12, 2020
I can't understand why the back say's knit to 13.5" then shape armholes, whereas the front says knit to 17" then shape the armholes. Surely, the two pieces will nit match up? I have knitted the front up to the neck shaping and left the piece on a needle,at 17"to the armholes it seems about the right length for me, and now I am doing the back. Anybody who's knitted this got any advice pleasse?
Lisa
Jul 17, 2020
In hand knit sweaters for women, the back and front are not knit to the same length, the front needs to longer to account for the bustline, otherwise there will be no room for the front to expand to accommodate it.
Tricia108
Sep 23, 2017
Pretty sweater. There are inconsistencies in the instructions so the notes help. Still all all it would be worth the effort to make. You certainly won't see this in the stores. You can also make the sleeve a bit longer if you want it for colder weather. Very feminine looking. Thank you. It will look great in the office.
m2guy 5266635
May 23, 2017
What does it mean in the Pattern Notes about fully fashioned decreases? When is this done? Thanks.
lcarr
May 24, 2017
In this case, the fully fashioned decreases are decreases made 3 sts in from either side, with the first decrease on the knit side being made with ssk, and the last decrease on the purl side with P2togtbl. This will make the decreases look uniform along the edge. You will make these decreases wherever it says to begin decreases at the ends or edges in the pattern, but not where it says to make decreases evenly across a row. I hope that helps.
Sassy Sue
Oct 15, 2016
I'm making the 2X size. The lace motifs don't line up properly. I have double checked every repeat, and they all look fine. What can I do, just go with it???
lawrenceljb 615621 0
May 21, 2016
Pretty sweater and yarn. However the directions for the sleeve cap are incorrect. Using size 4 as an example, you can't fit a 6" sleeve cap into a 9" armhole. I added 18 rows, and changed the decreases dec 1 st ea side every 3rd row 5 times, then every 4th row 9 times. BO 2 sts at beg of next 4 rows. BO remaining 11 sts. Similar corrections required for other sizes. Hope this helps others.
maureenchuck56 016 5541
Aug 28, 2018
Did you make the sleeve itself shorter by 18 rows to allow for the increase in rows for the cap?
2bizy2 1364241
May 09, 2016
I was all ready to start knitting this beautiful sweater, but the lace pattern doesn't say how many stitches to cast on. What am I missing?
lawrenceljb 615621 0
May 22, 2016
The number of stitches to cast on is found in the instructions for the sweater itself. Look at the first sentence in the instructions for BACK. Same for FRONT and SLEEVES. Hope this helps.
karen 9500492
Jan 20, 2016
I made this sweater in a medium coral color. I wear it all the time. the only modification I made was to make the sleeves 3/4 length
JosieHealy
May 08, 2016
Is it a sweater that someone with a full bust could wear without looking dumpy?
lawrenceljb 615621 0
May 27, 2016
Absolutely!! But look at my sleeve cap corrections on May 21 before you start.
nanina614 3865028
Sep 05, 2016
karen, did you have trouble with the sleeve cap directions or did you find the directions correct? just wondering cuz you've made the sweater and wear it all the time. thanks!
Report Inappropriate Comment
Are you sure you would like to report this comment? It will be flagged for our moderators to take action.
Thank you for taking the time to improve the content on our site.