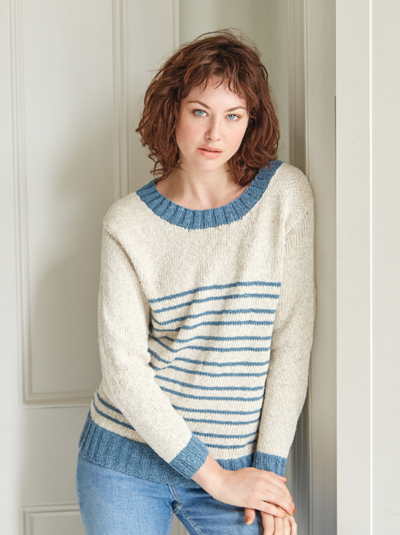
Lacy Dolman Pullover

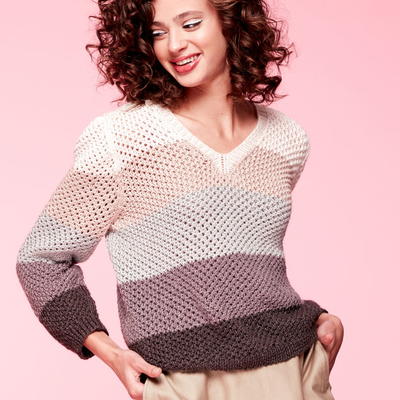
The Lacy Dolman Pullover will quickly become your go-to knit sweater for spring. The soft blue color of this lightweight sweater makes it ideal for warm days and cool nights. Plus, the relaxed fit is right on trend. This knit sweater pattern has an easy breezy feel to it and once you start wearing it, you won't want to take it off. The ribbon tie at the bottom of the sweater really gives this piece an extra special detail. This is certainly not your average free sweater knitting pattern, because the femininity and softness of the design will turn heads every time you wear this lacy pullover.
NotesKnitted Measurements
XS 20" [51 cm], S 21" [53.5 cm], M 22" [56 cm], L 23" [58.5 cm], XL 24" [61 cm]
Length
XS 28", S 28", M 28", L 28", XL 28"

Knitting Needle Size8 or 5 mm, Double-Pointed Knitting Needles (DPNs)
Yarn Weight(4) Medium Weight/Worsted Weight and Aran (16-20 stitches to 4 inches)
GaugeIn Stockinette stitch, 18 sts and 24 rows = 4"/10 cm
In Lace stitch, 8 stitches and 24 rows=4"/10 cm
In Lacy Rib, 16 sts and 24 rows = 4"/10 cm
Materials List
- Caron - Simply Soft Soft Blue XS (4 balls), S (4 balls), M (4 balls), L (5 balls), XL (5 balls)
- Single Point Aluminum Knitting Needles 14" - Size 8/5mm
- Double Point Aluminum Knitting Needles 7" - Size 8/5mm
- Aluminum Crochet Hook 6" - Size J10/6mm
- Chibi Tapestry Needle Set - Jumbo 2/Pkg
- Row counter
Pullover
Lacy Rib (multiple 4 sts + 3)
Note: The yarn-overs in this Stitch pattern provide the extra yarn needed to produce the 'eyelets' on each side of the slipped st, and to allow the slipped st to become elongated as it is slipped; they are not worked as sts. On Rows 3 and 6 the yarn-over strands are incorporated into the slipped st as it is worked.
Row 1 (RS): K3, * yo, slip 1, yo, k3; repeat from * across.
Row 2: P3, * yo, slip [first yo and next st, drop remaining yo], yo, p3; repeat from * across.
Row 3: K3, knit slipped st, inserting needle under both yarn-over strands and into st, k3; repeat from * across.
Row 4: P3, * yo, slip1, yo, p3; repeat from * across.
Row 5: K3, yo, slip [first yo and next st, drop remaining yo], yo, k3; repeat from * across.
Row 6: P3, purl slipped st, inserting needle under both yarn-over strands and into st, p3; repeat from * across.
Repeat Rows 1 – 6 for Lace Rib.
Lace Stitch (multiple of 2 sts + 1)
Note: This Stitch pattern is worked in the same way as Lacy Rib, with fewer sts between the slipped sts. The RS of the fabric is the reverse of Lacy Rib, to produce all-over lace, rather than a Rib.
Row 1 (WS): K1, * yo, slip 1, yo, k1; repeat from * across.
Row 2: P1, * yo, slip [first yo and next st, drop remaining yo], yo, p1; repeat from * across.
Row 3: K1, knit slipped st, inserting needle under both yarn-over strands and into st, k1; repeat from * across.
Row 4: P1, * yo, slip1, yo, p1; repeat from * across.
Row 5: K1, yo, slip [first yo and next st, drop remaining yo], yo, k1; repeat from * across.
Row 6: P1, purl slipped st, inserting needle under both yarn-over strands and into st, p1; repeat from * across.
Repeat Rows 1 – 6 for Lace st.
Double crochet (sc)
Single crochet (sc)
NOTE
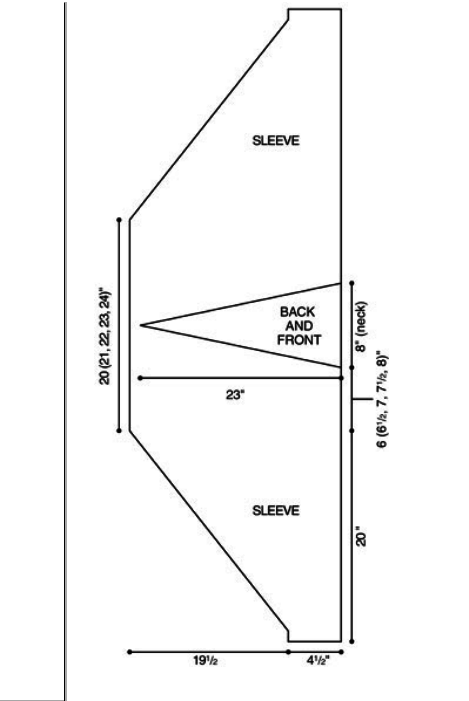
Fabric is very flexible; garment, worked side-to-side in 2 pieces, is designed to be loose fitting; measurements are approximate.
Back
Beginning at lower edge of right sleeve, cast on 18 sts.
Cuff
(RS) Begin St st; work even for 10 rows, end with a WS row. Establish Pattern: (RS) * K2tog, yo; repeat from * across, do NOT work a yarn-over at the end of the row—9 sts, not counting yarn-overs; drop yarn-overs as you come to them on first row of Lace st. (WS) Begin Lace st; work even for 4 rows, end with a RS row.
Shape Sleeve
(WS) Beginning this row, (working all increases at beginning of WS rows), working sts in pattern as they become available), inc 1 st every 4 rows 30 times—39 sts; place a marker (pm) for end of shaping.
Center Back
Continuing in pattern, work even until piece measures 6 (6 1/2, 7, 7 1/2, 8)" from end of shaping; pm at beginning of next RS for beginning-of-neck. Work even until piece measures 8" from beginning-of-neck (48 rows); pm at beginning of next RS row for end-of neck.
Work even until piece measures 6 (6 1/2, 7, 7 1/2, 8)" from end-of-neck, end with a RS row.
Shape Sleeve
(WS) Beginning this row, (working all decreases at beginning of WS rows), dec 1 st every 4 rows 30 times, end with a WS row—9 sts remain.
Cuff
(RS) * K1, yo; repeat from * across to last st, k1-f/b in last st—18 sts, counting yarn-overs.
(WS) Change to St st; work even on 18 sts for 10 rows.
Bind off all sts loosely.
Front
Beginning at lower edge of left sleeve, cast on 18 sts.
Work as for Back until beginning-of-neck marker, end with a WS row.
Shape Neck
(RS) At neck edge (beginning of RS rows), dec 36 sts, working decreases every other row, as follows: Bind off 4 sts once, [3 sts twice, 2 sts once] 4 times, end with a RS row—3 sts remain.
(WS) At neck edge, (end of WS rows), inc 36 sts, working increases every other row, as follows: Cast on [2 sts once, 3 sts twice] 4 times, 4 sts once, working increased sts in pattern as they become available—39 sts; end-o fneck.
Beginning with instructions after end-of-neck marker, complete Front as for Back.
Belt Loops and Lace Edging
With RS facing, pick up and knit 81 (91, 91, 101, 101) sts across lower edge of Back.
(WS) Begin St st; work 1 row even.
First Loop: (RS) K3, turn. Working on 3 sts only, work even for 5 rows, end with a RS row. Cut yarn; leave sts at end of needle.
Second loop: * Join yarn and knit next 5 sts, turn. Working on 5 sts only, work as for first loop. Repeat from * across, working last loop with remaining 3 sts; do NOT cut yarn after last loop.
(WS) Work even for 2 row across all sts, end with a RS row.
Establish Pattern: (WS) [P3, yo, p1, yo] 1 (4, 4, 3, 3) times [p3, yo, p1, yo, p2, p2tog, yo, p1, yo, p3, yo, p2tog, yo] 5 (4, 4, 5, 5) times, [p3, yo, p1, yo] 1 (4, 4, 4, 4) times, p3—71 (83, 83, 91, 91) sts remain, not counting yarnovers.
(RS) Begin Lacy Rib; work even for 4", end Row 3 or Row 6 of Lacy Rib. Bind off all sts loosely in pattern.
Repeat across lower edge of Front.
Finishing
Sew Sleeve and shoulder seams, matching Front neck shaping to neck markers on Back.
Belt Cords
Measure around waist loosely and make note of measurement; add 5" for the first cord and 7" for the second cord.
Work I-cords to these measurements, using Embellish-Knit™ or double pointed needles (see above).
Thread I-cords through loops, shorter on top, longer on bottom (see photo).
Cuff
Fold St st section in half at lower edge of sleeve; turn to WS and stitch in place along first row of Lace st, forming a hem.
Neck Edging
With RS facing, using crochet hook, join yarn with a slip st at shoulder seam.
Round 1: Ch 1, work 1 row sc evenly around neck edge, join with a slip st to first st.
Round 2: Ch 4 (counts as first dc on next round), * skip 2 sc, dc in next sc, ch 4; repeat * around, join with a slip st to third ch of beginning ch-4. Fasten off.
Using yarn needle, weave in all ends.
Abbreviations
- I-cord
- Using a doublepointed needle, cast on the number of sts indicated in instructions; DO NOT TURN. *Slide sts to the opposite end of the needle and knit them, pulling yarn firmly behind sts; rep from * to desired length. After a few rows, you will see that you are knitting a tiny tube; give it a gentle tug now and then to adjust any loose sts. Bind off all sts, leaving a 2" [5 cm] tail for finishing.
- st st
- stockinette stitch
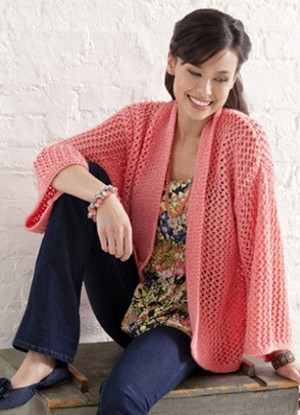
Read NextBright and Breezy Kimono
Your Recently Viewed Projects
Thanks for your comment. Don't forget to share!
Linda
Feb 14, 2017
Dolman sleeve sweater in lace pattern stitch is elegantly knitted. The sweaters are best made in one piece for me.
quanahs 5032097
May 04, 2016
I love this pattern too and its so nice to see a free pattern in a wide variety of sizes. While the sweater looks complicated, the lacy rib stitch is a simple repeat and easy to memorize. I love the choice of the Simply Soft Caron yarn too, not only does it give the sweater great drape, its very affordable which is always a consideration. Thanks for sharing.
chrismotsinger38 4 792531
Apr 06, 2016
Hi, love this pattern. Its gorgeous. How many stitches exactly do you cast on for size xl. Math just isnt my thing. Lol thanks
jayelcentro 889754 2
Apr 08, 2016
You cast on same amount of stitches for all sizes, just work pattern to the different measurements. Pattern is worked cuff to cuff
Report Inappropriate Comment
Are you sure you would like to report this comment? It will be flagged for our moderators to take action.
Thank you for taking the time to improve the content on our site.