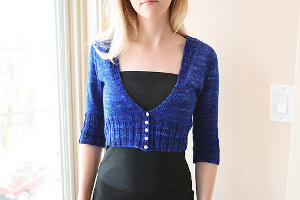
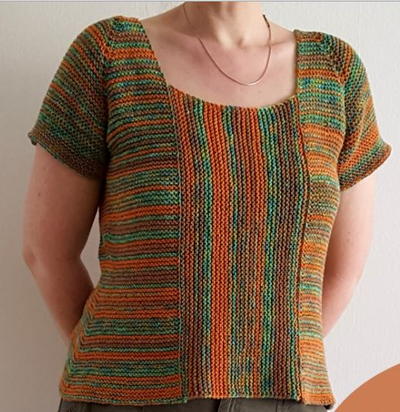
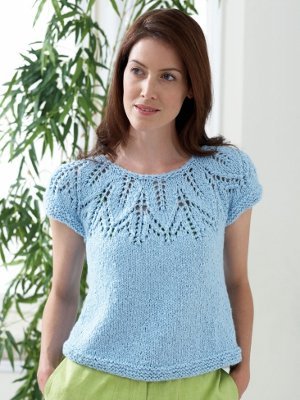
Tribeca Knit Tunic

Those cool and elaborate tunic designs aren't just in department stores. You can make one yourself with this Tribeca Knit Tunic pattern. The line designs are completely mesmerizing, and incredibly flattering to the wearer. This tunic top tutorial will teach you how to make the perfect piece of party-wear, that is both stunning and useful. The pattern includes pockets to easily carry your phone or wallet, and looks brilliant with leggings or tights. Whether you're out to your next big event, or plan to just lounge around at home, this tunic is worth a try.

Knitting Needle SizeCircular Knitting Needles
Yarn Weight(3) Light/DK (21-24 stitches to 4 inches)
Gauge1 stitches, 2 rows, 3 inches. stockinette stitch
Materials:
924-153 Lion Brand Modern Baby: Black - 5 6, 7 Balls (A)
924-098 Lion Brand Modern Baby: Cream - 3 4, 4 Balls (B)
861-153 Lion Brand Vanna's Glamour Yarn: Onyx - 1 1 Ball (C)
Boye Aluminum Circular Knitting Needles 16 inches, Size 7
Lion Brand Stitch Holders
Lion Brand Split Ring Stitch Markers
Lion Brand Large-Eye Blunt Needles (Set of 6)
Additional Materials:
Circular knitting needle
size 7 (4.5 mm), 36 in.
(91.5 cm) long
Gauge: 20 sts + 38 rows = about 4 in. (10 cm) in Garter st (k every row) with A.
Abbreviations:
beg = begin(s)(ning)
dec = decreas(e)(s)(ing)
k = knit
k2tog = knit 2 together
p = purl
rep = repeat(s)(ing)
rnd(s) = round(s)
St st = Stockinette stitch
st(s) = stitch(es)
tog = together
Notes:
1. Tunic is worked in 2 pieces: Back and Front.
2. Back and Front are each worked in 5 Panels: Lower Panel, Center Panel, Right Side Panel, Upper Panel, and Left Side Panel. Construction details are shown on the diagram.
3. The Front has a pocket!
4. Yarn color is changed to make stripes. Do not cut yarn between color changes, simply carrythe unused color along the side edge of your work.
5. A circular needle is used to accommodate the width of the pieces. Work back and forth in rows on circular needle as if working with straight needles for everything except neck edging. Work neck edging in rnds.
Instructions:
Stripe Sequence:
Work *2 rows with A, 2 rows with B; rep from * for Stripe Sequence.
BACK
Lower Panel
With longer circular needle and A, cast on 90 (111, 129) sts. Working back and forth in rows on the circular needle, work in Garter st (k every row) until piece measures about 9 (9 1/2, 10) in. (23 (24, 25.5) cm) from beg.
Center Panel
Row 1 (RS):
With A, bind off 29 (36, 42) sts, join B and bind off 1 st, with B, k to end of row – 60 (74, 86) sts. Place marker in first st of this row for beg location of Right Side Panel.
Row 2:
With B, knit.
Change to A.
Work in Garter st, changing color following Stripe Sequence until Center Panel measures about 6 in. (15 cm); end with a RS row worked with A as the last row you work.
Next Row (WS):
With A, bind off 30 (37, 43) sts, k to end of row – 30 (37, 43) sts. Place marker in first st of this row for end location of Left Side Panel.
Change to B.
Work in Garter st and Stripe Sequence until Center Panel measures about 12 in. (30.5 cm); end with a WS row worked with B as the last row you work.
Cut yarns and slip rem sts to a holder.
Right Side Panel
From RS, join A at marker in corner between Lower Panel and Center Panel; pick up and k60 sts spaced as evenly as possible across side edge of Center Panel between marker and st holder.
Next Row (WS):
With A, knit.
Change to B.
Work in Garter st and Stripe Sequence until Right Side Panel measures same as Lower Panel bind-off edge.
Bind off.
Upper Panel
From RS, join A at top right corner of Right Side Panel; pick up and k30 (37, 43) sts spaced as evenly as possible across top edge of Right Side Panel; then k30 (37, 43) Center Panel sts from holder – 60 (74, 86) sts.
Next Row (WS):
With A, knit.
Change to B.
Work in Garter st and Stripe Sequence until Upper Panel measures about 5 3/4 in. (14.5 cm); end with a RS row worked with B as the last row you work.
Shape Neck
Next Row (WS):
With B, bind off 37 (43, 46) sts, k to end of row – 23 (31, 40) sts.
With A, knit 2 rows.
Bind off.
Left Side Panel
From RS, join A at top left corner of Upper Panel, pick up and k29 sts spaced as evenly as possible across side edge of Upper Panel and 30 sts across side edge of Center Panel to marker on left edge of Panel – 59 sts.
Next Row (WS):
With A, knit.
Change to B.
Work in Garter st and Stripe Sequence until Left Side Panel measures about 1 1/2 (1, 1) in. (4 (2.5, 2.5) cm); end with a WS row as the last row you work.
Next Row (RS):
Cast on 1 st for neck, k to end of row – 60 sts. Work in Garter st and Stripe Sequence until Left Side Panel measures same as Center Panel bind-off edge.
Bind off.
Following diagram, sew lower side edge of Right Side Panel to Lower Panel bind-off edge. Sew lower side edge of Left Side Panel to Center Panel bind-off edge.
 FRONT
FRONT
Work same as Back to Upper Panel.
Upper Panel
From RS, join A at top right corner of Right Side Panel, pick up and k30 (37, 43) sts spaced as evenly as possible across top edge of Right Side Panel, then k30 (37, 43) Center Panel sts from holder – 60 (74, 86) sts.
Next Row (WS):
With A, knit.
Change to B.
Work in Garter st and Stripe Sequence until Upper Panel measures about 5 1/2 in. (14 cm); end with a RS row worked with A as the last row you work.
Shape Neck
Next Row (WS):
With A, bind off 37 (43, 46) sts, k to end of row – 23 (31, 40) sts.
With B, knit 2 rows.
With A, knit 2 rows.
Bind off.
Left Side Panel
From RS, join A at top left corner of Upper Panel, pick up and k27 sts spaced as evenly as possible across side edge of Upper Panel and 30 sts across side edge of Center Panel to marker on left edge of Panel – 57 sts.
Next Row (WS):
With A, knit.
Change to B.
Work in Garter st and Stripe Sequence until Left Side Panel measures about 1 1/2 (1, 1) in. (4 (2.5, 2.5) cm); end with a WS row as the last row you work.
Next Row (RS):
Cast on 3 sts for neck, k to end of row – 60 sts. Work in Garter st and Stripe Sequence until Left Side Panel measures same as Center Panel bind-off edge.
Bind off.
Sew lower side edge of Left Side Panel to Center Panel bind-off edge. Leave lower side edge of Right Side Panel unsewn – this makes the pocket!
Pocket
Hold Front upside down, with cast-on edge at top. From RS, referring to diagram, place a marker on free side edge of the Right Side Panel, about 1 in. (2.5 cm) from outer edge of Front. From RS, join C at beg of marked edge (in inside corner). Pick up and k25 (32, 38) sts spaced as evenly as possible across edge to marker.
Next Row (WS):
Purl.
Continue in St st (k on RS, p on WS) until pocket measures about 8 in. (20.5 cm).
Bind off.
Fold pocket in half, with RS tog. Sew bound-off edge of pocket to WS of bound-off edge of Lower Panel. Seam sides of pocket. Sew rem 1 in. (2.5 cm) of side edge of Right Side Panel and top edge of Lower Panel tog.
FINISHING
Sew shoulder seams.
Neck Edging
From RS with shorter circular needle and C, working around neck edge beg at right shoulder seam, pick up and k2 sts along right back shoulder, 54 (57, 60) sts spaced as evenly as possible across back neck, 2 sts along left back shoulderto seam, 4 sts along left front shoulder, 54 (57, 60) sts spaced as evenly as possible across front neck, and 4 sts along right front shoulder – 120 (126, 132) sts.
Note:
After working a few rows, you may decide that your band would look better if you had picked up more or fewer sts than the amount indicated for your size. Since a well-balanced band adds a beautiful finishing touch to your Tunic, we strongly recommend that if you've any doubts, simply pull out the sts and adjust the number that you pick up. The pattern instruction reflects the number that the designer picked up – but everyone's knitting is a bit different. Place marker for beg of rnd and join by working the first st on the left hand needle with the working yarn from the right hand needle.
Knit 2 rnds.
Bind off.
Armhole Edging
Place markers on side edges of Front and Back about 7 1/2 (8, 8 1/2) in. (19 (20.5, 21.5) cm) down from shoulder seams. From RS with shorter circular needle and C, pick up and k84 (90, 96) sts spaced as evenly as possible across armhole edge between markers.
Purl 1 row.
Knit 1 row.
Bind off.
Rep for other armhole.
Sew side seams of Front and Back (including ends of armhole edging), leaving lower 6 in. (15 cm) unsewn for side slits.
Weave in ends.
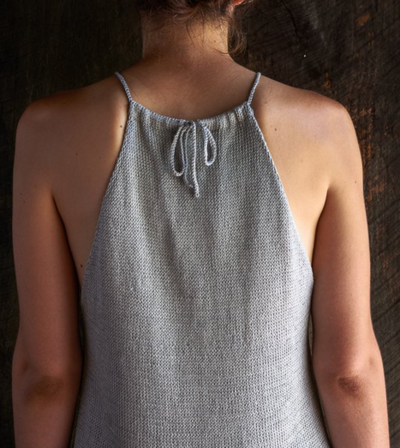
Read NextDrawstring Camisole
Your Recently Viewed Projects

Thanks for your comment. Don't forget to share!
Tricia108
Mar 14, 2018
In posting this pattern they left out some of the detail. I like it but I will have to go looking for the original on the Lion Brand site. Still, it is a lovely top and is very professional looking. The instructions that are there are easy to follow, although it looks complicated, and it would probably be a good stash buster if you did not want to stick with just black and white. I like it and I will put it on my list. Thank you.
achumley0003 31706 34
Nov 25, 2017
I really love this tunic. I love the way the stripes are designed and I love the solid block of color on the bottom with side slits.It works perfectly with the top. This would look great in other colors as well. It could even be made longer to make a cute dress, but you would need to seam the side slits down farther more than likely.
suemartin24 521356 1
Sep 14, 2015
Can you tell me what sizes are covered in this pattern as it give 3 different amounts of wool and the details of how many stitches to do for each amount but does not say what each size it is for
Lisa
Apr 01, 2021
That information is missing here, I found it on the original pattern, it is- SIZE Small, M/L, 1X/2X S (M/L, 1X/2X) Finished Bust About 36 (44, 52) in. (91.5 (112, 132) cm) Finished Length About 27 (27 1/2, 28) in. (68.5 (70, 71) cm)
fiberlicious
Feb 21, 2015
You can download the complete pattern here http//www.lionbrand.com/patterns/L40519.html?noIma == ges=
Hoomuch
Feb 20, 2015
This pattern is posted on this website very incomplete. They either need to fix it or yoiu can go to Lion Brand to get the complete free pattern.
fiberlicious
Feb 04, 2015
Extrapolate from the widths 18", 22" and 26" = 32" around, 44", and 52"
Report Inappropriate Comment
Are you sure you would like to report this comment? It will be flagged for our moderators to take action.
Thank you for taking the time to improve the content on our site.