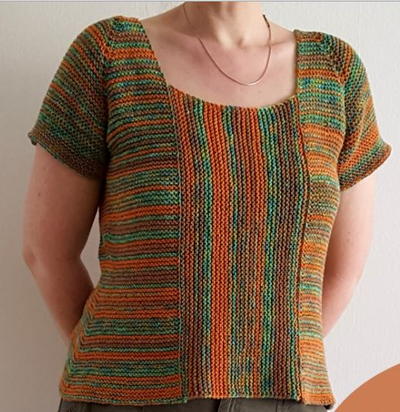
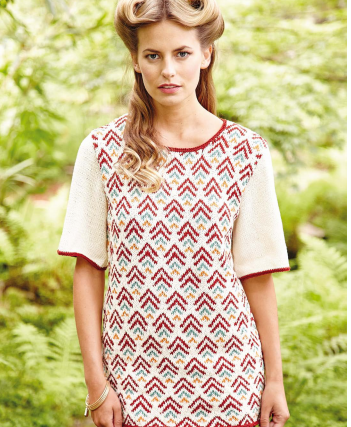
Snowmass Intarsia Tee

For those looking for a classic, comfy look, the Snowmass Intarsia Tee is the perfect solution. Featuring a bold diamond pattern around the yoke, this simple sweater will look great in any season. You will only need a basic knowledge of intarsia to create this colorwork knit tee. The bold stripes featured in the body of the sweater mean that most of this project will be a modest challenge. Wear this tee around the office or on a sunny spring day; no matter where you go, youre sure to get lots of compliments.

Knitting Needle Size4 or 3.5 mm
Yarn Weight(3) Light/DK (21-24 stitches to 4 inches)
Materials:
- Yarn: Bijou Basin Ranch “Sport Weight”, 100% yak, 328 yds
- (300 m), 3½ oz (100 g) 2 (3, 3, 3, 4, 4) in brown (A), 2 (3, 3, 3,
- 4, 4) in cream (B), and 1 (2, 2, 2, 2, 2) red (C)
- Needles: Size US 4 (3.5 mm) needles or size to obtain gauge
- Notions: Stitch markers, stitch holders, tapestry needle
Size: S (M, L, XL, 2X, 3X)
Gauge: 23 sts and 28 rows = 4" (10 cm) in Stockinette st
Finished Measurements: Bust: 37 (40, 44, 48, 52½, 57½)";
Length: 24¾ (25¼, 26½, 27¼, 28¾, 29½)"
Pattern Stitch:
1 x 1 Rib (multiple of 2 sts plus 1)
Row 1 (RS): K1, * p1, k1; rep from * to end.
Row 2: P1, * k1, p1; rep from * to end.
Rep rows 1 and 2 for 1 x 1 Rib.
Instructions:
Front and Back (make both the same)
Using C, cast on 109 (117, 129, 141, 153, 165) sts, and work 4 rows in 1 x 1 Rib.
Change to A, and work 21 (21, 22, 22, 23, 23) rows in Stockinette st beg with a RS (RS, WS, WS, RS, RS) row.
[Work 21 (21, 22, 22, 23, 23) using B, then 21 (21, 22, 22, 23, 23) using A] twice, ending after a RS row.
Shape Sleeve Cap and Begin Intarsia Pattern
Next 3 rows:
Row 1: (WS): P1 using C, [p53 (57, 63, 69, 75, 81) using B, p1 using C] twice.
Row 2: K2 using C, p51 (55, 61, 67, 73, 79) using B, p3 using C, p51 (55, 61, 67, 73, 79) using B, p2 using C.
Row 3: (inc row): (P1, M1p, p2) using C, p49 (53, 59, 65, 71, 77) using B, p5 using C, p49 (53, 59, 65, 71, 77) using B, (p2, M1p, p1) using C – 111 (119, 131, 143, 155, 167) sts
To shape sleeve cap, rep this inc every 4 (6, 6, 10, 12, 30) rows 6 (1, 1, 1, 1, 1) more times, then every 2 (4, 4, 8, 10, 0) rows 10 (11, 11, 6, 5, 0) more times, then work 3 (1, 5, 3, 3, 41) rows without increasing – 50 (54, 58, 64, 68, 74) Sleeve Cap rows.
AT THE SAME TIME, work 25 (27, 30, 33, 36, 39) more rows in established intarsia pat, working 1 more color C st and 1 less color B st wherever the colors meet – all sts are in color C.
Pm on either side of center 55 (59, 65, 71, 77, 83) sts, and begin top potion of intarsia pat as follows, while keeping Sleeve Cap incs consistent:
Row 29 (31, 34, 37, 40, 43): Work to marker using C, slm, work 1 st using A, work to 1 st before marker using C, work 1 st using A, slm, work to end using C. Remove markers.
Work 26 (28, 31, 34, 37, 39) more rows using new colors, working 1 more color A st and 1 less color C st wherever the colors meet.
AT THE SAME TIME, when 50 (54, 58, 64, 68, 74) Sleeve Cap rows are complete, beg to shape shoulders follows: Bind off 7 (7, 8, 8, 9, 9) sts at beg of next 4 (4, 6, 6, 8, 8) rows.
Shape Neck and Shoulders:
Pm on either side of center 37 (37, 41, 41, 45, 45) sts.
Next row (WS): Bind off 7 (7, 8, 8, 8, 8) sts, work to 2nd marker, sl all sts between markers to a holder, work to end.
Right Shoulder:
Next 9 (9, 7, 7, 5, 5) rows:
Row 1 (RS): Bind off 7 (7, 8, 8, 8, 8) sts, work to end.
Row 2 (dec row, WS): p2tog, work to end.
Rows 3 and 4: Rep rows 1 and 2.
Row 5: Bind off 7 (7, 7, 8, 7, 8) sts, work to end.
For 1st 4 Sizes Only:
Row 6: Rep row 2.
Row 7: Bind off 7 (7, 7, 7, 0, 0) sts, work to end.
For 1st 2 Sizes Only:
Row 8: Rep row 2.
Row 9: Bind off rem 7 (7, 0, 0, 0, 0) sts.
Left Shoulder
Join yarn to Right Shoulder sts still on the needle with RS facing.
Next 8 (8, 6, 6, 4, 4) rows:
Row 1 (RS): Ssk, work to end.
Row 2 (dec row, WS): Bind off 7 (7, 8, 8, 8, 8) sts, work to end.
Row 3: Rep row 1.
Row 4: Bind off 7 (7, 7, 8, 7, 8) sts, work to end.
For 1st 4 Sizes Only:
Row 5: Rep row 1.
Row 6: Bind off 7 (7, 7, 7, 0, 0) sts, work to end.
For 1st 2 Sizes Only:
Row 7: Rep row 1.
Row 8: Bind off rem 7 (7, 0, 0, 0, 0) sts.
Finishing:
Block pieces to measurements.
Sew Left Shoulder seam.
Neckband:
Using A and with RS facing, pu&k 9 (9, 7, 7, 5, 5) sts down right back neck edge, knit across 37 (37, 41, 41, 45, 45) sts from back neck holder, pu&k 9 (9, 7, 7, 5, 5) sts up left back neck edge and 9 (9, 7, 7, 5, 5) sts more down left front neck edge, knit across 37 (37, 41, 41, 45, 45) sts from front neck holder, pu&k 9 (9, 7, 7, 5, 5) sts up right front neck edge – 110 sts.
Row 1 (WS): * K1, p1; rep from * to end.
Rep this row twice more, then bind off all sts in rib pat.
Sew Right Shoulder and Neckband seam.
Sleeve Bands:
Using C and with RS facing, pu&k 84 (90, 94, 104, 112, 120) sts evenly along left Sleeve Cap edge, from 1st row of intarsia on front to 1st row of intarsia on back.
Row 1 (WS): * K1, p1; rep from * to end.
Rep this row twice more, then bind off all sts in rib pat.
Work right sleeve band the same.
Sew side and Sleeve Band seams.
Weave in loose ends
 You can find this project, as well as many other exciting knitting patterns, in our new free eBook, Best of the West STITCHES Show 7 Knit Tops, Free Shawl Patterns and More, Vol. 3. Download your own free copy today!
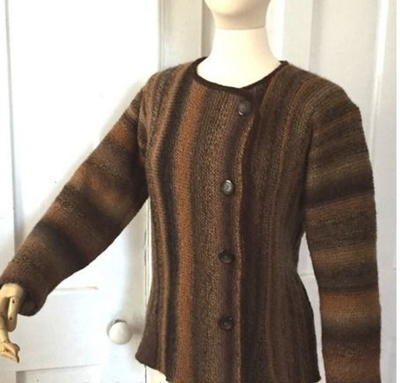
Read NextAutumn Elegance Knit Jacket