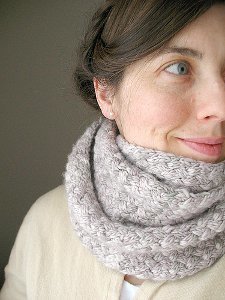
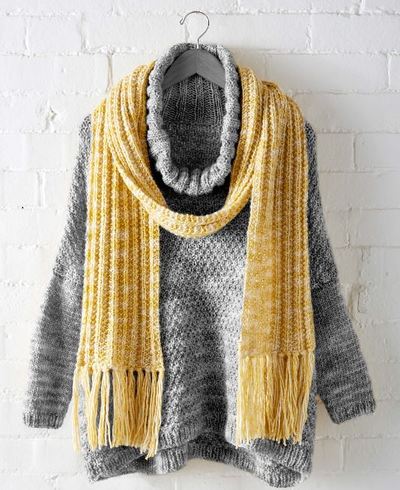
Entrelac Cowl
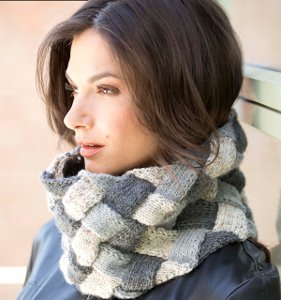
The Entrelac Cowl is a gorgeous knit cowl pattern that features three beautiful shades of gray. This pretty knit has a interlocking design, giving the cowl great texture and interest. The basic neutral colors will look great with any outfit, and add a sophisticated finishing touch to a jacket or sweater. The Entrelac Cowl is a lovely scarf you'll enjoy for seasons to come, so pull out your knitting needles and get lost in the shades of gray.

Knitting Needle Size8 or 5 mm
Yarn Weight(4) Medium Weight/Worsted Weight and Aran (16-20 stitches to 4 inches)
Size:
Finished Circumference: About 28 in. (71 cm); Finished Height: About 7 1/2 in. (19 cm)
Gauge: 18 sts + 24 rows = 4 in. (10 cm) in St st (k on RS, p on WS). BE SURE TO CHECK YOUR GAUGE.
When you match the gauge in a pattern, your project will be the size specified in the pattern and the materials specified in the pattern will be sufficient. If it takes you fewer stitches and rows to match the gauge, try using a smaller size hook or needles; if more stitches and rows, try a larger size hook or needles.
Materials:
- LION BRAND WOOL-EASE (Art. #620)
- #152 Oxford Grey 1 ball (A)
- #151 Grey Heather 1 ball (B)
- #402 Wheat 1 ball (C)
- or colors of your choice
- LION BRAND knitting needles size 8 (5 mm)
- LION BRAND split ring stitch markers
- LION BRAND® large-eyed blunt needle
Stitch explanations kfb (knit into front and then back) - An increase worked as follows:
1. Knit the next st through the front loop, but do not remove the st from your left-hand needle. 2. Knit the same st once more, this time inserting your needle through the back loop of the st. You will have created 2 loops (sts) on your right-hand needle. 3. Drop the st from your left-hand needle – you have increased 1 st.
ssk (slip, slip, knit) - Slip next 2 sts as if to knit, one at a time, to right needle; insert left needle into fronts of these 2 sts and knit them tog – 1 st decreased.
Notes
1. Entrelac knitting consists of rows of triangles and blocks that are worked in short rows. Short rows are rows that are worked over a portion of the sts in a row, leaving the remaining sts unworked. To work short rows, the pattern instructions will tell you to 'turn' before you reach the end of the row.
2. Follow the instructions for each row carefully and be sure to keep track of your place in the pattern.
3. Stitch markers are used to make it easier to see the beginning and end of each short row triangle or block. Move the position of the markers following the pattern instructions, being careful to move the beg of the row marker or the end of row marker as specified in the pattern. Use different color markers so that you can distinguish the beg of the row marker from the end of the row marker.
4. The Cowl begins with a section of foundation triangles, then half triangles and blocks are worked. To finish the Cowl, a section of finishing triangles is worked.
5. Unless otherwise noted, slip all sl sts as if to purl.
COWL
With A, cast on 24 sts.
FOUNDATION TRIANGLE SECTION
Foundation Triangle 1
Row 1 (WS): Sl 1, p1, turn.
Row 2 and all RS rows: K to end of row.
Row 3: Sl 1, p2, place marker (pm), turn.
Row 5: Sl 1, p2 (to marker), remove marker, p1, pm, turn.
Row 7: Sl 1, p3 (to marker), remove marker, p1, pm, turn. Row 9: Sl 1, p4 (to marker), remove marker, p1, pm, turn. Row 11: Sl 1, p5 (to marker), remove marker, p1, pm, turn. Row 13: Sl 1, p6 (to marker), remove marker, p1, pm (for beg of next triangle), DO NOT TURN.
Foundation Triangles 2 and 3
Row 1 (WS): Sl 1, p1, turn.
Row 2 and all RS rows: K all sts of this triangle (to beg marker), turn. Remove beg marker at end of Row 12.
Row 3: Sl 1, p2, pm, turn.
Row 5: Sl 1, p2 (to marker), remove marker, p1, pm, turn.
Row 7: Sl 1, p3 (to marker), remove marker, p1, pm, turn.
Row 9: Sl 1, p4 (to marker), remove marker, p1, pm, turn.
Row 11: Sl 1, p5 (to marker), remove marker, p1, pm, turn.
Row 13: Sl 1, p6 (to marker), remove marker, p1, pm (for beg of next triangle), DO NOT TURN.
Rep Rows 1-13 one more time – you will have made a total of 3 foundation triangles. Do not place a marker at the end of the last rep of Row 13, TURN.
Change to B.
Right-Edge Half Triangle
Row 1 (RS): K2, turn.
Row 2 and all WS rows: P to end of row.
Row 3: Kfb, pm, ssk, turn.
Row 5: Kfb, k1 (to marker), ssk, turn.
Row 7: Kfb, k2 (to marker), ssk, turn.
Row 9: Kfb, k3 (to marker), ssk, turn.
Row 11: Kfb, k4 (to marker), ssk, turn.
Row 13: Kfb, k5 (to marker), remove marker, ssk, pm (for beg of next square), DO NOT TURN.
The Right-Edge Half Triangle is complete. Leave 8 sts on right-hand needle.
Right Side Blocks
Row 1 (RS): Pick up and knit 8 sts along edge of next foundation triangle, turn.
Row 2: P1, pm, p7 (to beg marker), turn.
Row 3 and all RS rows: Sl 1, k6 (to marker), ssk, turn.
Row 4 and all WS rows: P8 (to beg marker), turn.
Rep Rows 3 and 4 six more times.
Row 17: Remove beg marker, sl 1, k6, remove marker, ssk, DO NOT TURN. Place marker at end of Row 17 (for beg of next block).
Rep Rows 1-17 one more time – 2 Right Side Blocks have been completed.
Left-Edge Half Triangle
Row 1 (RS): Pick up and k 8 sts along edge of last foundation triangle, turn.
Row 2: P2tog, p6 (to beg marker), turn.
Row 3 and all RS rows: Sl 1, k to end of row.
Row 4: P2tog, p5 (to beg marker), turn.
Row 6: P2tog, p4 (to beg marker), turn.
Row 8: P2tog, p3 (to beg marker), turn.
Row 10: P2tog, p2 (to beg marker), turn.
Row 12: P2tog, p1, remove marker, turn.
Change to C.
Row 13: P2tog using C, DO NOT TURN – 1 st remaining on right-hand needle.
First Wrong Side Block
Row 1 (WS): Pick up and purl 7 sts along edge of triangle just worked (for a total of 8 sts on right-hand needle), turn.
Row 2: K1, pm, k7, turn.
Row 3 and all WS rows: Sl 1, p6 (to marker), p2tog, turn.
Row 4 and all RS rows: K to end of row.
Rep Rows 3 and 4 six more times.
Row 17: Sl 1, p6, remove marker, p1, pm (for beg of next square), DO NOT TURN.
Next Wrong Side Blocks
Row 1 (WS): Pick up and purl 8 sts along upper edge of next block.
Row 2: K1, pm, k7 (to beg marker), turn.
Row 3 and all WS rows: Sl 1, p6 (to marker), p2tog, turn.
Row 4 and all RS rows: K8 (to beg marker), turn.
Rep Rows 3 and 4 six more times.
Row 17: Sl 1, p6, remove marker, p1, pm (for beg of next square), DO NOT TURN.
Rep Rows 1-17 one more time – 3 Wrong Side Blocks have been completed. Do not place marker at end of last Row 17, TURN.
Change to A.
Rep from Right-Edge Half Triangle (working Right Side Blocks and Left-Edge Half Triangle across edges of blocks instead of foundation triangles), work in following color sequence: *A, B, C; rep from * until Cowl measures approximately 28 in. (71 cm) from beginning, end with a row of Right Side Blocks and Left-Edge Half Triangle using C.
Change to A before Row 17 of last Left-Edge Half Triangle – 1 st remaining on right-hand needle. DO NOT TURN.
Finishing Triangle 1
Row 1 (WS): Pick up and p 7 sts along edge of triangle just worked (for a total of 8 sts on right-hand needle), turn.
Row 2 and all RS rows: K to end of row.
Row 3: P2tog, p5, pm, p2tog, turn.
Row 5: P2tog, p4 (to marker), p2tog, turn.
Row 7: P2tog, p3 (to marker), p2tog, turn.
Row 9: P2tog, p2 (to marker), p2tog, turn.
Row 11: P2tog, p1 (to marker), p2tog, turn.
Row 13: P2tog, remove marker, p2tog, turn.
Row 15: P2tog, p2tog, pass 1st st over 2nd st – 1 st remaining on right-hand needle. DO NOT TURN.
Finishing Triangles 2 and 3
Row 1 (WS): Pick up and p 7 sts along upper edge of next block (for a total of 8 sts on right-hand needle), turn.
Row 2 and all RS rows: K to end of row.
Row 3: P2tog, p5, pm, p2tog, turn.
Row 5: P2tog, p4 (to marker), p2tog, turn.
Row 7: P2tog, p3 (to marker), p2tog, turn.
Row 9: P2tog, p2 (to marker), p2tog, turn.
Row 11: P2tog, p1 (to marker), p2tog, turn.
Row 13: P2tog, remove marker, p2tog, turn.
Row 15: P2tog, p2tog, pass 1st st over 2nd st – 1 st remaining on right-hand needle. DO NOT TURN.
Rep Rows 1-15 one more time – 3 Finishing Triangles have been completed.
Fasten off remaining stitch.
FINISHING
Sew cast on edge to finishing edge to make Cowl. Weave in ends.
Every effort has been made to produce accurate and complete instructions. We cannot be responsible for variance of individual knitters or crocheters, human error, or typographical mistakes.
Notes:
Love this cowl? Check out these 21 Killer Knit Cowl Patterns for even more crazy awesome cowls!
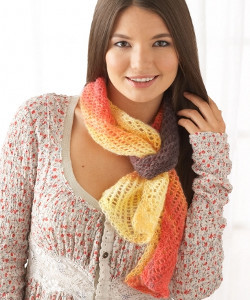
Read NextGrandma's Sunshine Scarf
Your Recently Viewed Projects
Thanks for your comment. Don't forget to share!
BHerb
Oct 30, 2013
Hi everyone, This pattern is linked to our free eBook, New Favorites from Lion Brand, in which the Entrelac Cowl can be found. All of our eBooks are available as FREE downloadable PDF documents. To download any PDF, you will need to have Adobe installed on your computer if you do not already (it is free). For downloading instructions, please see Adobes website here: http://get.adobe.com/reader/ Happy knitting!
wyndwoman 2929359
Oct 06, 2013
Here's a link for the pattern that I found through Ravelry.com. http://www.lionbrand.com/patterns/L32020.html?service=801&letterId=56034
jancra 2086260
Oct 06, 2013
Link not working takes me to other pages but no pattern??? Will design my own it's not difficult, just need to work out the correct number of stitches then divide for each square, but do love Entrelec such a classy effect.
Report Inappropriate Comment
Are you sure you would like to report this comment? It will be flagged for our moderators to take action.
Thank you for taking the time to improve the content on our site.