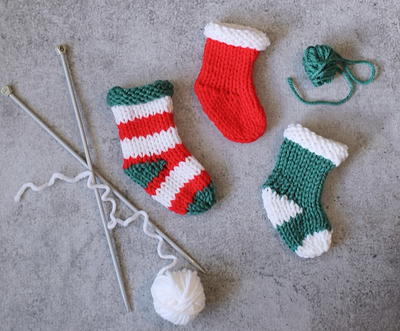
Folkways Christmas Stocking
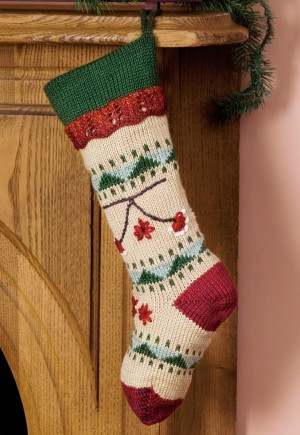
Knit this free stocking pattern for a Christmas heirloom that your family will cherish for years to come. This Folkways Christmas stocking is full of holiday cheer. This sophisticated stocking has earthy shades of your favorite Christmas colors and cute embroidered designs. This Christmas knit is full of country charm. Hang this stocking by your chimney with care for seamless holiday decor. If your home is filled with vintage decor and rustic furnishings, this stocking pattern is for you! Knit this intricate pattern at your leisure.

Knitting Needle Size8 or 5 mm, 9 or 5.5 mm, Double-Pointed Knitting Needles (DPNs)
Yarn Weight(4) Medium Weight/Worsted Weight and Aran (16-20 stitches to 4 inches)
Gauge17 stitches, 22 rows, 4 inches. stockinette stitch
Materials:
- Simply Soft (170 g/6. oz;288 m/315 yds) A Bone (9703) 1 Ball
- Simply Soft (170 g/6. oz;288 m/315 yds) B Dark Sage (9707) 1 Ball
- Simply Soft (170 g/6. oz;288 m/315 yds) C () 1 Ball
- Simply Soft (170 g/6. oz;288 m/315 yds) D Off White (9702) 1 Ball
- Simply Soft (170 g/6. oz;288 m/315 yds) E Autumn Red (9730) 1 Ball
- Simply Soft (170 g/6. oz;288 m/315 yds) F () 1 Ball
- Simply Soft (170 g/6. oz;288 m/315 yds) G () 1 Ball
- Single Point Aluminum Knitting Needles 14" Size 9/5.5mm
- Bent Tip Steel Yarn Needles Sizes 13 & 16 2/Pkg
- Double Point Aluminum Knitting Needles 7" Size 8/5mm
- Materials not included in this kit:
- Bobbins
- Row counter
- 1/2 yard fabric for lining
- Sewing needle and thread
Gauge: In Stockinette stitch, 17 sts and 22 rows = 4"/10 cm
Measurements: Stocking measures approx 7 1/2”/ 19 cm wide x 18”/ 45.5 cm from upper edge to heel
Instructions:
SPECIAL TECHNIQUES
Fair Isle (Stranded) Technique: Carry color not in use loosely across WS of work. Wrap colors if carried over more than 3 or 4 sts to avoid long floats.
Short Row Shaping: Work the number of sts indicated in the instructions, wrp-t; return to starting point. Continue to work progressively longer (OR… shorter…) rows as indicated in the instructions; work wraps together with wrapped sts as you come to them, as follows: Insert right-hand needle into wrap at base of wrapped st from beneath, then bring right-hand needle up and into st on left-hand needle ready to work the st; knit (or purl) wrap and st together—this prevents a hole from forming where Short Row ended.
Hint: If it's difficult to work wrap and st together as given above, slip wrapped st to right-hand needle, insert lefthand needle into wrap (from bottom to top), place wrap on left-hand needle, return wrapped st to left-hand needle and knit (or purl) wrap and wrapped st together.
Wrap and Turn (wrp-t): (RS) Yarn forward (to the purl position), slip next st to right-hand needle, yarn back (to the knit position), return slipped st, (which is now wrapped), to left-hand needle; turn, leaving remaining sts unworked.
I-Cord: Using a double pointed needle, cast on, the number of sts indicated in instructions; DO NOT TURN. * Slide sts to the opposite end of the needle and knit them, pulling yarn firmlybehind sts; repeat from * to desired length. After a few rows, you will see that you are knitting a tiny tube; give it a gentle tug now and then to adjust any loose sts. Bind off all sts, leaving a 12" tail for finishing.
EMBROIDERY STITCHES
Stem Stitch (F): Bring needle from WS to RS at center of a stitch, * insert needle into upper right-hand edge of next st to right, then out again at center of stitch; repeat from *, making regular, slightly slanted stitches.
Lazy Daisy Flowers (E): Beginning each st at the same point, work six or seven Lazy Daisy loops to form flower (seediagrams).
French Knot (D): Bring needle from WS to RS, wrap yarn around needle one or two times and hold it in place as you pull needle through.
STITCHES USED
Stockinette stitch (St st)
Garter stitch (Garter st)
Fair Isle (see chart)
Lace Edging (multiple of 11 sts - also see Chart)
Row 1 (RS): Knit.
Row 2: Knit.
Rows 3, 5, 7 and 9: * K2tog, k3, yo, k1, yo, k3, k2tog; rep from * across.
Rows 4, 6, 8 and 10: Purl.
Work Rows 1 – 10 for Lace.
NOTES
Stocking is worked in one piece, then seamed.
Cuff is worked with RS facing, then WS of Cuff becomes RS for remainder of Stocking.
Fair Isle Chart may be worked from right to left or left to right as needed.
STOCKING
Using G, CO 66 sts.
Begin Lace Edging; work even for 10 rows, end with a WS row.
Cuff
Change to B and St st; work even until piece measures 6" from Lace Edging, end with a WS row.
(RS) Change to A and knit 1 row, decreasing 4 sts evenly across last row—62 sts remain.
Note: WS of Cuff now becomes RS of Leg.
Leg
(RS) Change to St st; cont with A, work even for 16 rows, end with a WS row.
(RS) Begin Fair Isle Chart; work Rows 1 – 11 once, changing colors as indicated.
(WS) Cont with A only in St st, work 22 rows.
(WS) Begin Fair Isle Chart; work Rows 1 – 11 once, changing colors as indicated.
(RS) Cont with A only in St st, work even for 4 rows, end with a WS row.
Heel
(RS) Change to G; k31, leaving remaining sts unworked.
Begin Short Row shaping, working across to last 2 sts, wrp-t for each row until 15 sts remain.
Reverse the Short Row shaping by working across 1 more st each row, working wraps together with wrapped st, until all sts are being worked – 31 sts; end with a WS row.
Foot
(RS) Change to A; cont in St st, work across all sts—62 sts.
Work even for 9 rows.
(RS) Begin Fair Isle Chart; work Rows 1 – 11 once, changing colors as indicated.
(WS) Cont with A only in St st, work even for 9 rows.
Toe
(RS) Change to G, work the toe shaping as for heel.
Bind off sts, or leave live and graft together.
FINISHING
Embroidery
Using diagrams and photo as a guide, work Embroidery as shown.
Assembly
Sew side seam. Turn Cuff to RS; neatly sew the Cuff to the Stocking along the first and last row of B, as shown (if desired).
Using yarn needle, weave in ends.
Hanger
Using B, work a 14" piece of I-cord, using Embellish-knit machine or double pointed needles. Fold cord in half and tack to WS of stocking at upper edge of Cuff fold.
Lining (optional): Using Stocking as a pattern, draw the shape on a piece of paper, adding 1/2" on all sides for seam.
Note: Lining should end at the edge of the folded cuff on the WS. With RS's together, using sewing needle and matching thread, sew seam. Insert lining into Stocking and neatly sew upper edge of lining along edge of Cuff where it is joined to Stocking.
Folkways Christmas Stocking Charts
Your Recently Viewed Projects
Thanks for your comment. Don't forget to share!
Sylvia
Aug 30, 2021
What are the colours and colour numbers for F and G please?
Lisa
Aug 30, 2021
According to yarnspiarations the colors for this pattern are- Contrast A Bone (9703) 1 ball Contrast B Dark Sage (9707) 1 ball Contrast C Robin's Egg (9780) 1 ball Contrast D Off White (9702) 1 ball Contrast E Autumn Red (9730) 1ball Contrast F Chocolate (9750) 1 ball Hope this helps, happy knitting.
justinezoe 2109987
Sep 15, 2014
hi, can you give me, please, the instructions in french ? thanks Maryline
Editor JD
Sep 15, 2014
Hi justinezoe 2109987, Unfortunately we only have the English version of this pattern. However, we suggest checking the Caron website to see if they have any patterns in French. Hope this helps! -Editors of AllFreeKnitting
Report Inappropriate Comment
Are you sure you would like to report this comment? It will be flagged for our moderators to take action.
Thank you for taking the time to improve the content on our site.