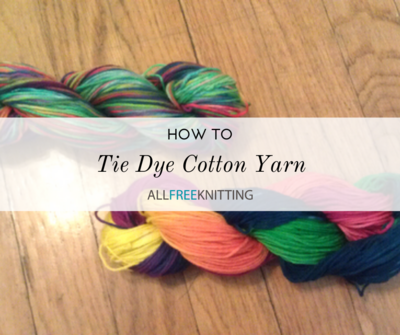
How To Tie Dye Cotton Yarn
Dyeing cotton yarn is so easy to do! Learn to make hand dyed cotton yarn in a trendy tie-dye style.

It's no secret that ChemKnits likes to dye yarn. The greatest limitation of my past dyeing projects is that using KoolAid and Food Coloring as the dye source doesn’t let you dye 100% cotton yarns. When I picked up the Tulip Tie Dye Kit I knew that my dyeing limitations were over. This kit, traditionally used to dye cotton T-shirts, works on cotton, silk, wool and other natural fibers, so you can make hand dyed cotton yarn in all kinds of cool colors. Although it is not advertised as a yarn dyeing kit, the contents are perfect for your hand painting needs.

Materials List
- Cotton Yarn - In the accompanying video I dyed 50 g of organic cotton in both skein and ball forms.
- Tulip Tie Dye Kit - This kit is a dream to tie dye multicolored yarn with. Depending on which kit you select, you get 3-12 different colors of dye, squeeze bottles, plastic gloves, rubber bands and an instructional packet full of inspiration.
- Water
- Plastic Bags
- Gloves (keep your hands dye free!)
- Time - It will take 6-8 hours to allow the dye to permanently absorb to the yarn.
- Plenty of paper towels to mop up spills.
How to Dye Cotton Yarn with a Tulip Tie Dye Kit
-
Before you begin, make sure you read the instructions that come with your tie dyeing kit. The below instructions are based on the Tulip Tie Dye Kit, so times and other recommendations may vary with different brands.
-
Prepare your yarn for dyeing - In the accompanying video, I will demonstrate dyeing yarn both in ball form and in skein form. Either way works great, but if you want more control over your color repeats, then I would recommend winding the yarn into a skein first.
-
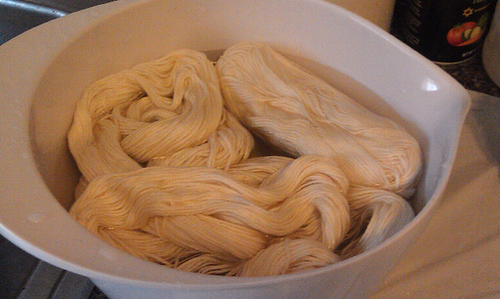
Presoak your yarn - The kit states that no presoaking is required, but I know from experience that it is easier to apply dye to wet fibers. Submerge your yarn in water and let it soak for ~30 minutes.
-
Protect your work surface - The Tulip Tie Dye kit comes with almost everything you need to dye your yarn, but you don’t want to end up dying your kitchen as well! I put a plastic trash bag over my work surface. If I am working on multiple projects in one day, I would also lay plastic wrap on the surface, which comes in handy when I am ready to wrap up my yarn to let the dye set.
-
Wring out your yarn - Gently squeeze out the excess water from your yarn. The more water left in the yarn means the less dye you’ll be able to apply.
-
Prepare your dyes - follow the Tulip Tie Dye kit instructions to add water to the powder dyes. According to the Tulip Instructions, the dye should be used within 45 minutes of mixing.
-
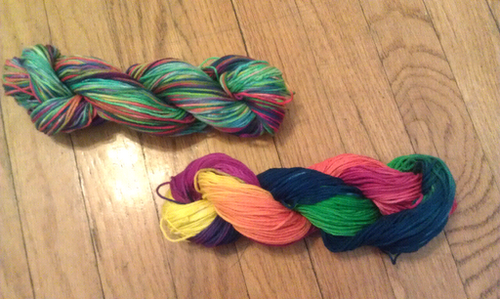
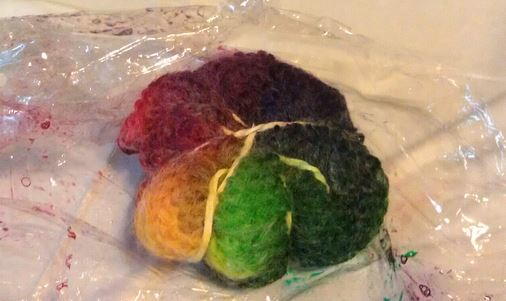
Tie dye multicolored yarn in whatever way you can imagine. HAVE FUN! Tie dyeing isn’t about perfection, it is about expression. Have fun painting your yarns in a variety of patterns. With the included squeeze bottles, you can create very precise shapes, or you can pour the dye into a container to try dipping. Make sure to wear the provided gloves so you don’t also dye your hands!
-
When you are done applying dye to the yarn, wrap the yarn in plastic wrap and let it sit in a safe place for at least 6-8 hours. The longer you let the yarn sit the more vibrant colors you can achieve. I recommend putting the yarn inside additional plastic bags in addition to the plastic wrap to catch any leaks.
-
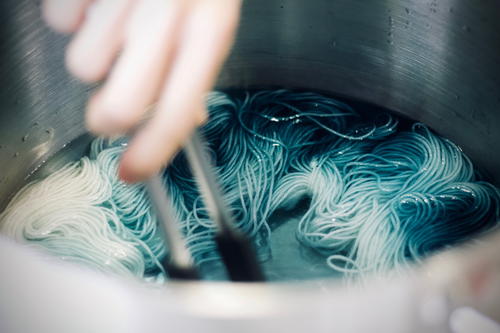
Wash the yarn - Don’t forget to wear the gloves! Rinse the yarn with warm water (for cotton yarns, for wools use cool water) until the water runs clear, removing any rubber bands you may have used. Hand wash your yarn with some laundry soap to remove any excess dye. I do not recommend putting unknit yarns into a washing machine, so follow the Tulip washing instructions at your own risk.
-
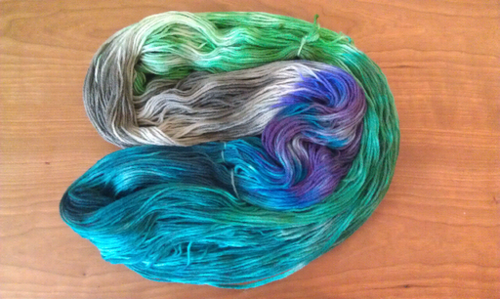
Hang the yarn up to dry. If you dyed yarn in a ball form, I would wrap it into a skein after it has dried out a little bit and then wash the yarn a second time. It can be hard to penetrate the ball of yarn to remove excess dye trapped on the interior.
Share Your Tie-Dyed Yarn With Us!
Upload your pictures of the hand dyed cotton yarn you've made to show us (and the world)! We'd love to see what creative colorways you managed to come up with.
Up Next:
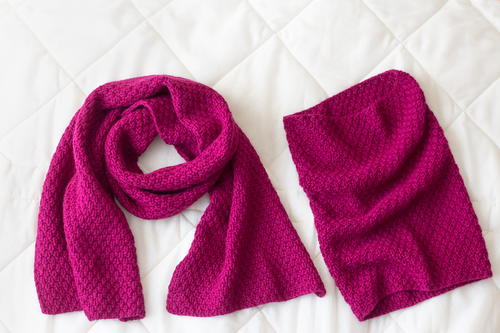
What is the Best Yarn for Scarves?
What's the coolest yarn you've dyed? Share it with us in the comments!
Your Recently Viewed Projects
Thanks for your comment. Don't forget to share!
jkane2 9843395
Jun 10, 2014
is this for cotton yarn only? if not, what others would work as well? Great video, great instruction as well. Thank you
pattiroth 2269942
Jun 12, 2013
I have been looking for something like this easy, I am so excited to try it! Thanks so much!
jphares52 8578599
Aug 15, 2012
Very instructive and uncomplicated. With this process, the waiting of 6-8 hours would be the most difficult. Could you possibly put the yarn in the microwave and with 30 second intervals heat the yarn, to speed up the process? Just a thought................ :-)
Report Inappropriate Comment
Are you sure you would like to report this comment? It will be flagged for our moderators to take action.
Thank you for taking the time to improve the content on our site.