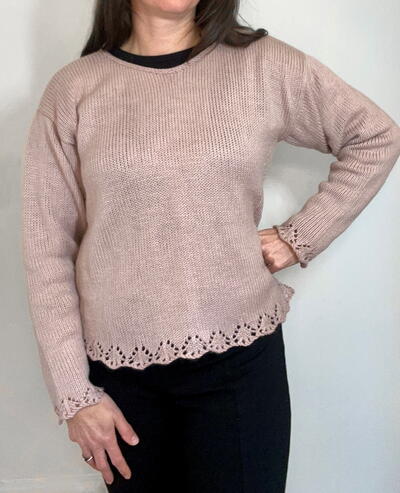
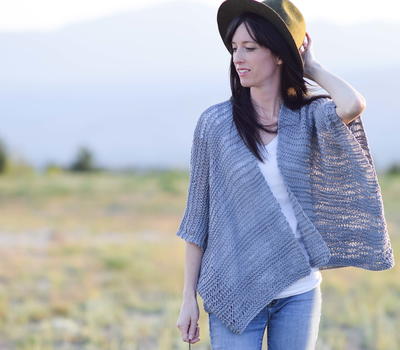
Solid Staple Sweater
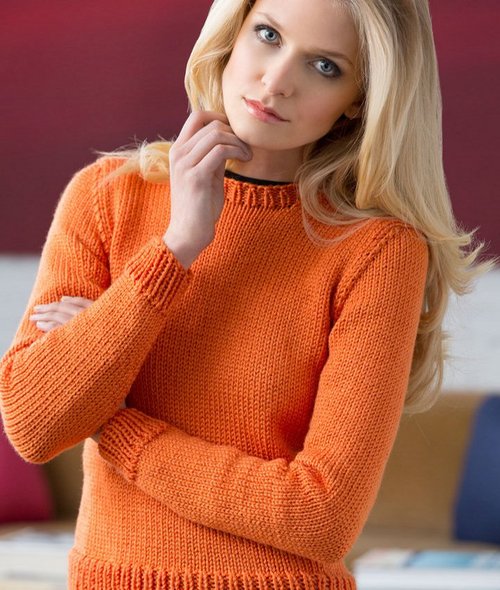
You'll reach for this knit sweater pattern again and again. Let this Solid Staple Sweater become your new favorite! You can't go wrong with a classic crew neck sweater. This soft and smart knit will never go out of style. This piece will go with everything in your closet. Combine it with slacks, jeans, and skirts to make your wardrobe more versatile. With its solid color, this sweater is easy to dress up with a statement necklace or an infinity scarf. This sweater will become a timeless staple in your closet.

Knitting Needle Size8 or 5 mm, Circular Knitting Needles
Yarn Weight(4) Medium Weight/Worsted Weight and Aran (16-20 stitches to 4 inches)
Materials:
- RED HEART® Soft®: 4 (5, 5, 6, 6) balls 4422 Tangerine
- Susan Bates® Knitting Needles: 5mm [US 8] straight needles and
- Susan Bates® Knitting Needles: 5mm [US 8] 16” (40 cm) long circular needle (for neckband)
- Stitch holder
- Yarn needle
Gauge: 16 sts = 4” (10 cm); 22 rows = 4” (10 cm) in Stockinette st (knit on right side, purl on wrong side)
Measurements:
- Directions are for size Small. Changes for sizes Medium, Large, XLarge and XXLarge are in parentheses.
- Finished Bust/Hip: 36 (40, 44, 48, 52)” [91.5 (101.5, 112, 122, 132) cm]
- Finished Length: 21 (22, 23, 24, 25)” [53.5 (56, 58.5, 61, 63.5) cm]
Abbreviations:
- k = knit
- k2tog = knit next 2 sts together
- p = purl
- st(s) = stitch(es)
- * = repeat whatever follows the * as indicated
- pfb (Purl into front and back) = Purl next st but do not remove from needle, purl into back loop of same st and remove from needle
- ssk = Slip next 2 stitches, one at a time as if to knit, to right needle, insert point of left needle through front of sts, knit these sts together through back loop
Instructions:
Pattern Stitch
1x1 Rib (over odd number of sts)
Row 1 (right side): K1, *p1, k1; repeat from * across.
Row 2: P1, *k1, p1; repeat from * across. Repeat Rows 1 and 2 for 1x1 Rib.
BACK
With straight needles, cast on 71 (79, 87, 95, 103) sts. Work in 1x1 Rib until piece measures about 2” (5 cm) from beginning; end with a right side row.
Increase Row (wrong side): P35 (39, 43, 47, 51), pfb, purl to end of row—72 (80, 88, 96, 104) sts.
Beginning with a right side row, work in Stockinette st (knit on right side, purl on wrong side) until piece measures 14 (14½, 15, 15½, 16)” [35.5 (37, 38, 39.5, 40.5) cm] from beginning; end with a wrong side row.
Shape Armholes
Row 1 (right side): Bind off 5 (6, 8, 9, 11) sts, knit to end of row—67 (74, 80, 87, 93) sts.
Row 2: Bind off 5 (6, 8, 9, 11) sts, purl to end of row—62 (68, 72, 78, 82) sts.
Row 3 (decrease row – right side): K1, ssk, knit to last 3 sts, k2tog, k1—60 (66, 70, 76, 80) sts.
Row 4: Purl. Repeat last 2 rows 4 (5, 7, 8, 10) more times—52 (56, 56, 60, 60) sts. Work even in Stockinette st until armholes measure 7 (7½, 8, 8½, 9)” [18 (19, 20.5, 21.5, 23) cm]
Bind off.
FRONT
Work same as back until armholes measure 4½ (5, 5½, 6, 6½)” [11.5 (12.5, 14, 15, 16.5) cm]; end with a wrong side row.
Shape Neck
Row 1 (right side): K20 (22, 22, 24, 24) for left front, join 2nd ball of yarn and k12 sts, place these 12 sts on a holder, k20 (22, 22, 24, 24) for right front. Work both fronts at the same time with separate balls of yarn.
Row 2: Purl across both fronts (using separate balls of yarn).
Row 3: Knit to last 3 sts of first front, k2tog, k1; on 2nd front, k1, ssk, knit across—19 (21, 21, 23, 23) sts for each front. Repeat last 2 rows 5 more times—14 (16, 16, 18, 18) sts. Work even in Stockinette st on both fronts, if needed, until armholes measure same as back armholes.
Bind off.
SLEEVES (make 2)
With straight needles, cast on 31 (31, 35, 35, 39) sts. Work in 1x1 Rib until piece measures about 2” (5 cm) from beginning; end with a right side row.
Increase Row (wrong side): P15 (15, 17, 17, 19) pfb, purl to end of row—32 (32, 36, 36, 40) sts. Beginning with a right side row, work even in Stockinette st for 7 (5, 5, 5, 5) rows.
Next Row (increase row): P1, pfb, purl to last 2 sts, pfb, p1—34 (34, 38, 38, 42) sts. Repeat last 8 (6, 6, 6, 6) rows 9 (11, 11, 13, 13) more times—52 (56, 60, 64, 68) sts. Work even in Stockinette st until piece measures about 18 (18, 18½, 19, 19)” [45.5 (45.5, 47, 48.5, 48.5) cm] from beginning; end with a wrong side row.
Shape Cap
Row 1 (right side): Bind off 5 (6, 8, 9, 11) sts, knit to end of row—47 (50, 52, 55, 57) sts.
Row 2: Bind off 5 (6, 8, 9, 11) sts, purl to end of row—42 (44, 44, 46, 46) sts.
Row 3 (decrease row – right side): K1, ssk, knit to last 3 sts, k2tog, k1—40 (42, 42, 44, 44) sts.
Row 4: Purl. Repeat last 2 rows 13 (14, 15, 17, 18) more times—14 (14, 12, 10, 8) sts.
Bind off.
FINISHING
Sew shoulder seams.
Neckband
With right side facing and circular needle, pick up and k24 sts across back neck, and 12 sts down left front neck edge, k12 front neck sts from holder, pick up and k12 sts up right front neck edge—60 sts. Place marker for beginning of round.
Round 1: *K1, p1; repeat from * around. Repeat Round 1 for 1” (2.5 cm).
Bind off loosely.
Sew side seams. Sew sleeve seams. Sew sleeve caps into armholes. Weave in ends.
Read NextEasy Cable Sweater
Your Recently Viewed Projects

Thanks for your comment. Don't forget to share!
achumley0003 31706 34
Aug 18, 2017
This is a perfect starting point sweater because it is made with classic stitches. It would be fairly easy to change the neckline or even stitch pattern to change the look, if you like. Obviously, you could do it in any color or colors you like, too. It is done in separate pieces but could be converted to the round with some simple math and adjustments.
Susan S
Dec 22, 2016
This is a great first sweater for beginners to knit - basic knit and purl stitches and ways of shaping. And you can make it in several colors so you get to practice a lot. Perfect!
bcrfairview 087256 0
Aug 31, 2016
i need help with the sleeve shaping this is my fist time in shaping sleeves i done row 1 row 2 roe 3 on row 4 i purled across i am stuck for it said to repeat the last 2 rolls 7 times but that did not look right please helpsend help to bcrfairview@surry.net
The Designing Peng uin
May 30, 2016
Like the classic look of this sweater - it knit up very nicely and looks wonderful when complete. As it happened I had the tangerine, so knit it in the suggested colour. Now have to knit it in a shade of yellow for the younger sister and the third sister wants it in pink... what have I started here?
ginrinker 9134233
Feb 09, 2017
I am a bit confused about lack of shoulder information. How did you manage the shoulders?
Jaggrif 0573321
Oct 02, 2015
I understand this to mean you will purl to you reach your number 43 to the one increase then you purl to end. so for small start with 71 increase on after 35 purls then continue on to get a total of 72. Hopes this makes sense.
bcrfairview 087256 0
Sep 08, 2015
In your pattern it says increase row wrong side p 43 in( ) then pfb purl to end can you help with this I love this sweather
Lisa
Oct 03, 2015
Purl 35 (39, 43, 47, 51) purl the number of stitches that correspond to the size you are making, then PFB (purl front and back) increase and continue to purl to the end of the row. You are simply increasing 1 stitch on the wrong side row before starting the main body of the sweater. Hope this helps, happy knitting.
Report Inappropriate Comment
Are you sure you would like to report this comment? It will be flagged for our moderators to take action.
Thank you for taking the time to improve the content on our site.