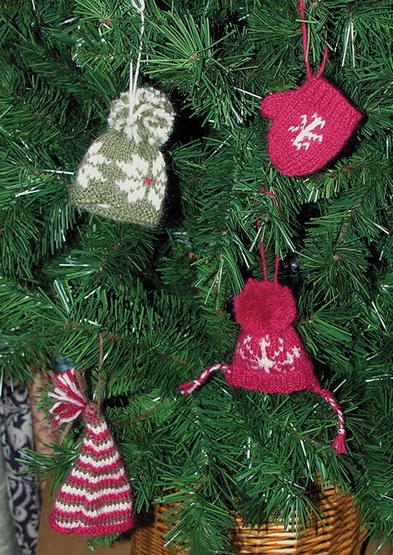
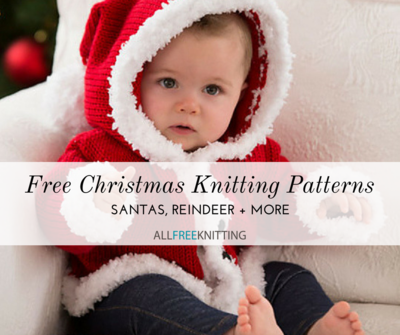
Cheerful Snow Gear Garland

Looking for unique mantle decorating ideas this holiday season? Look no further than the Cheerful Snow Gear Garland. This festive DIY Christmas garland is a delightful string of miniature hats and mittens. If you've been wondering how to decorate a mantle with warmth and cheer, this garland pattern is the one for you. Bright and colorful, the Cheerful Snow Gear Garland makes a great backdrop for family photos and warm, crackling fires.

Knitting Needle Size9 or 5.5 mm
Yarn Weight(4) Medium Weight/Worsted Weight and Aran (16-20 stitches to 4 inches)
Materials:
- RED HEART® “Super Saver®” (Art. E300 available in solid color 7 oz (198 g), 364 yd (333 m); multicolor, heather and print 5 oz (141 g), 244 yd (223 m), flecks 5 oz (141g), 260 yds (238 m) skeins.): 1 skein each 0319 Cherry Red A, 512 Turqua B, 672 Spring Green C, 324 Bright Yellow D, 254 Pumpkin E, and 358 Lavender F
- Knitting Needles: 5.5mm [US 9]
- Yarn needle
- stitch holder
- stitch markers
- 5.5mm [US I-9] crochet hook
- yarn needle
- 4” square of heavy cardboard (for pompoms)
GAUGE: 16 sts = 4”; 20 rows = 4” in St st (knit on Right Side, purl on Wrong Side).
CHECK YOUR GAUGE. Use any size needles to obtain the gauge.
Each hat and mitten measures 5” long x 4” wide.
ABBREVIATIONS:
A, B, C, D, E and F = Color A, B, C, D, E and F
ch = chain
k = knit
k2tog = knit 2 sts together
p = purl
p2tog = purl 2 sts together
st(s) = stitch (es)
St st = Stockinette stitch
[] = work directions in brackets the number of times specified
* or ** = repeat whatever follows the * or ** as indicated.
Special Stitch
M1 = Make 1 (Increase) – Lift strand between needles to left-hand needle and knit strand through the back loop, twisting it to prevent a hole.
wyib = with yarn in back.
Notes
See photo at end of pattern for design numbers.
Hats and mittens can be used as individual ornaments, or can be strung on a cord to make a garland.
HAT #1 (worked with A and F)
Ribbing
With A, cast on 34 sts.
Row 1 (Right Side): With F, *k1, p1; repeat from * to end of row.
Repeat Row 1 until piece measures ¾” from beginning.
Body
Work in St st and stripe sequence, as follows: Work 5 rows with A, 2 rows with F, 2 rows with A, 2 rows with F.
Work remainder of hat with A only.
Work in St st until piece measures 4” from beginning; end with a Wrong Side row.
Shape Crown
Row 1: K2, [k3, k2tog] 6 times, k2—28 sts.
Row 2: K2, [k2, k2tog] 6 times, k2—22 sts.
Row 3: K2, [k1, k2tog] 6 times, k2—16 sts.
Row 4: [K2tog] 8 times—8 sts.
Cut yarn, leaving a long tail. Thread tail through remaining sts and pull to gather. Use remainder of tail to sew back seam.
Finishing
Weave in ends.
Pompom
Note: Pompom can be made with any color(s) desired.
Wrap yarn around 4” piece of cardboard 20 times. Slip wraps from cardboard and tie a length of yarn tightly around center of wraps. Cut ends of wraps, fluff and trim. Attach pompom to top of hat.
HAT #2 (worked with B and D)
Ribbing
With B only (do not change color after cast-on), work ribbing same as for Hat #1.
Body
Work in St st and stripe sequence, as follows: Work *2 rows with D, 2 rows with B; repeat from * until piece measures 4” from beginning; end with a Wrong Side row.
Shape Crown
With B, work crown and finish hat same as for Hat #1.
HAT #3 (worked with E and F)
Ribbing
With E only (do not change color after cast-on), work ribbing same as for Hat #1.
Body
With F, work in St st until piece measures 4" from beginning; end with a Wrong Side row.
Shape Crown
With E, work crown and finish hat same as for Hat #1.
HAT #4 (worked with D, E, and C)
Ribbing
With D only (do not change color after cast-on), work ribbing same as for Hat #1.
Body
With E, work in St st for 1 row.
With C, work in St st until piece measures 4” from beginning; end with a Wrong Side row.
Shape Crown
With C, work crown and finish hat same as for Hat #1.
HAT #5 (worked with A and E)
Ribbing
With A only (do not change color after cast-on), work ribbing same as for Hat #1; end with a Wrong Side row.
Body
Row 1 (Right Side): *With E, k1; slip 1 with yarn in back (wyib); repeat from * to end of row.
Row 2: With E, purl.
Row 3: *With A, k1; slip 1 wyib; repeat from * to end of row.
Row 4: With A, purl.
Rows 5–8: With E, work even in St st.
Rows 9 and 10: Repeat Rows 3 and 4.
Repeat Rows 1–10 until piece measures 4” from beginning; end with a Wrong Side row.
Shape Crown
With E, work crown and finish hat same as for Hat #1.
HAT #6 (worked with D)
Ribbing
With D only (do not change color), work ribbing, body and crown same as for Hat #1. Finish same as for Hat #1.
MITTEN #1 (worked with C and A)
Ribbing
With C, cast on 33 sts.
Row 1 (Right Side): K1, *p1, k1; repeat from * to end of row.
Row 2: P1, *k1, p1; repeat from * to end of row.
Repeat Rows 1 and 2 until piece measures 3/4" from beginning; end with a Wrong Side row.
Change to A and work in St st for 4 rows.
Shape Thumb
Row 1 (Right Side): K16, place marker, M1, k1, M1, place marker, knit to end of row—3 sts between markers.
Row 2: Purl.
Row 3: Knit to first marker, slip marker, M1, knit to next marker, M1, slip marker, knit to end of row—5 sts between markers.
Repeat Rows 2 and 3 until there are 11 sts between markers.
Next Row (Wrong Side): P16, place next 11 sts on stitch holder for thumb, purl to end of row—32 sts on needle.
Continue in St st until mitten measures 4½” from beginning; end with a Wrong Side row.
Shape Top
Next Row: [K2tog] 16 times—16 sts.
Next Row: [P2tog] 8 times—8 sts.
Cut yarn, leaving a long tail. Thread tail through remaining sts and pull to gather. Fasten off.
Thumb
With Wrong Side facing, place 11 sts from holder back onto needle.
With A, work in St st for 4 rows.
Next Row (Wrong Side): P1, [p2tog] 5 times—6 sts.
Cut yarn, leaving a long tail. Thread tail through remaining sts and pull to gather. Use remainder of tail to sew thumb seam.
Finishing
Sew side seam. Weave in ends.
MITTEN #2 (worked with D and F)
With D, work ribbing same as for Mitten #1.
With F, work in St st for 2 rows.
With D, work in St st for 2 rows.
With F, work remainder of mitten same as for Mitten #1.
Finish same as for Mitten #1.
MITTEN #3 (worked with E and B)
With E, work ribbing same as for Mitten #1.
With B, work remainder of mitten same as for Mitten #1.
Finish same as for Mitten #1.
MITTEN #4 (worked with E)
With E only (do not change color), work same as for Mitten #1. Finish same as for Mitten #1.
HANGING CHAINS
For each Hat and Mitten, make hanging chain, as follows:
With crochet hook, join desired color yarn with slip st in side of cast-on edge, ch 33, slip st in other side of cast-on edge.
Fasten off.

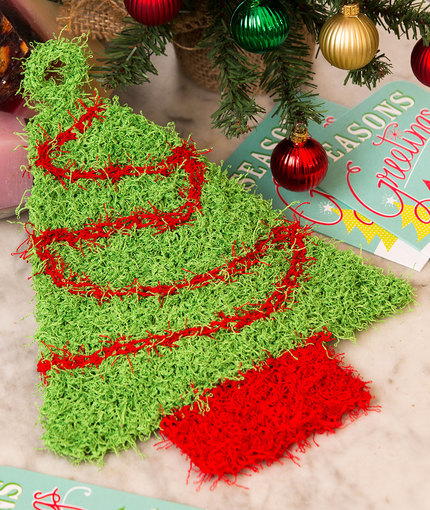
Read NextChristmas Tree Knit Scrubby