How to Knit One-Row Buttonholes
This video tutorial will teach you how to knit a one row buttonhole in any project or stitch you can think of!

Whether you're knitting a cowl with buttons or putting the finishing touches on a knitted cardigan, this tutorial for how to knit one row buttonholes will surely come in handy. While this technique might seem like a lot to process at first, one row buttonholes are actually very easy to knit, even for beginners.
Because these buttonholes are completed in one row, there's no need to plan ahead in previous rows or do anything extra in subsequent rows. Just follow the video above, and you can place your buttonholes anywhere on your project, making them as wide or as narrow as you need. If this is your first time trying this, consider starting with practice yarn instead of a full project, just so you get the feel of the various techniques required.
Watch and Learn
Materials
- Knitting needles
- Yarn
Instructions
Step 1
Work in pattern to the point where you want to put the buttonhole.
Step 2
To secure the first stitch, bring the working yarn to the front, s1 purlwise, and then bring the yarn to the back.
Step 3
Begin binding off the number of stitches you need for your buttonhole without working them. To do this, slip a stitch purlwise and then pass the previous stitch over that stitch.

Step 4
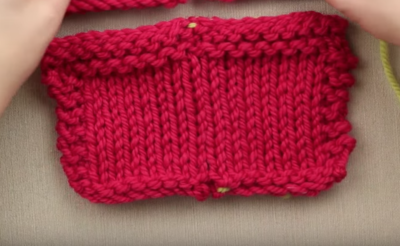
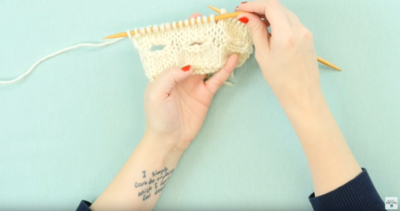
Now you will have a small arc in your work that will form the bottom half of your buttonhole.
Slip the last stitch on your right-hand needle to the left-hand needle and then turn your work so the wrong side is facing you. Bring the yarn to the back of your work.
Tip: Since you will be turning your yarn a lot always remember to keep your yarn at the back of your work, excluding when you have to do one of those wraps discussed in step 2.

Step 5
Using a cable cast on, cast on the number of stitches that you bound off plus one extra. (For example, if you bound off 4, you will cast on 5.)
To do a cable cast on, insert your right needle between the first two stitches (instead of going in the loop of the first stitch). Then, wrap your yarn and bring it back through, and put that loop on the left needle.
Repeat for the number of stitches you need.

Step 6
Turn your work to the right side and bring the yarn to the back of your work.
To secure the final stitch of your buttonhole, slip one stitch and pass the last of the cable cast on over it. Then, you finish the row as the pattern calls for.
Read NextHow to Do the Mattress Stitch
Your Recently Viewed Projects


Thanks for your comment. Don't forget to share!
Mark
Apr 09, 2018
SUCH a great and helpful video! Having the whole thing in one row is nice so that you can just insert them wherever you need to without much planning
Report Inappropriate Comment
Are you sure you would like to report this comment? It will be flagged for our moderators to take action.
Thank you for taking the time to improve the content on our site.